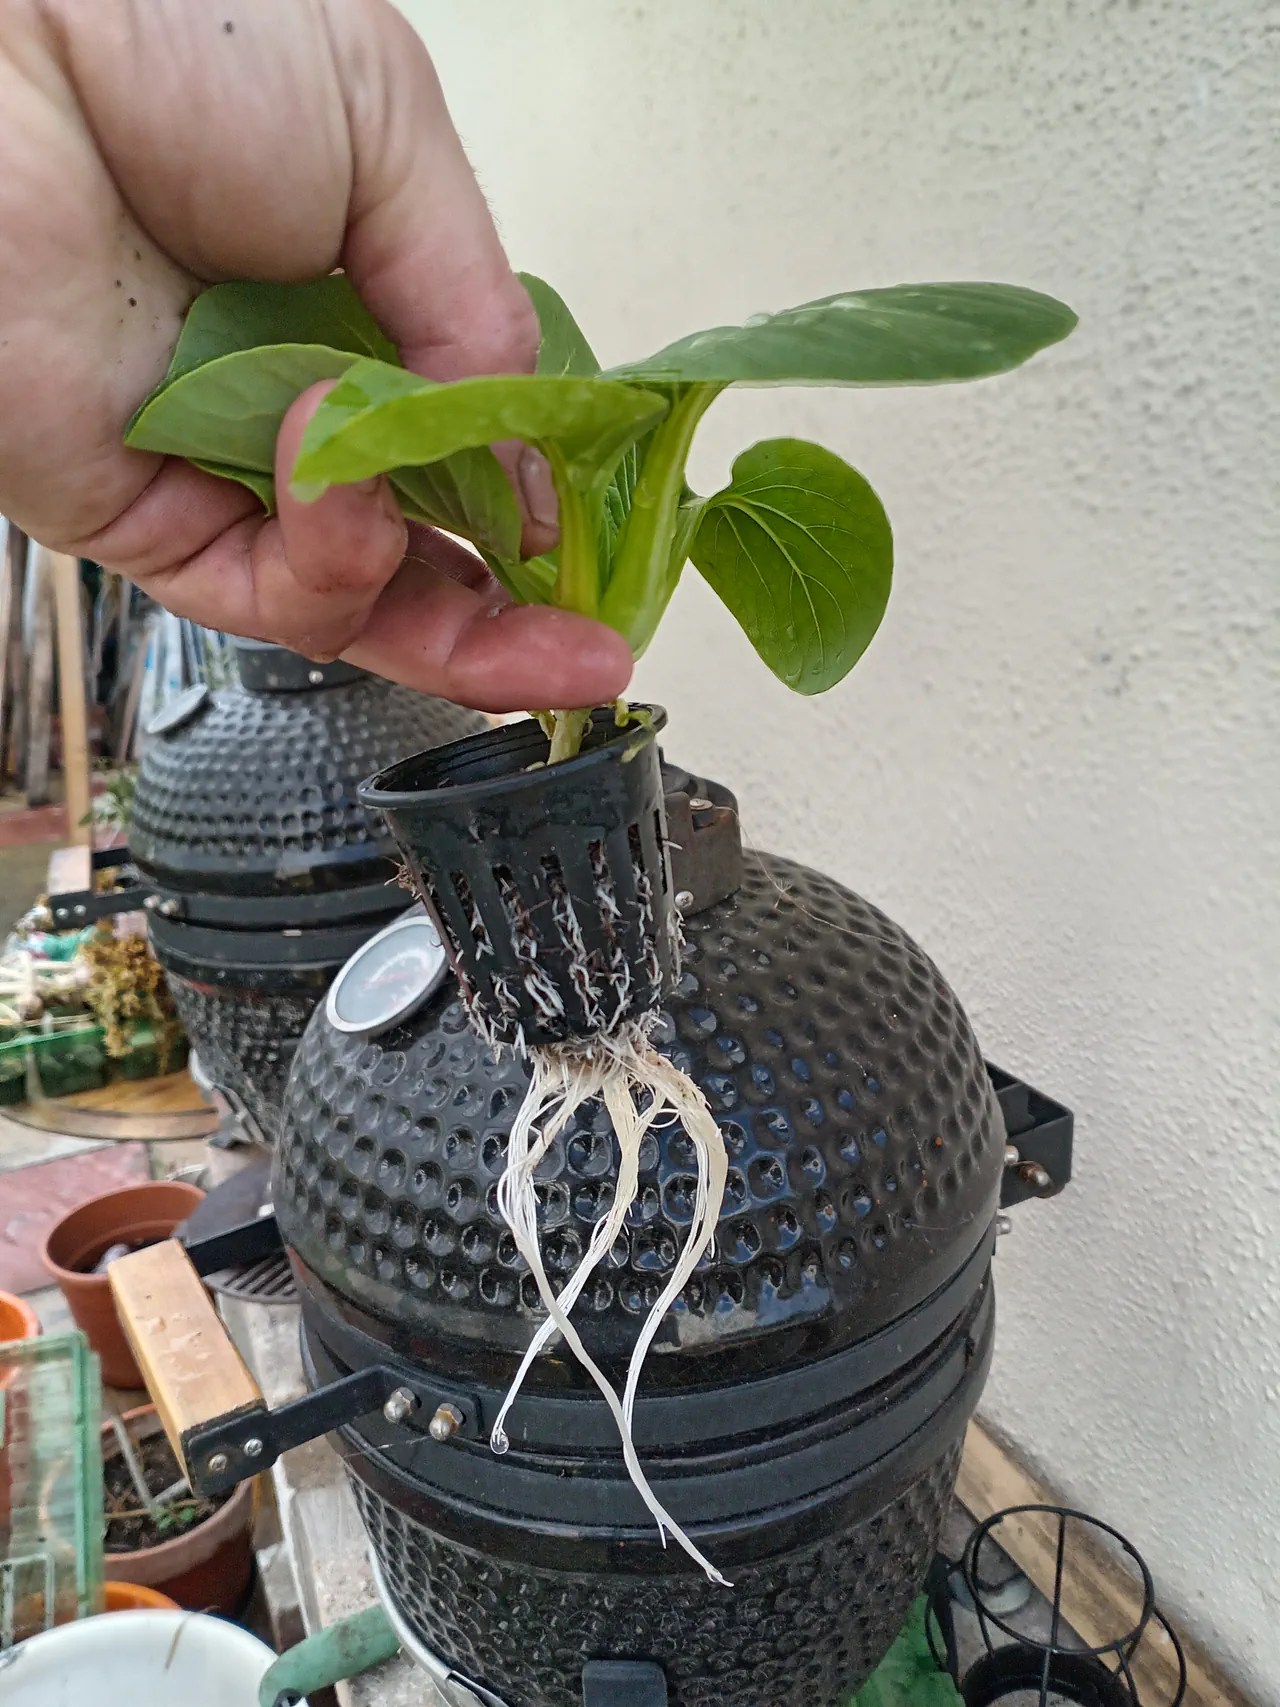
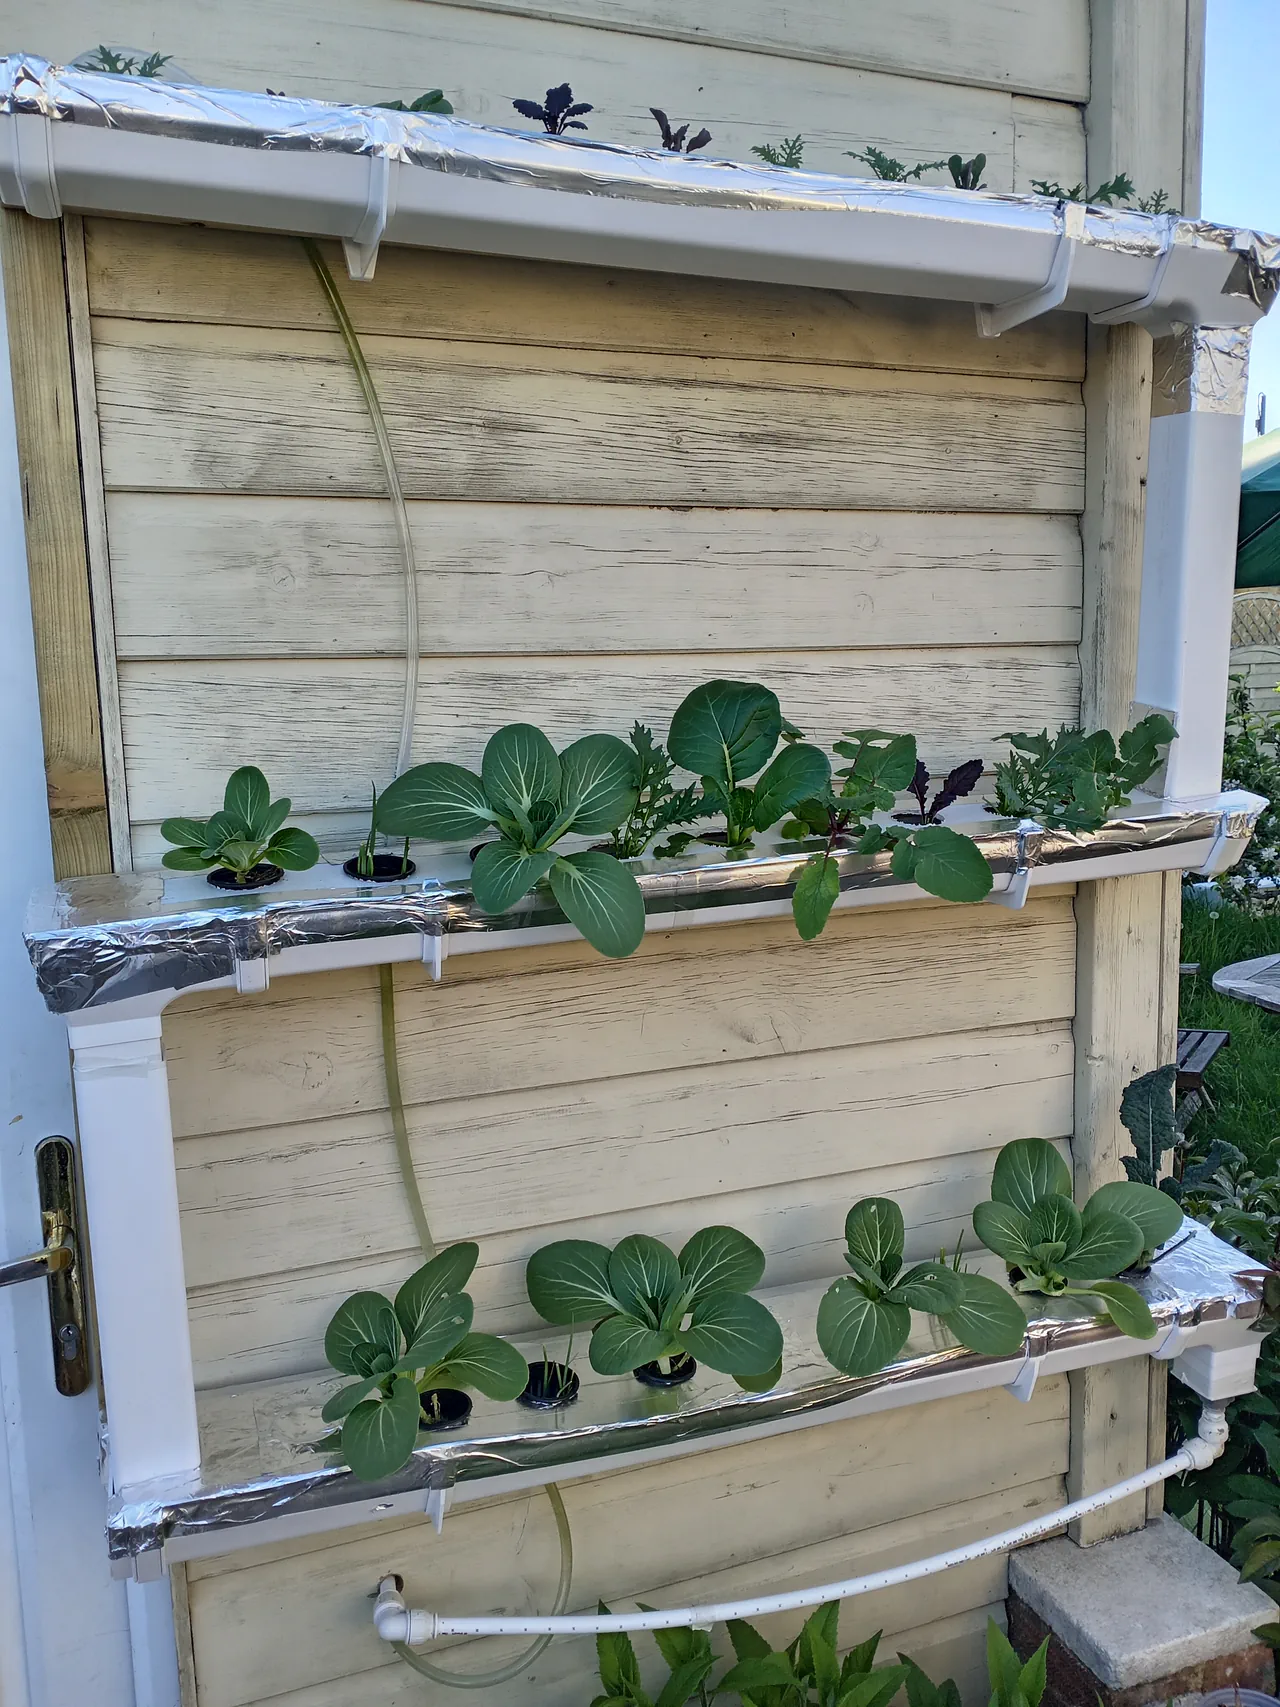
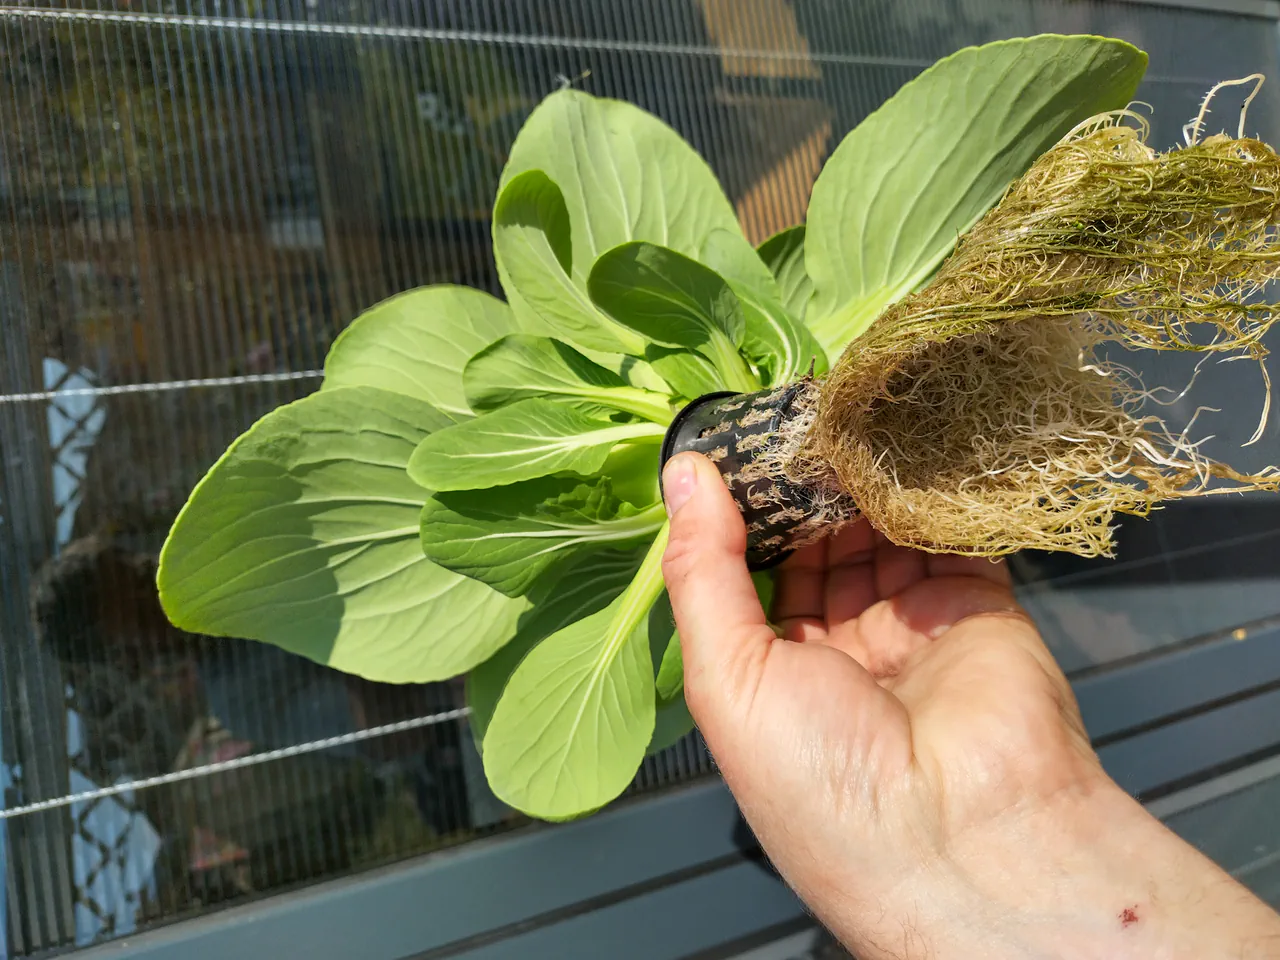
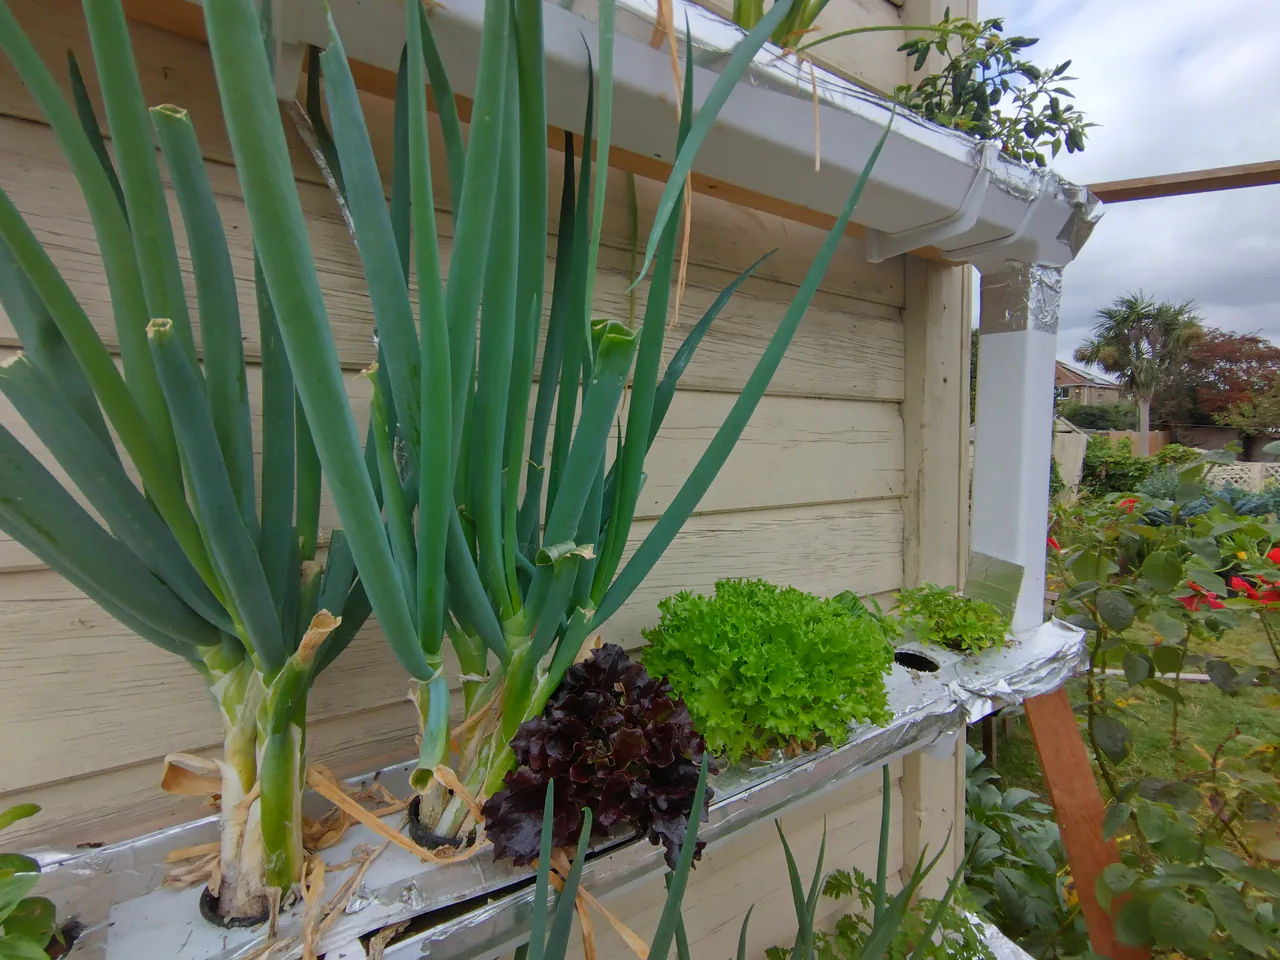
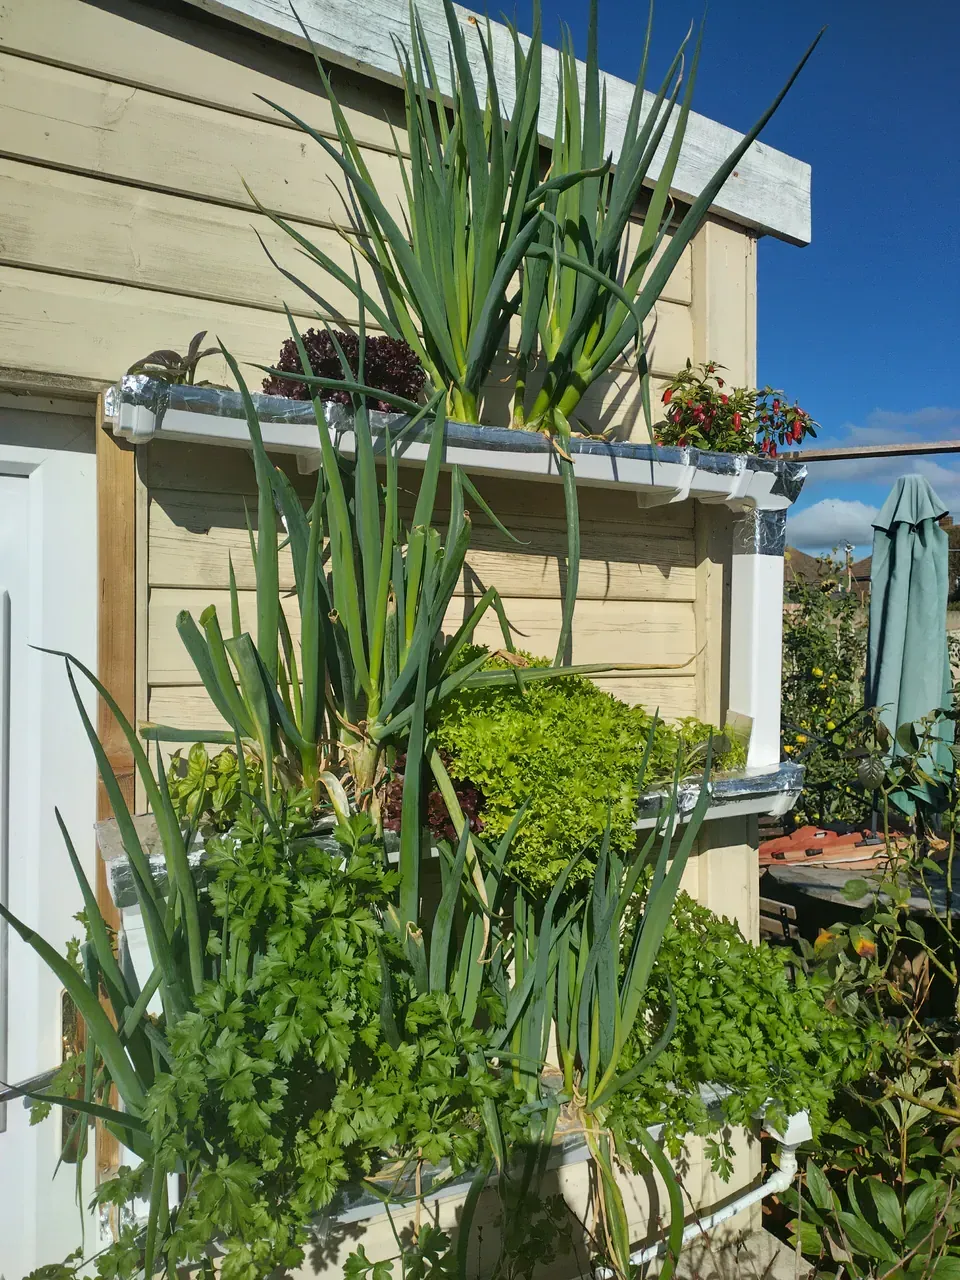
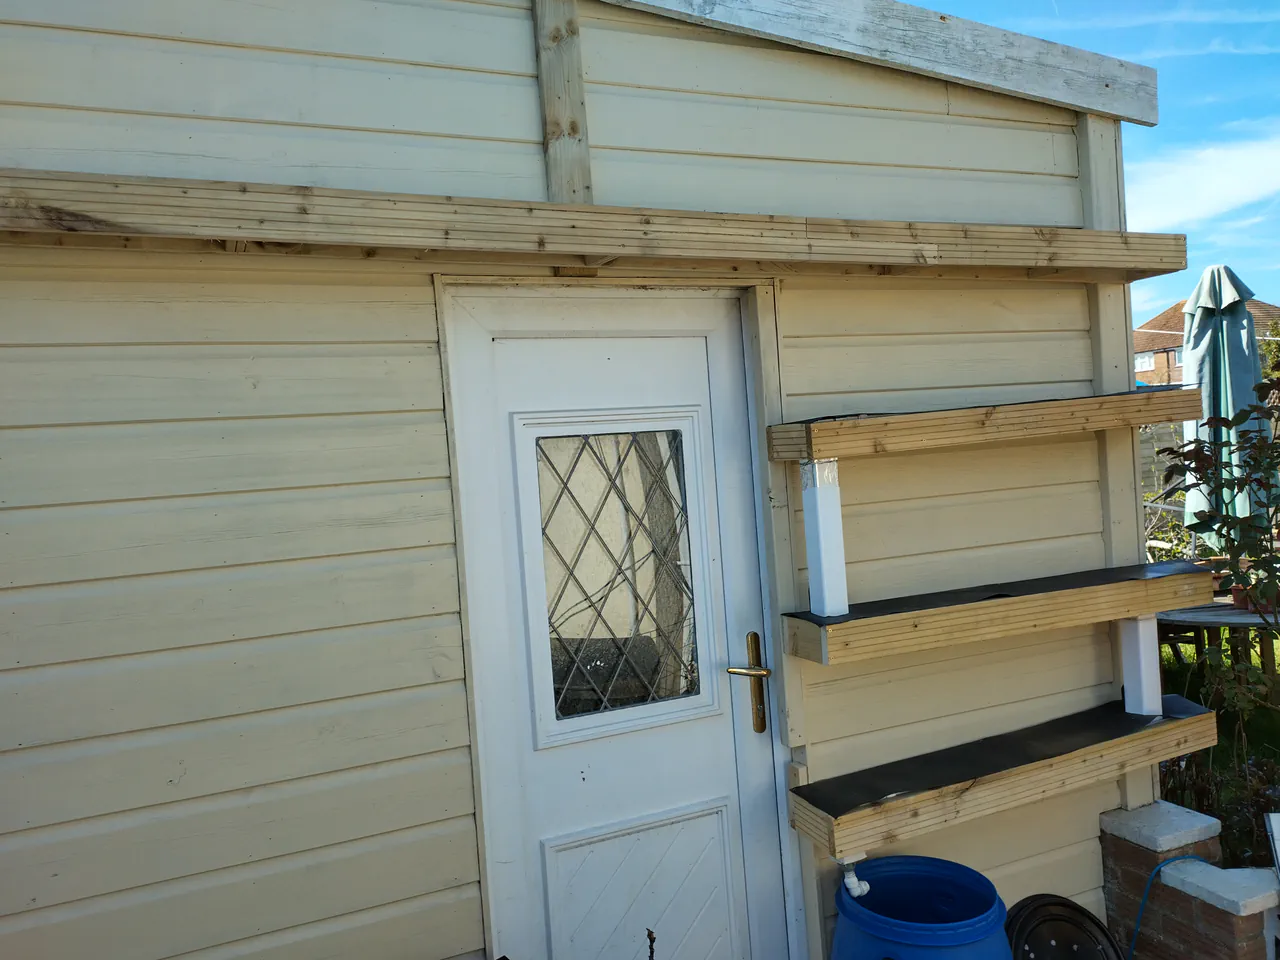
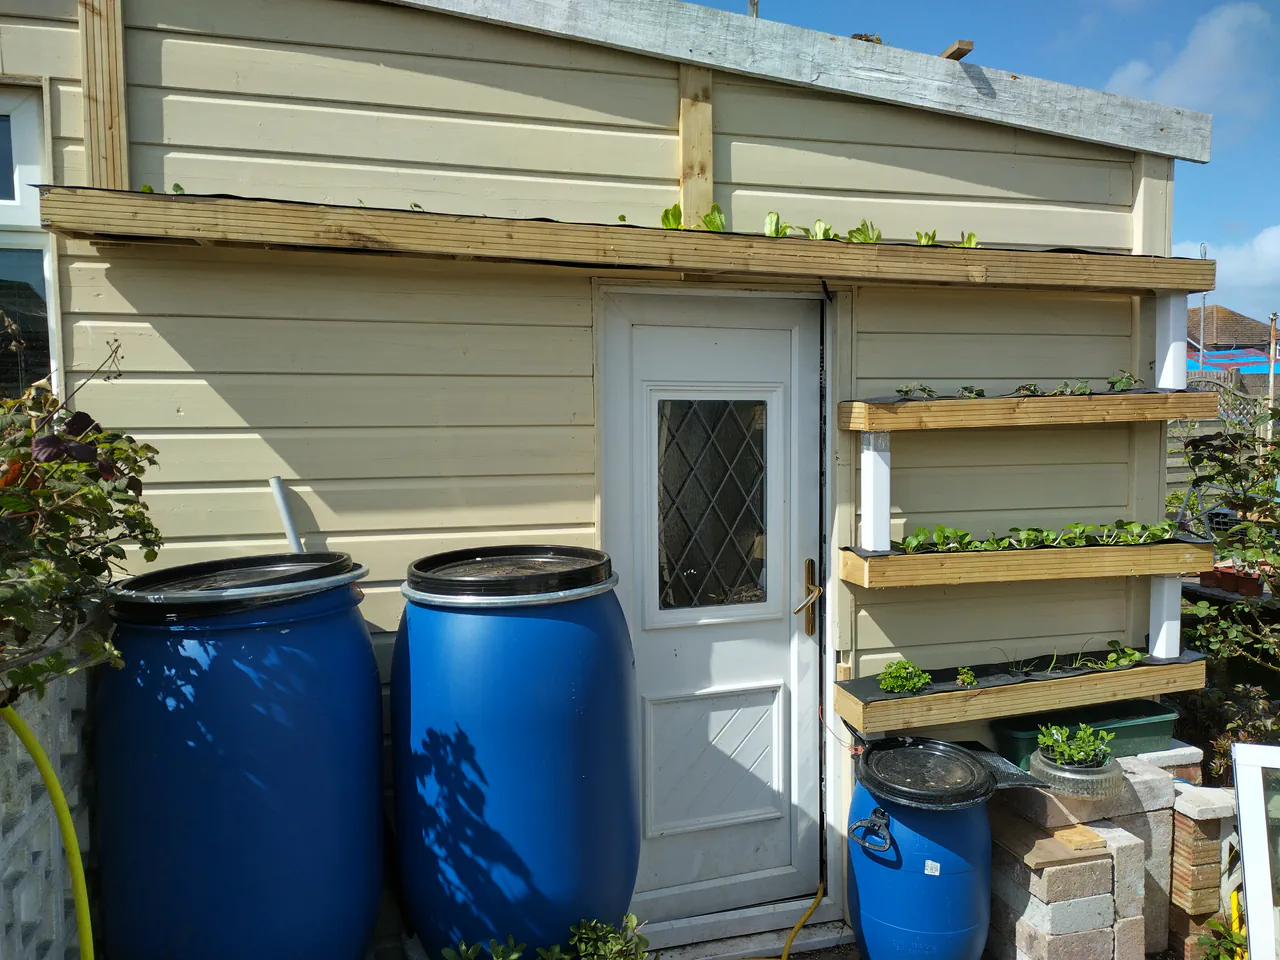
This is the cheapest, simplest, and most productive hydroponic system I have built. Three tiers of standard guttering screwed to the side of a shed, a plasterers bucket with a tiny 12-volt pump, and no growing medium at all. Plants sit in little net pots with their roots dangling directly in a thin film of flowing nutrient solution — that is what Nutrient Film Technique means, and it is spectacularly effective for salads, herbs, and spring onions.
I run three hydroponic systems. The gutter grow tomato wall uses fabric pots and coir in gutters — brilliant for heavy crops like tomatoes. The gravel bed system (guide coming soon) uses an IBC tote with LECA for brassicas. Both of those are passive, gravity-fed systems with no pump and no electricity. This NFT wall is the only one with a moving part — a little 5-watt pump — and the trade-off is worth it, because for leaf crops and herbs, nothing else comes close.
Total cost: about £130. That makes it the cheapest of the three, mainly because there is no growing medium to buy. And it is the most productive per square metre, because the plants are not competing with soil or LECA for nutrients — they are getting everything they need directly through their roots, continuously, all day.
Why NFT Works So Well
The really neat thing about this system is that it does not use any growing medium. No coir, no LECA, no perlite, no soil. The plants sit in net pots with their roots hanging directly into the flowing nutrient solution. This means three things:
- It is cheap. No growing medium to buy, replace, or dispose of. The gutters, brackets, pump, and bucket are essentially the whole system.
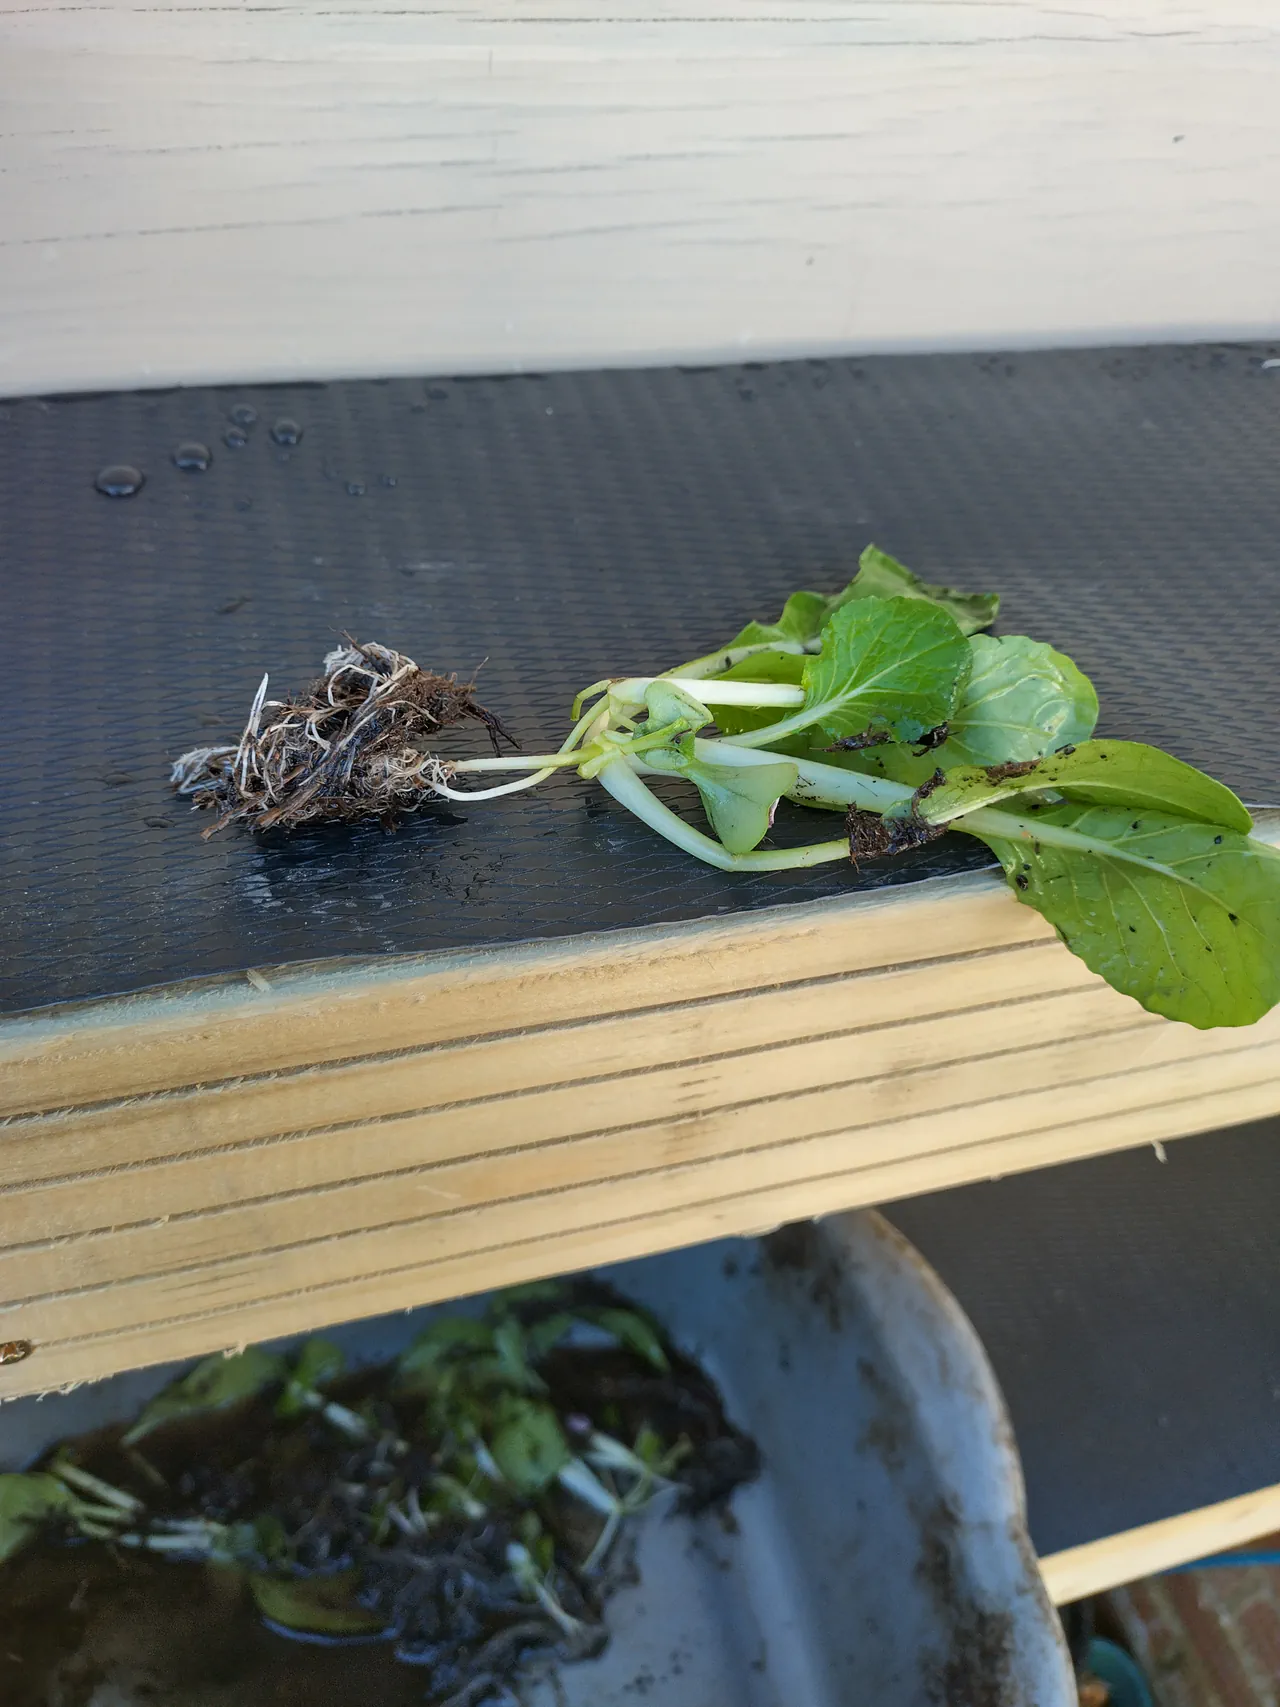
- Plants pop in and out freely. No roots tangled in medium, no transplant shock. It is like gardening with LEGO — you can rearrange everything at any time, thin plants out as they grow, and move them between positions with zero disruption.
- It is incredibly productive. Roots get direct, continuous access to nutrients and oxygen. For leaf crops and herbs, this translates to fast growth and generous harvests.
The Honest Trade-Offs
NFT is not perfect for everything. Before you build one, know this:
- It needs a pump. This is the single moving part — a tiny 12V 5-watt pump that cost £6 on eBay. If the pump fails on a hot summer day, plants will wilt fast because there is no moisture buffer from growing medium. I bought two pumps so I always have a spare.
- pH management is more demanding. The aeration from the return waterfall drives pH upward faster than in the passive systems. You will be adjusting pH every couple of days instead of just checking it occasionally.
- Not for heavy crops. Tomatoes, peppers, cucumbers — anything big and heavy — will not work in a shallow gutter with no root support. For those, use the gutter grow system with fabric pots and coir.
What You'll Need
| Item | Source | Cost |
|---|---|---|
| 114mm square line gutter 3m (×2) | Toolstation | £8.45 |
| Stop end external | Toolstation | £2.43 |
| Fascia brackets (×8) | Toolstation | £1.12 |
| Stop end outlets (×4) | Toolstation | £4.99 |
| 30L heavy duty plasterers buckets (×2) | Toolstation | £9.78 |
| 12V 5W submersible pump (×2, one spare) | eBay | ~£12 |
| Timber battens | DIY store | ~£20 |
| 12V transformer (kite-marked) | Online | ~£10 |
| Net pots (bag of dozens) | Amazon | ~£5 |
| Corrugated plastic for covers | DIY store | ~£5 |
| Silver insulation tape | DIY store | ~£5 |
| Solvent cement, push-fit fitting, tubing | Toolstation | ~£5 |
| Total system cost | ~£130 |
Plus nutrients, pH kit, and EC pen — shared across all hydroponic systems. See the tomato wall guide for details on those if you are starting from scratch.
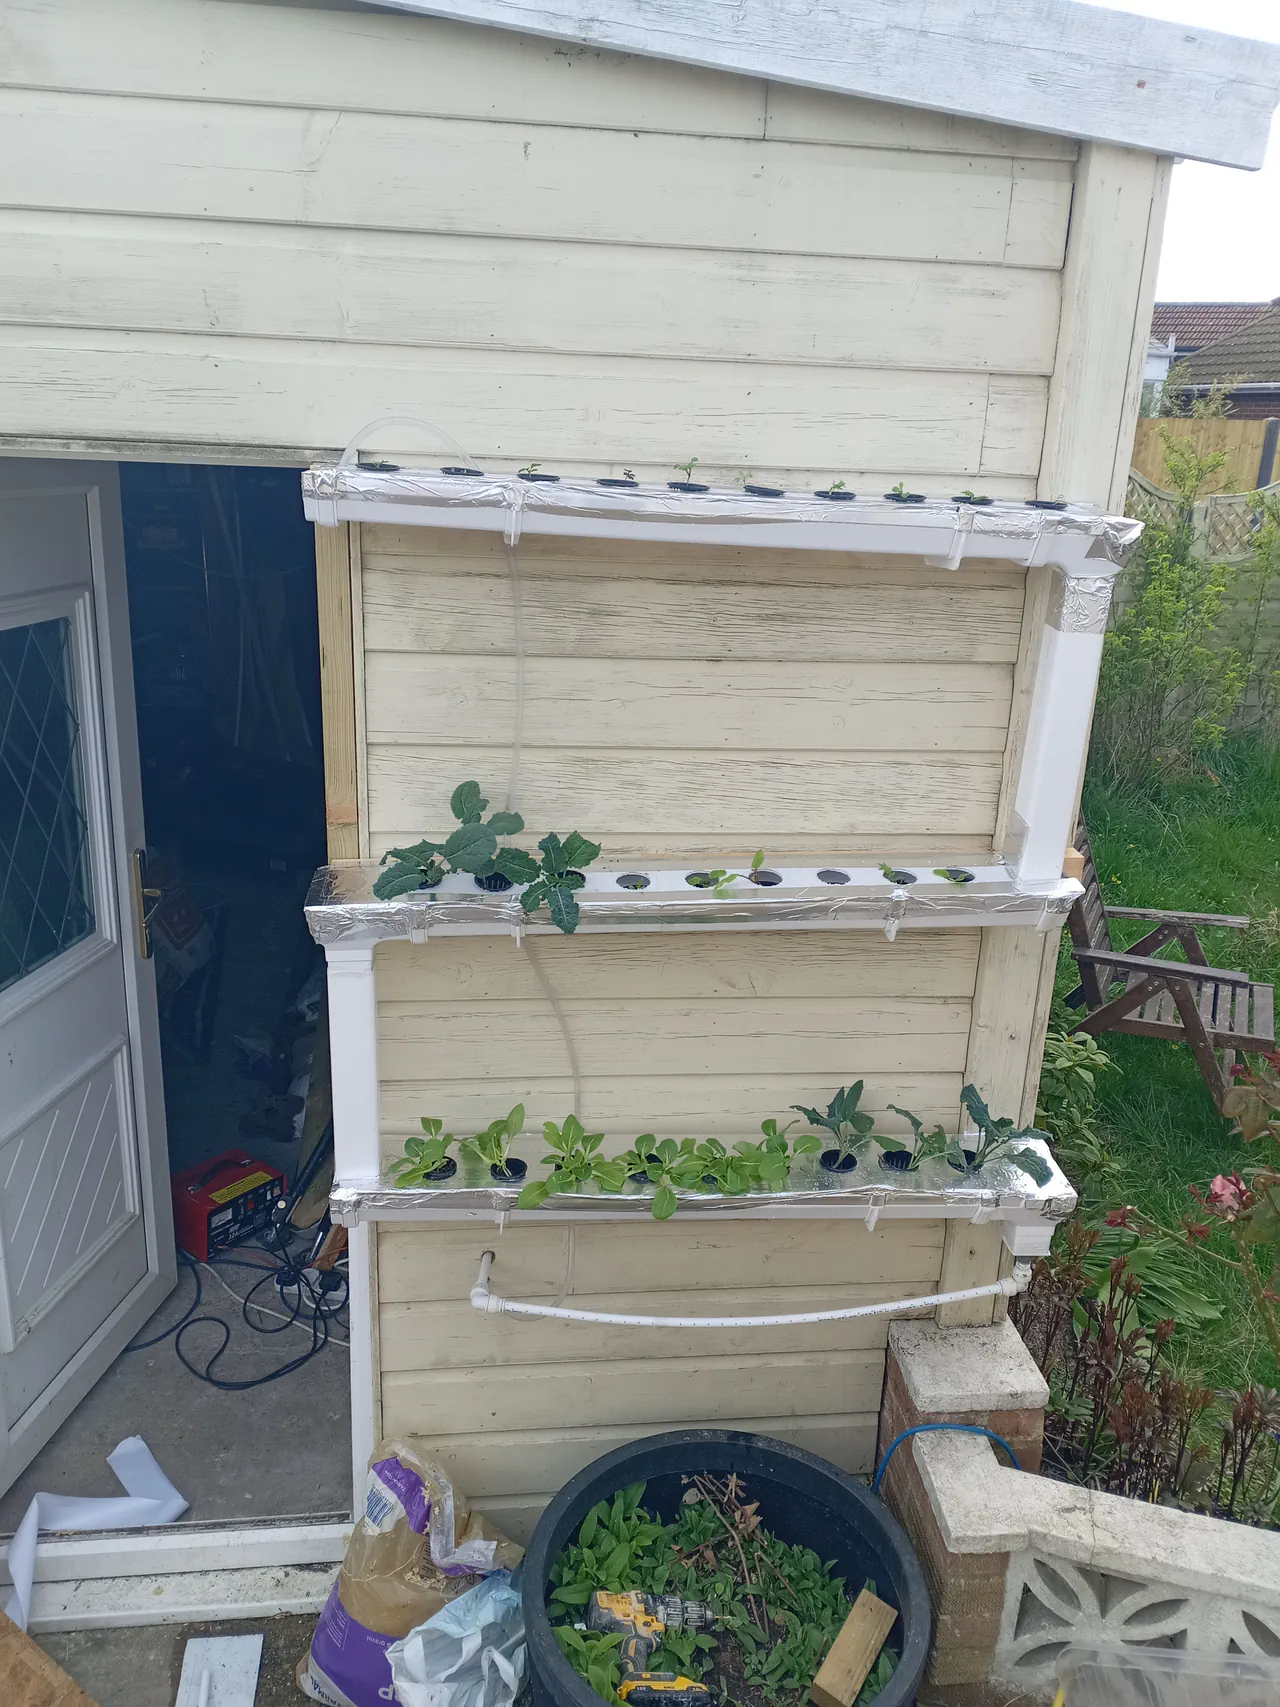
How NFT Works
The principle is beautifully simple. A pump in a bucket pushes nutrient solution through a piece of tubing up to the very top gutter. The solution then gravity-flows along that gutter in a thin film — just a few millimetres deep — washing over the roots of every plant it passes. At the end of the gutter, it drops down like a little waterfall onto the next tier, flows along that, drops again, and eventually returns to the bucket.
Where the solution falls back into the bucket, the return pipe drops water from about a foot above the surface. This provides natural aeration — the splashing oxygenates the solution, which is important for healthy root growth. It also creates a satisfying trickling sound that makes the whole system feel like it is alive.
The one downside of all this aeration is that it seems to drive the pH upward faster than in the passive systems. While the gutter grow and gravel bed (guide coming soon) only need a nutrient change about once every 10 days, this NFT system needs pH adjustment every couple of days. Drop it to 5.5, let it rise over a couple of days to about 6.0, then adjust it back down. I have accidentally left it for a week and a half and watched it rise above 7.0 — the plants were not totally happy (growth slowed, some yellowing on leaf tips) but they recovered quickly once pH was corrected.
Building the System
Building this is particularly easy because standard guttering is designed to clip together. The whole system is made from 114mm square line guttering from Toolstation — the same stuff you would use on the fascia of a house. It just clips into brackets.
Screw timber battens to the side of the shed (or any sturdy wall), then screw the gutter fascia brackets onto the battens. Because the whole system is quite lightweight — even when full of plants — you do not need anything particularly heavy-duty. Space the tiers about 40-50cm apart vertically to give plants room to grow upward.
The only modification the guttering needs: on the final gutter end (where the solution exits back to the bucket), you need to attach a piece of pipe. Cut a small square of plastic, use PVC solvent adhesive to stick it onto the end cap, drill through it with a 15mm hole, and push a standard 15mm push-fit pipe fitting into it. This converts from the square gutter profile to round pipe for the return to the bucket. It takes about ten minutes and the solvent cement makes a watertight seal.
Covers and Net Pots
Plants go in little net pots that pop into holes cut in the gutter covers. I covered the gutters with corrugated plastic, drilled holes with a hole saw the right size for the net pots, then covered the corrugated plastic with silver insulation tape — the kind you use for taping joints in insulation boards.
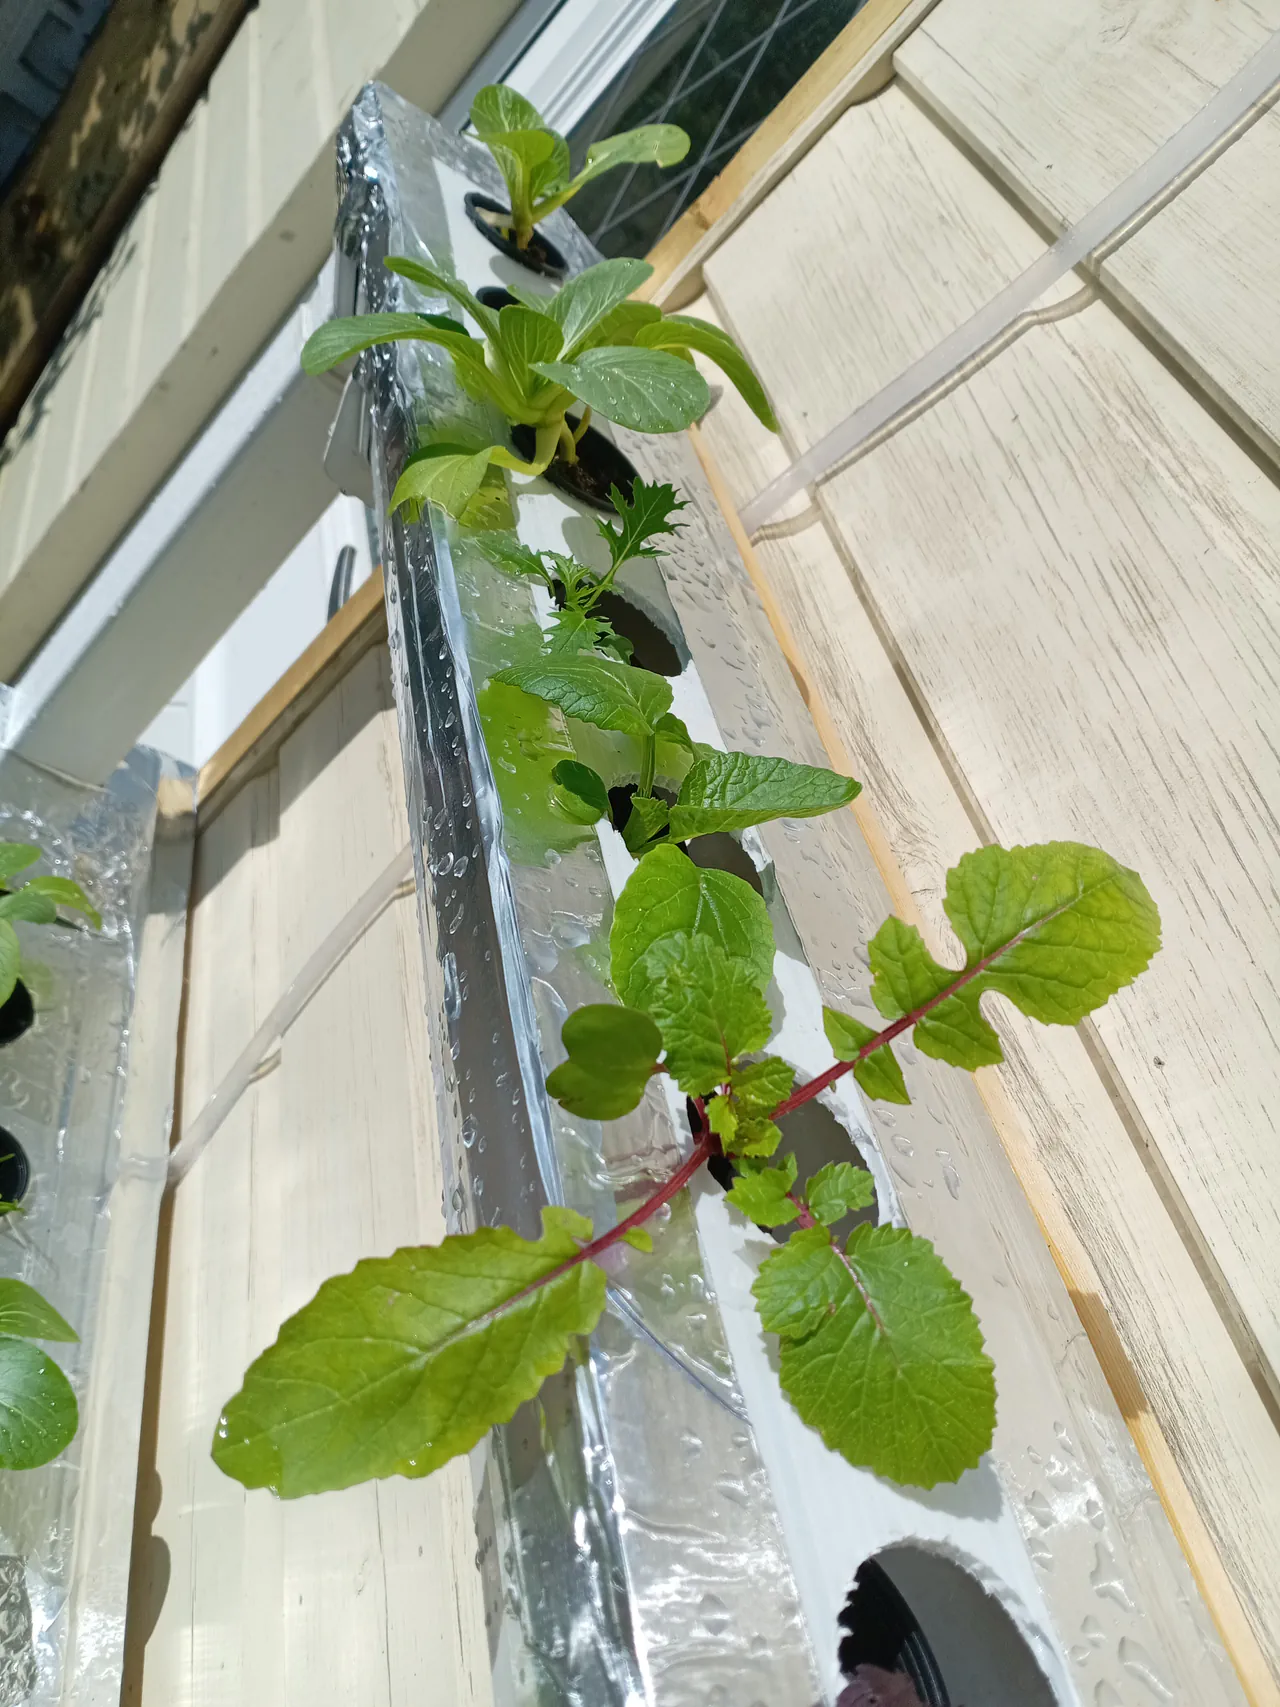
The silver tape serves two purposes: it blocks light from getting into the gutters (algae prevention) and it reflects light back at the plants. I did not actually have any real problems with algae growth, but keeping it dark inside the channels is good practice. DPC membrane (like the gutter grow system uses) is a neater alternative — I will be switching to that method and updating this guide.
Net pots cost almost nothing — a bag of dozens for a few quid on Amazon. They make it incredibly easy to lift plants in and out, rearrange them, or thin the system as crops grow. More on that in the spacing section.
Nutrients and pH Management
Same two-part nutrient solution as the other systems — an A and B concentrate that you mix into water. I kept the vegetative formula the whole time since the NFT wall grows only leaf crops — I do not know if that was strictly the right thing to do, but the results were excellent. Going to experiment more with nutrient ratios this year.
Mix to an EC of about 1.7. Over about 10 days it drops to around 1.0 as the plants consume nutrients, at which point it is time for a fresh batch. Surprisingly little water loss — the system is mostly sealed, with minimal evaporation through the small openings around the net pots and the bucket return.
Disposing of Spent Solution
Really important: spent nutrient solution gets tipped onto soil garden beds. The plants in the soil absolutely love it — they really thrived from the nutrient-rich water this year. Do not tip it down the drain. It is nutrient-rich and will trigger all sorts of growth in your drains and make them smell. Dispose of it sensibly — if you have a soil garden, tipping it on there is a genuinely good thing to do.
Power Options
The pump runs 24/7. I initially ran it off an old 12-volt car battery, which I charged in the house every 3-4 days. Then I bought a 12V transformer for about £10 online, which was much less hassle. If buying a transformer, it is worth spending a few extra quid to get one with the European kite mark — you can find really cheap ones but I would be concerned about quality and safety.
Another option I am considering: a small solar panel to keep the car battery topped up, for a completely off-grid setup. If doing that, you could probably have the pump on a timer and turn it off overnight — the plants would survive fine for a few hours without water flowing. I may experiment with this approach this year.
What to Grow and When
The beauty of this system is that it produces food from early spring right through to winter — and in some cases, beyond. Here is roughly how my year went:
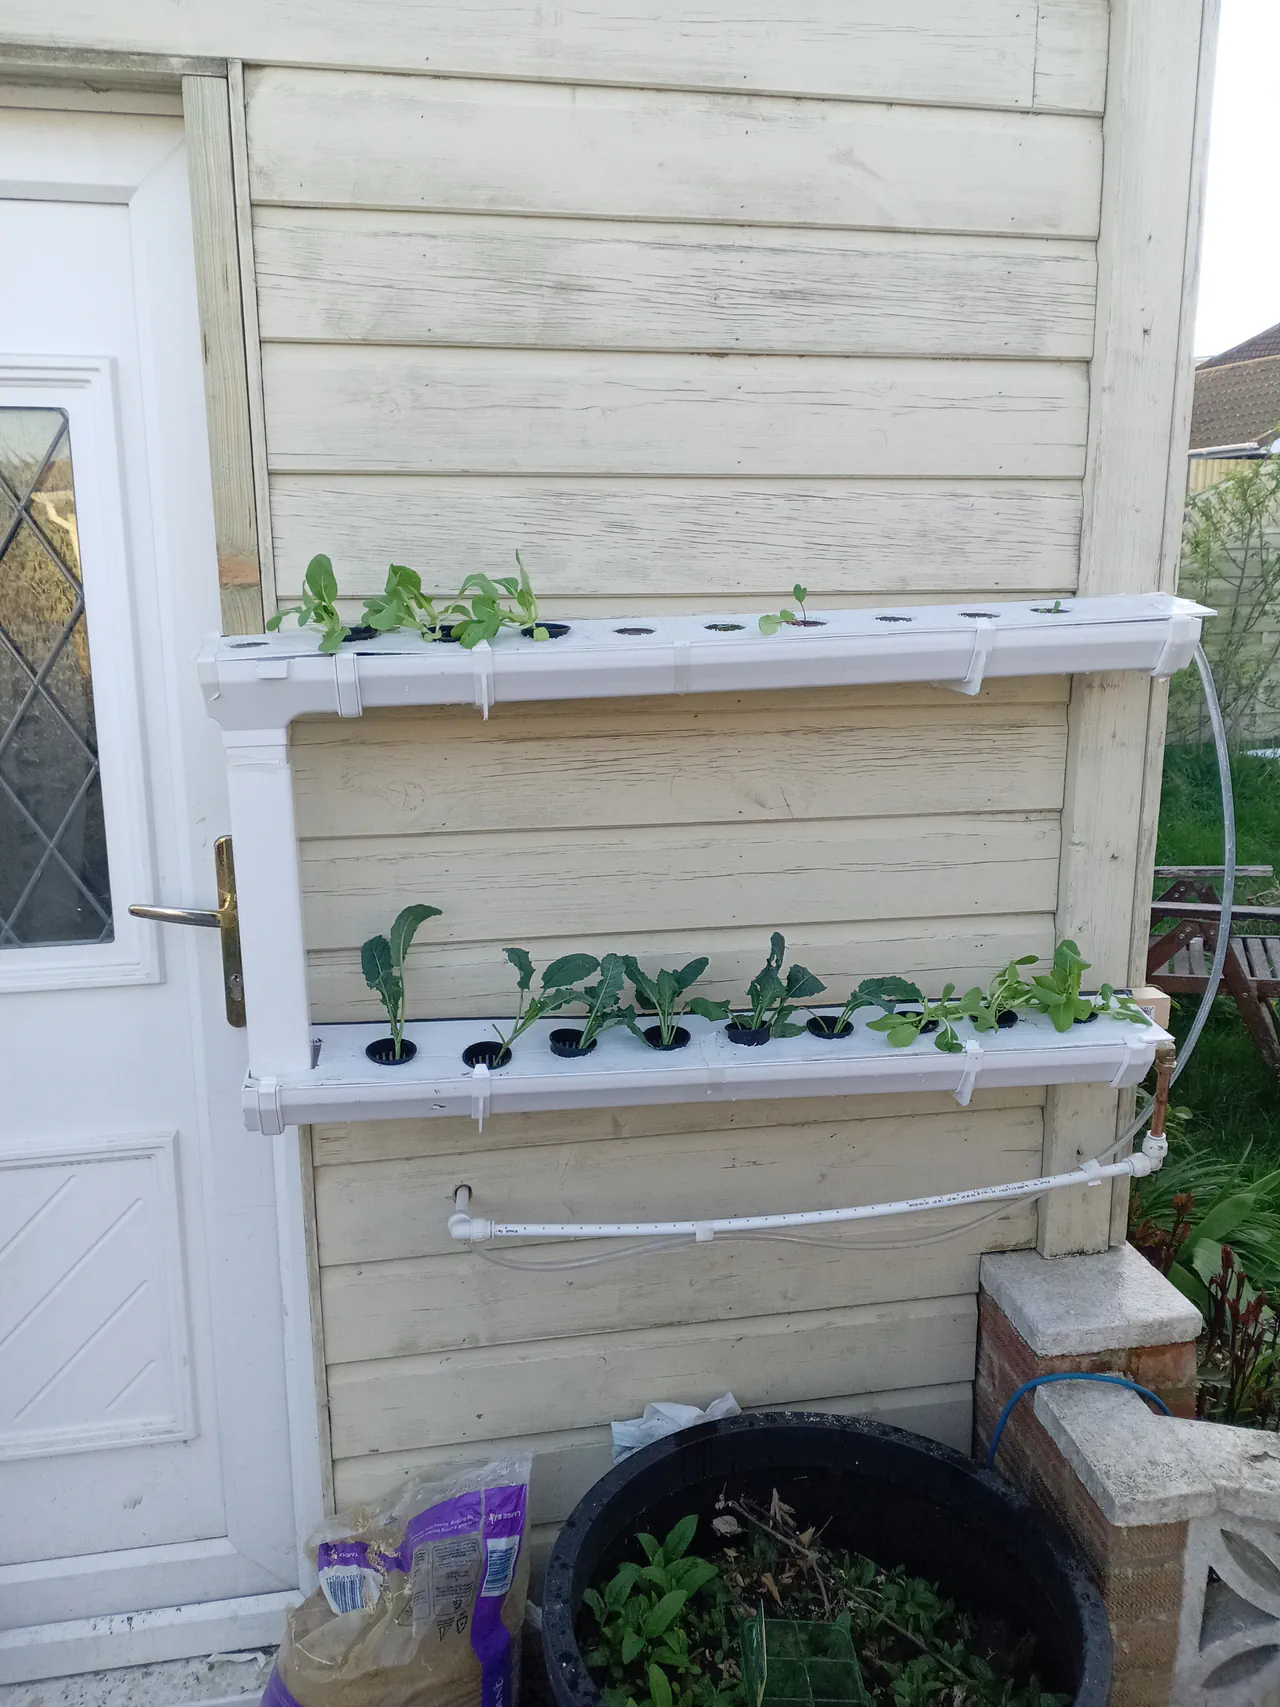
Spring (March–May)
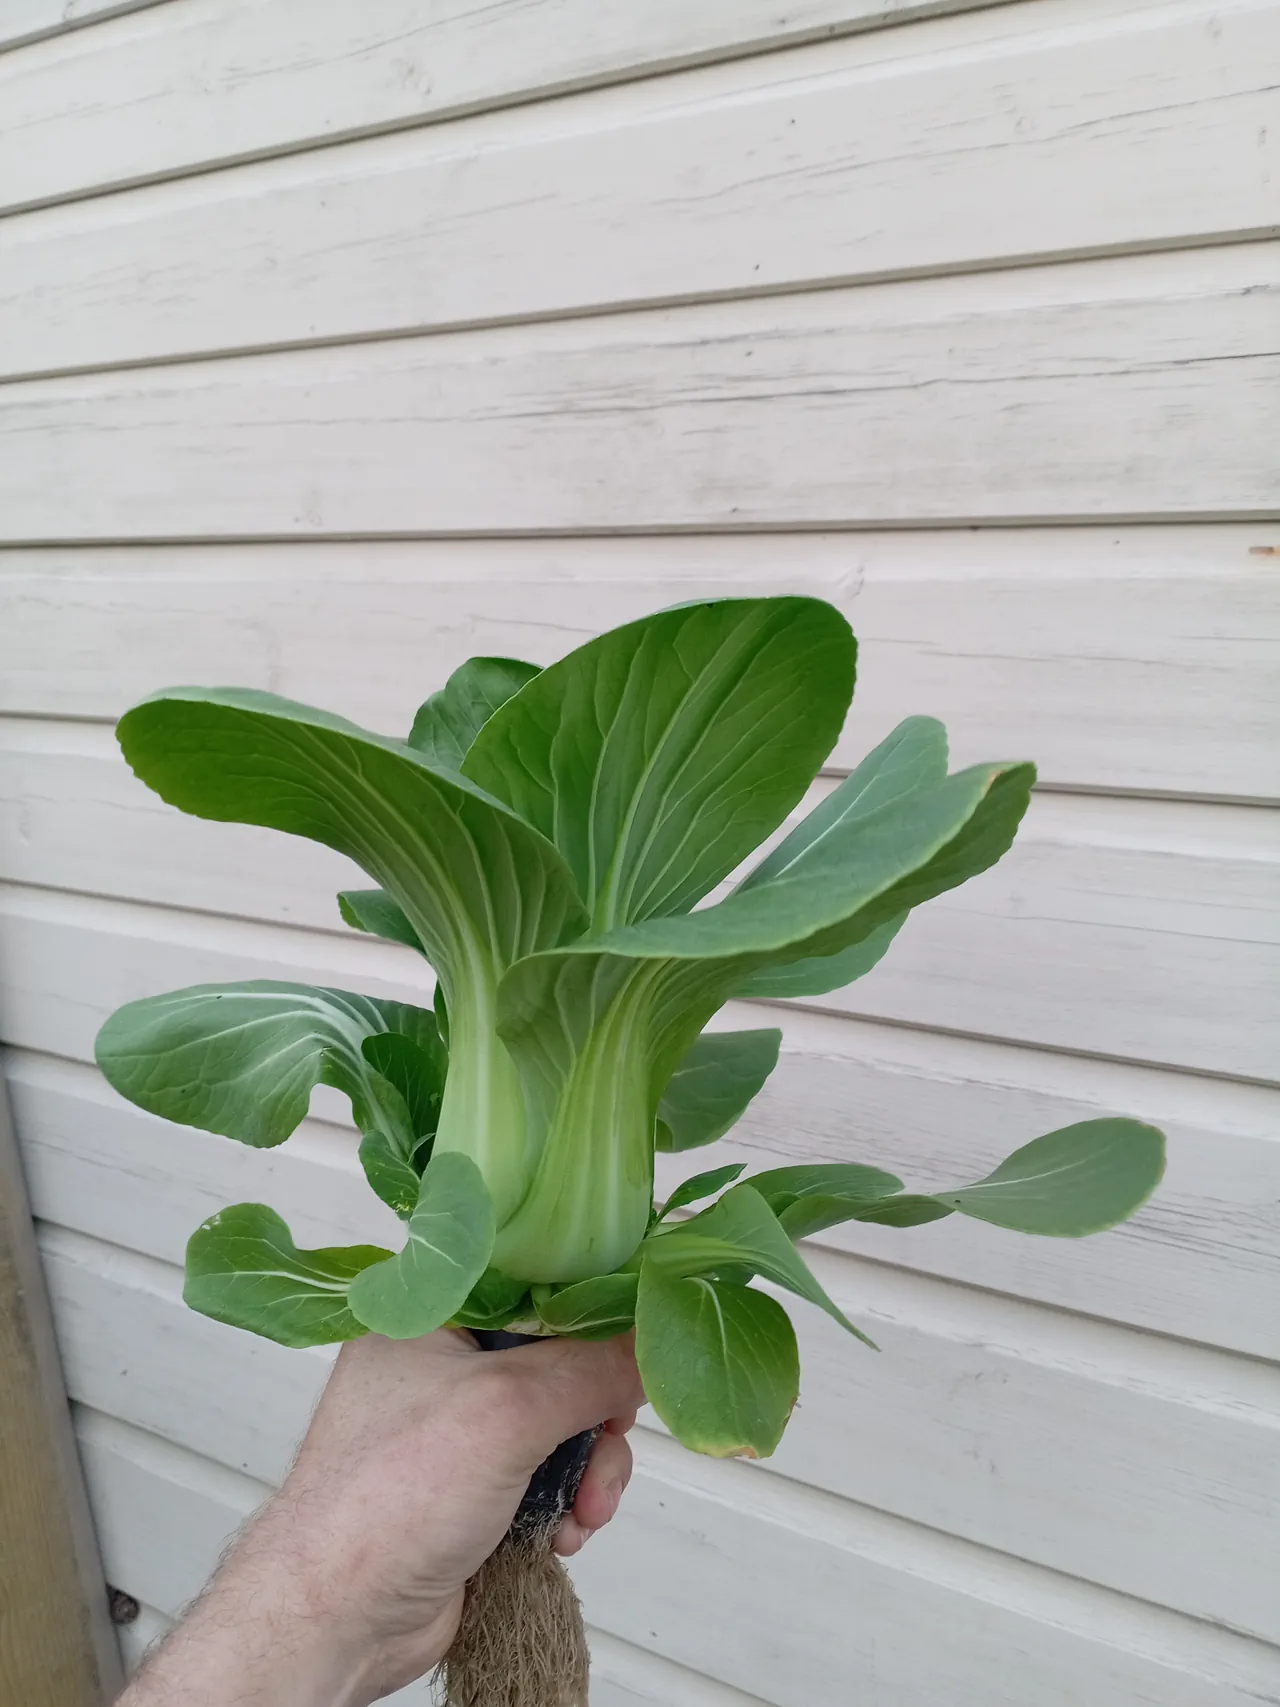
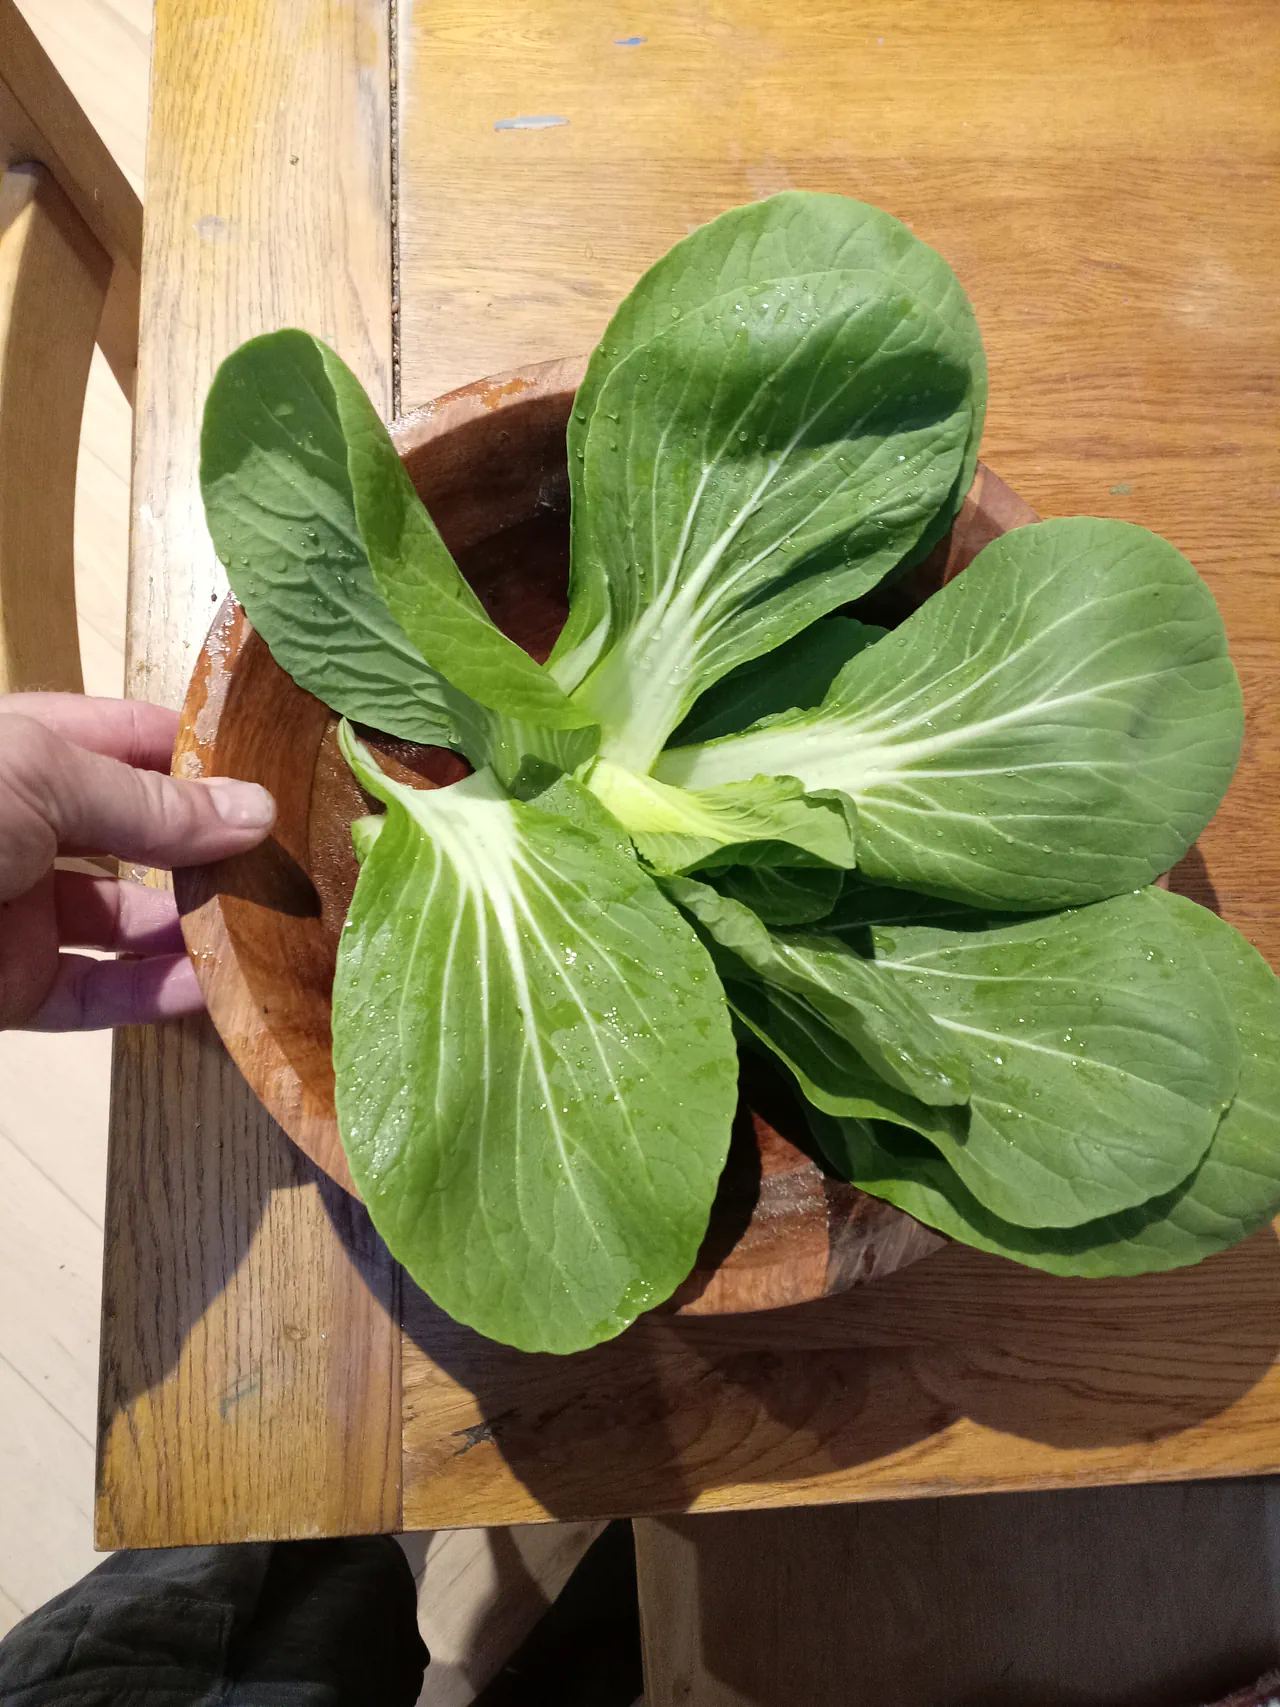
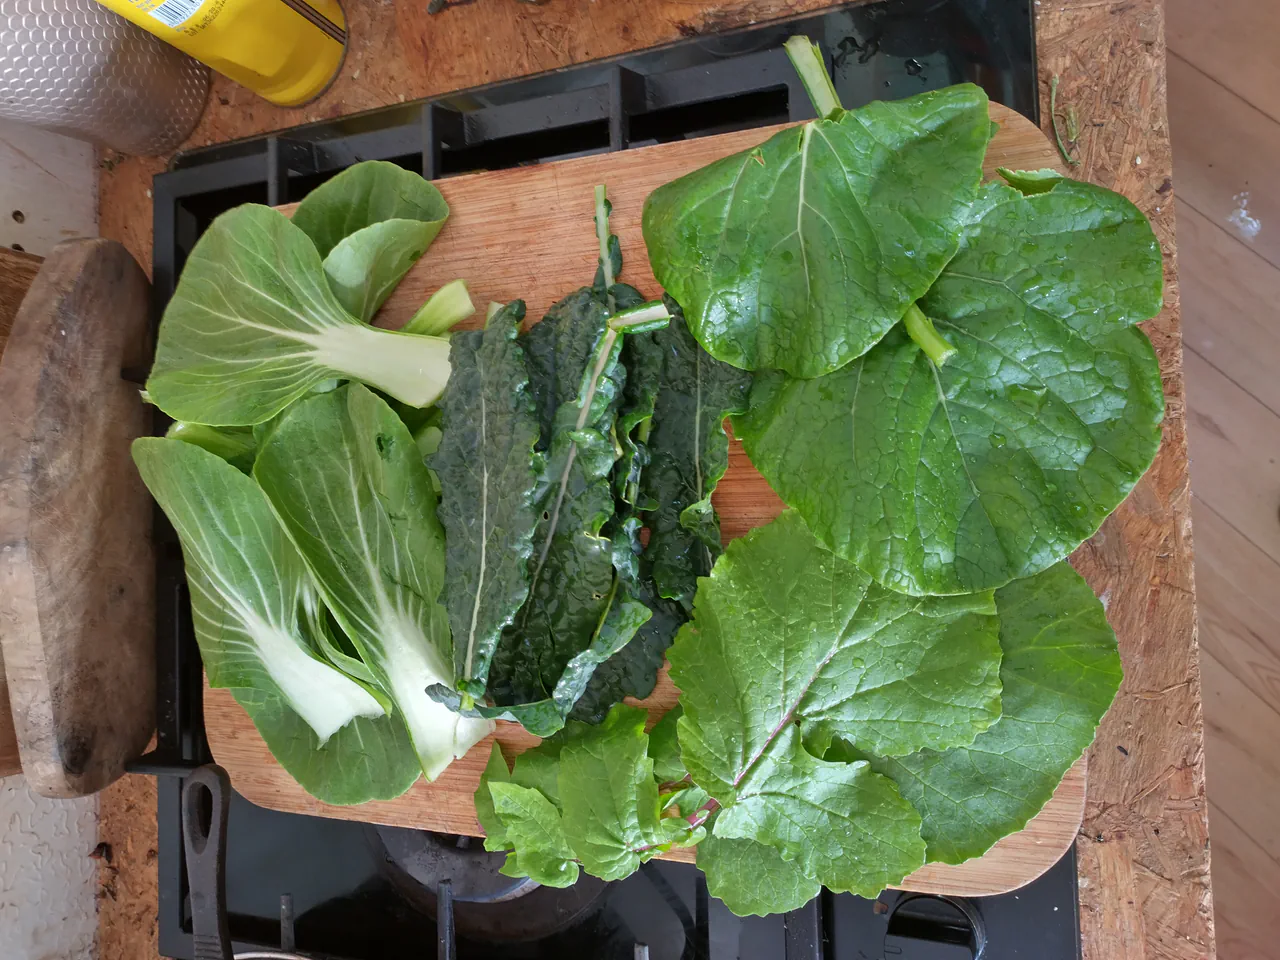
Mizuna, mibuna, kale seedlings, oak leaf lettuce, and pak choi — all cut-and-come-again crops. I had about eight plants in there initially, and they grew fast. The pak choi was particularly impressive, producing big healthy heads within weeks.
As the weather warmed, the early crops started bolting — going to seed. This is normal and unavoidable with cut-and-come-again salads as temperatures rise. When a plant bolts, pull it out (eat the leaves first if they are still good), and replace it with a summer crop.
Summer (June–September)
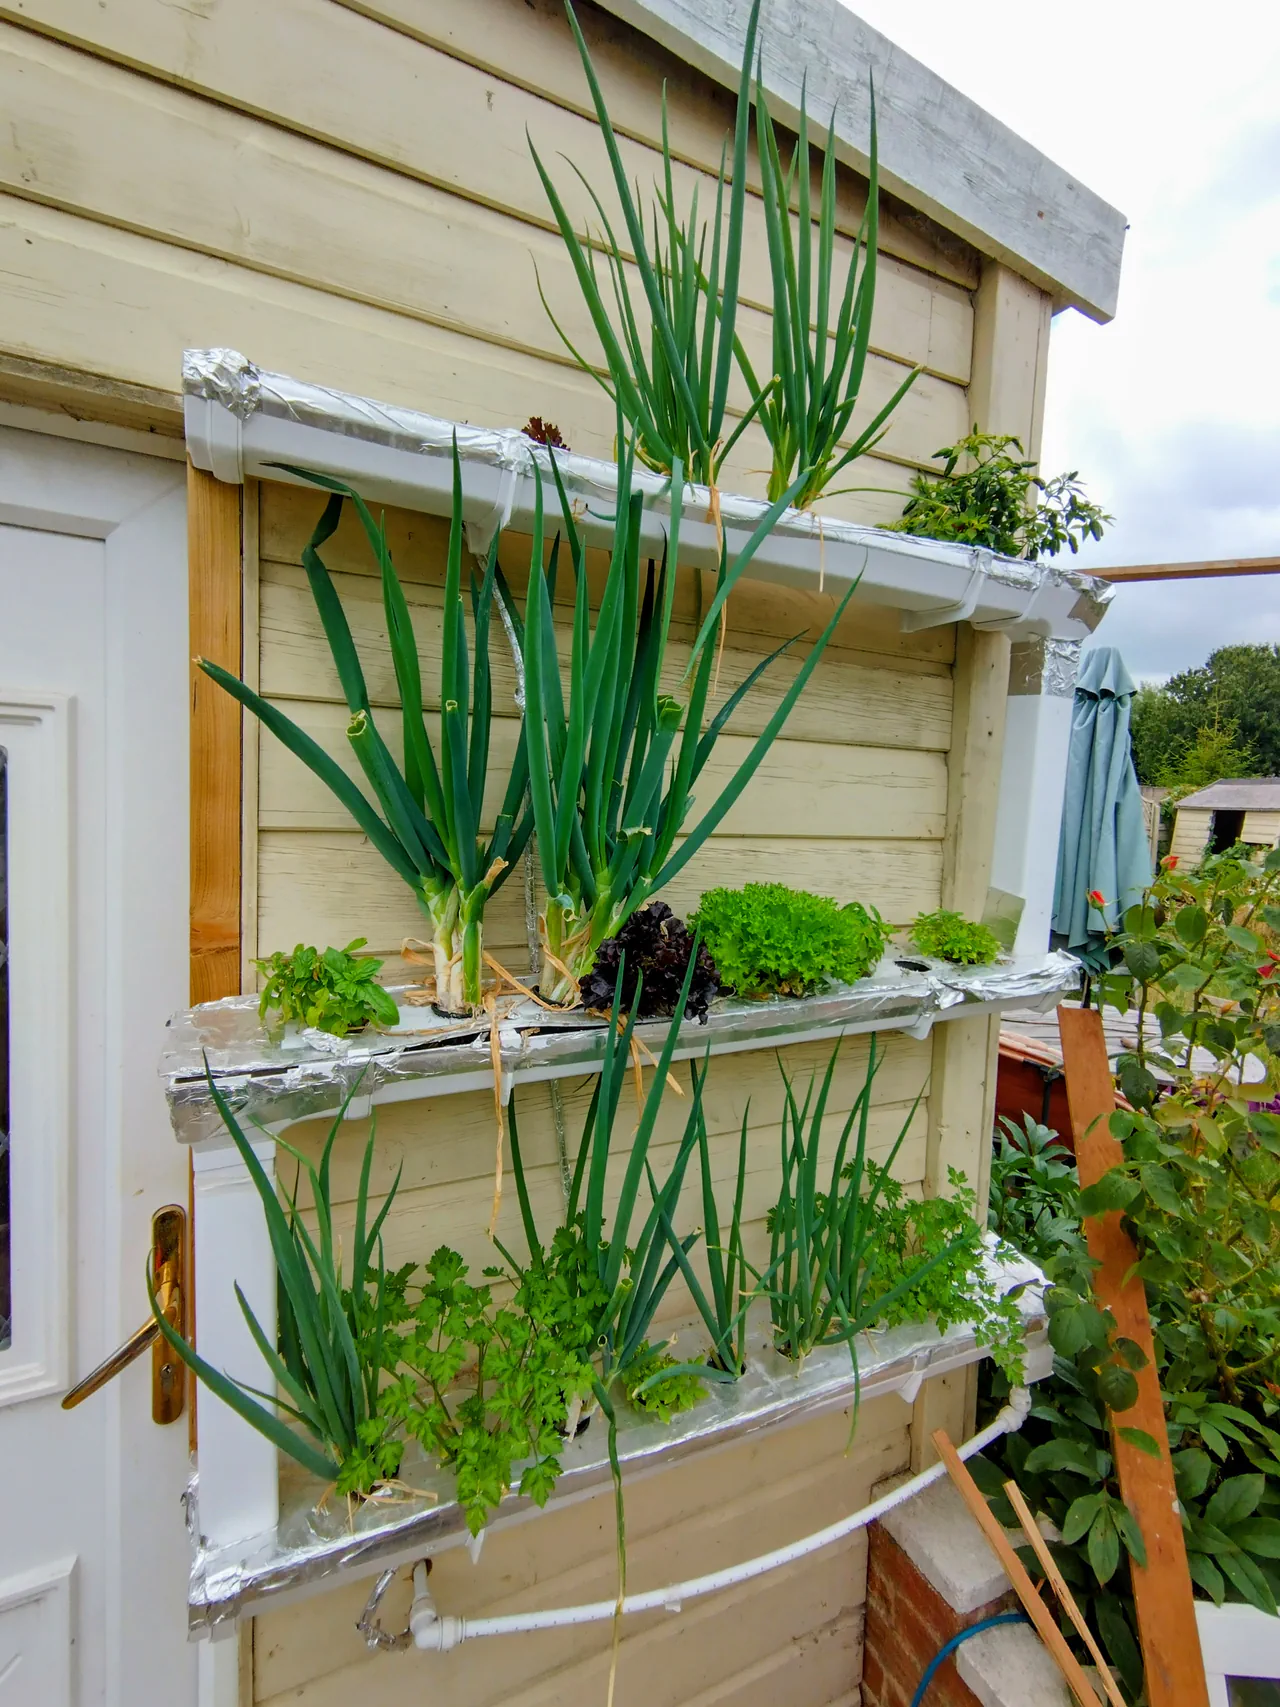
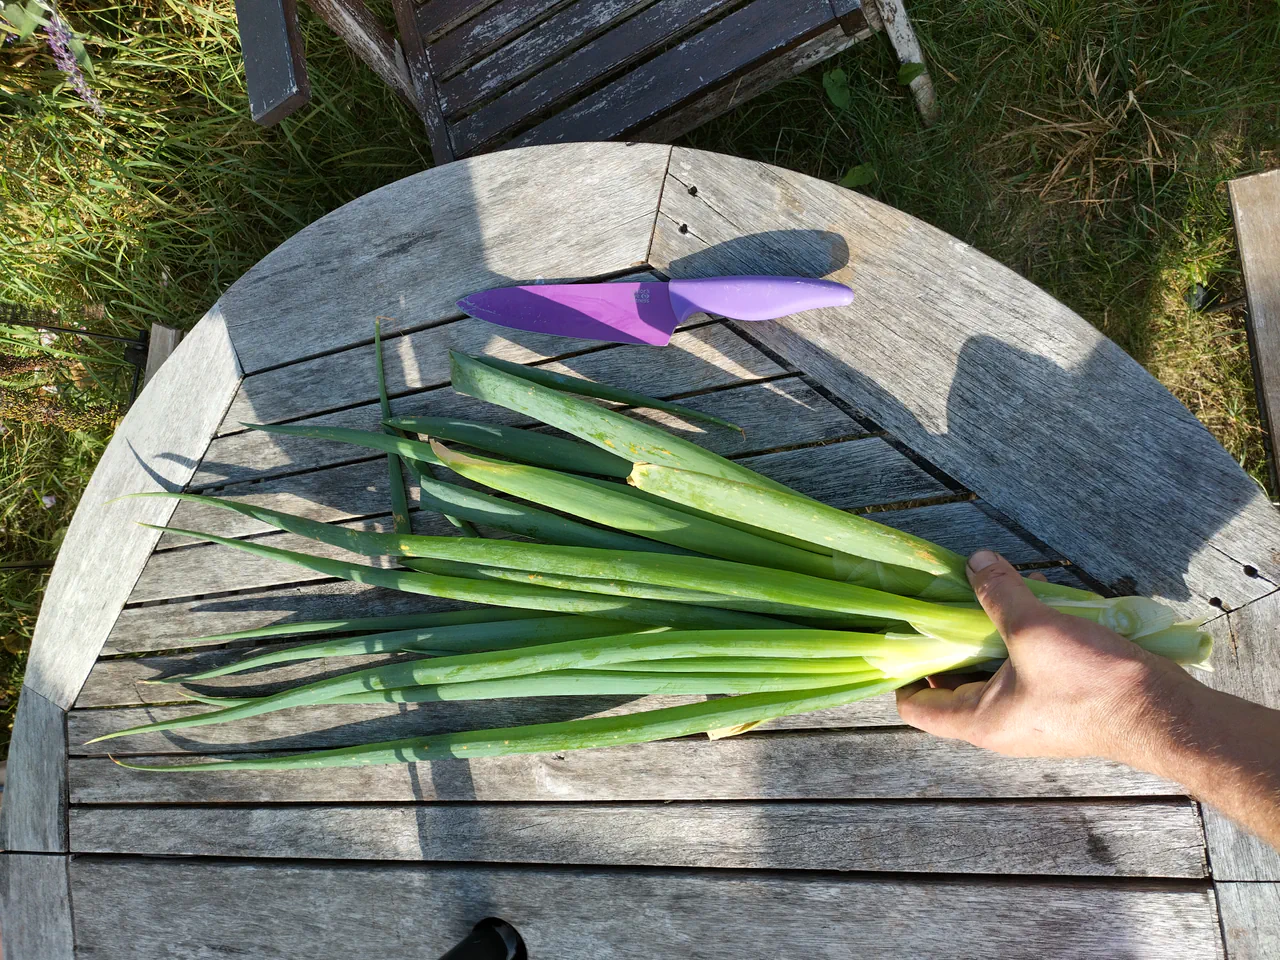
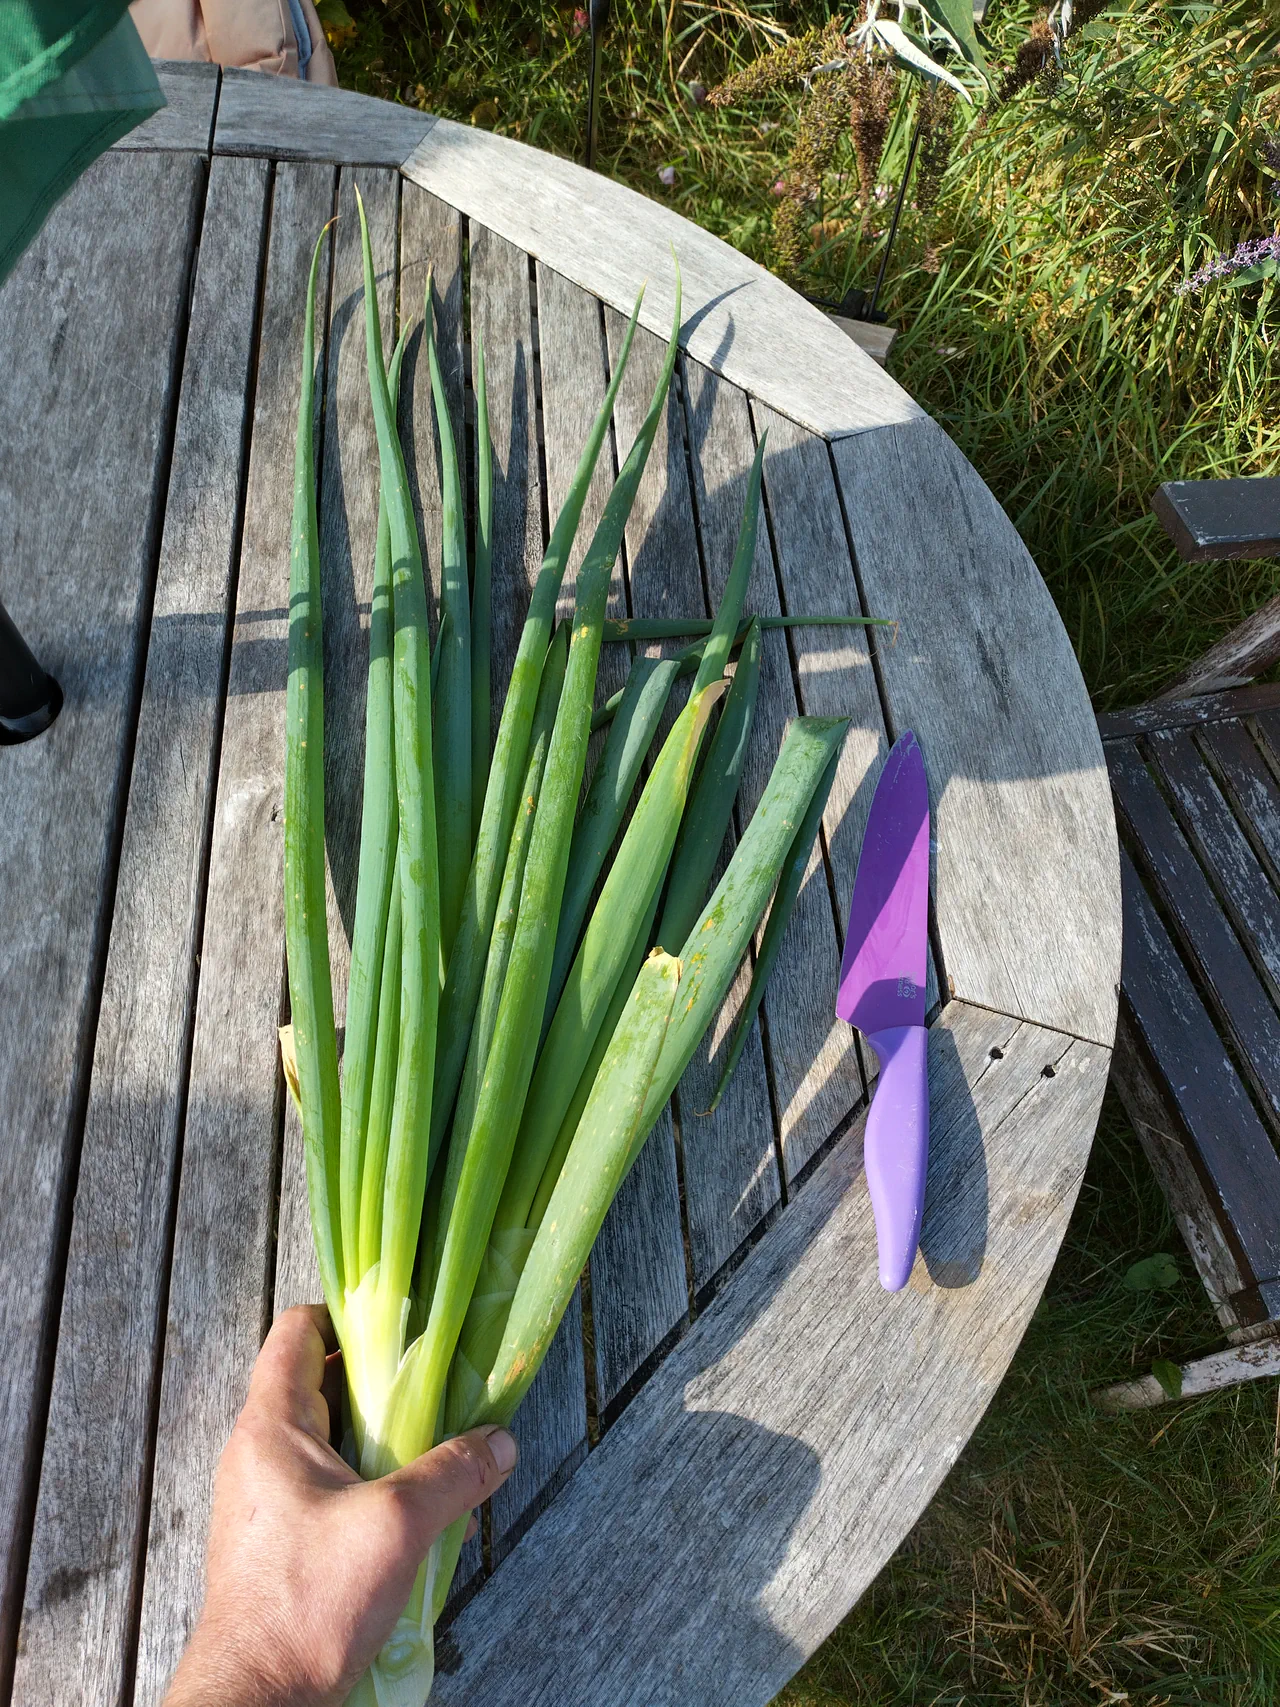
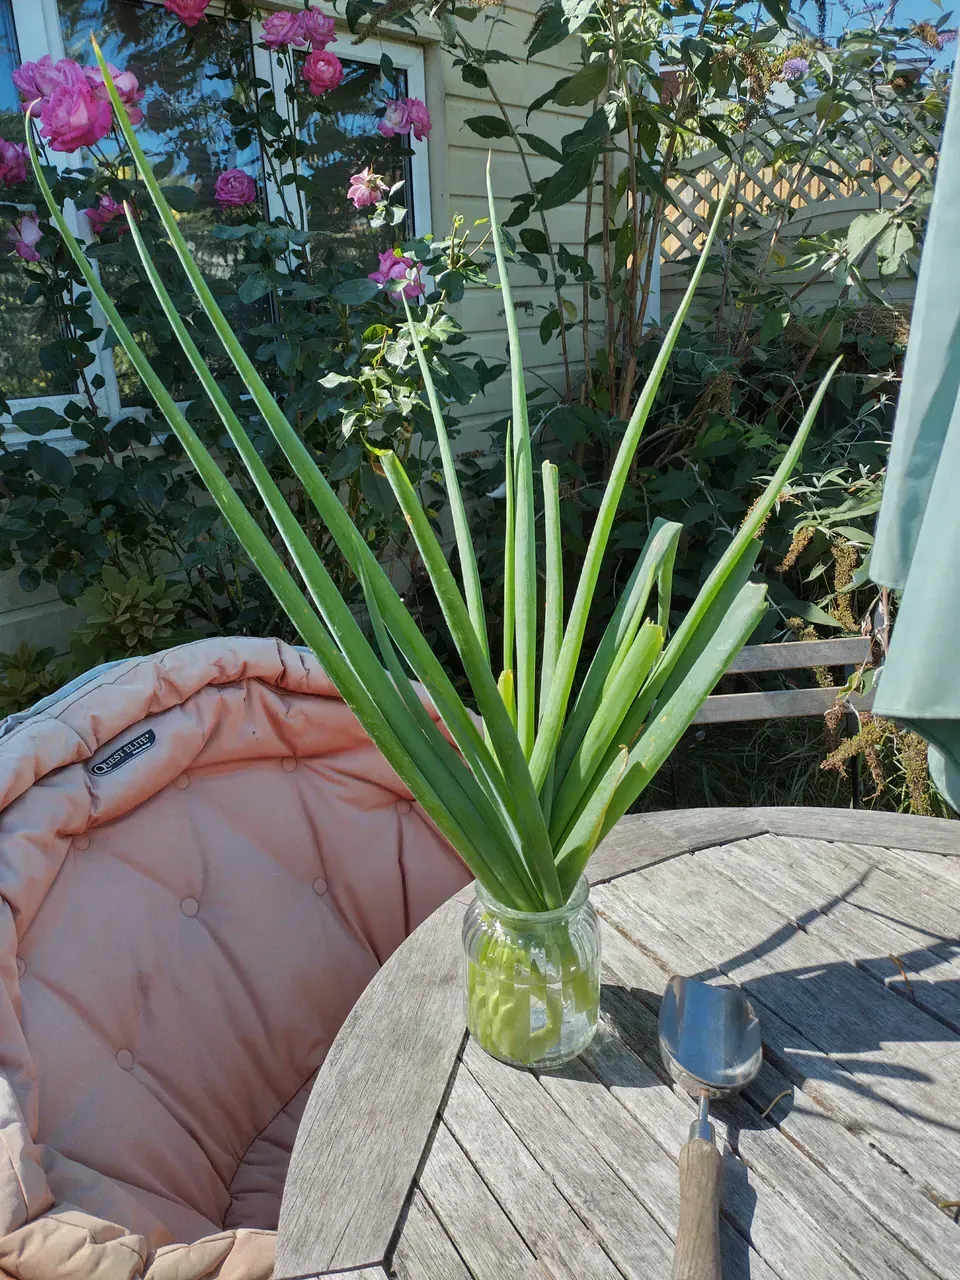
This is where the spring onions took over and became the star of the season. I planted spring onion seedlings in the upper gutter and they just kept growing. And growing. By August they were the size of big leeks — thick, juicy stems with gorgeous green tops that I could chop big pieces off and they would spring straight back within days.
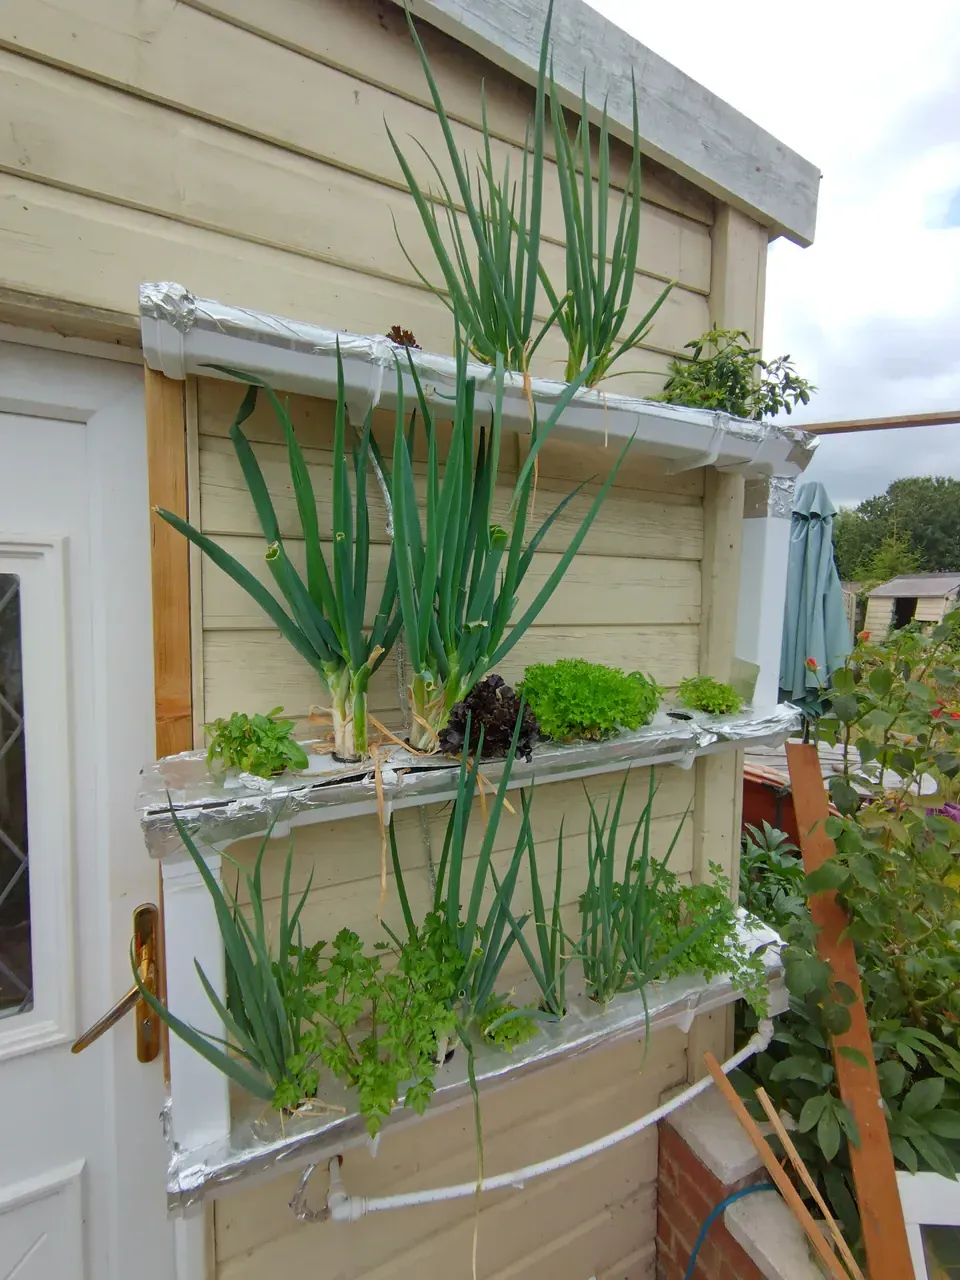
Alongside the spring onions: replacement lettuce (the originals had gone to seed), curly parsley that was producing generous handfuls, basil, and various other herb and salad crops. I also had cavolo nero and kale seedlings that started in the NFT nursery then got transplanted out to the gravel bed system (guide coming soon) when they were big enough — the LEGO advantage in action.
Peak Production (September)
September was the absolute peak. The spring onions were towering, the parsley was lush, the replacement lettuces were at their best, and the whole system was stuffed with food. This is when the NFT wall earns its keep — you cannot walk past it without grabbing a handful of something for the kitchen.
Autumn and Winter (October–February)
Here is where it gets interesting. I actually turned the pump off and emptied the bucket in November because I decided to shut the system down for the year. Just left it. Expected everything to wither and die.
It did not.
The only plants left by then were spring onions and parsley — but they turned out to be almost indestructible. It has been a rainy winter, and the rainwater collecting in the gutters was apparently enough to keep them alive. The spring onions had built up substantial root balls over months of growing, and those root balls hold moisture even when the system is not running. The parsley just refused to give up.
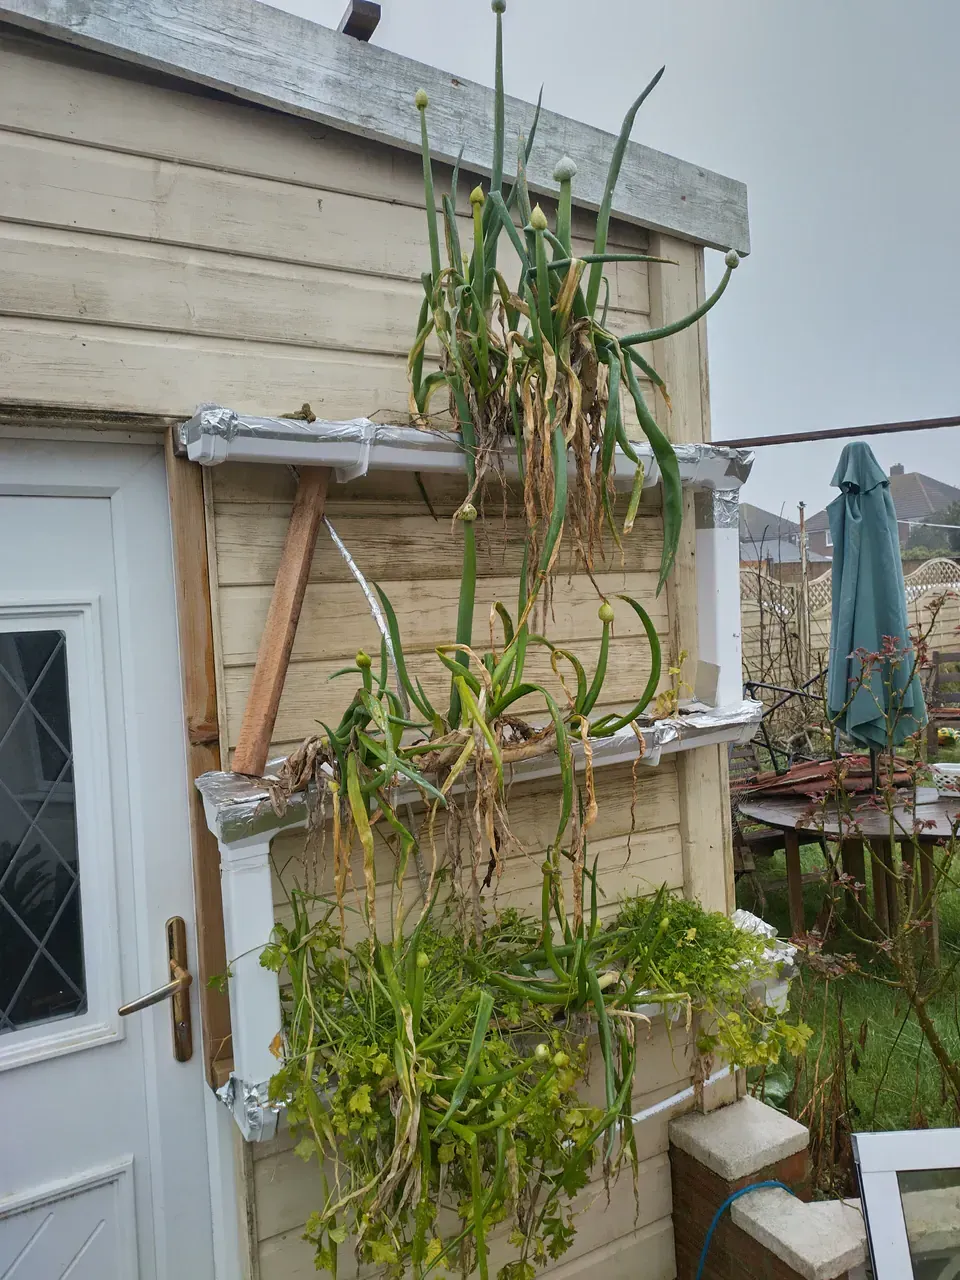
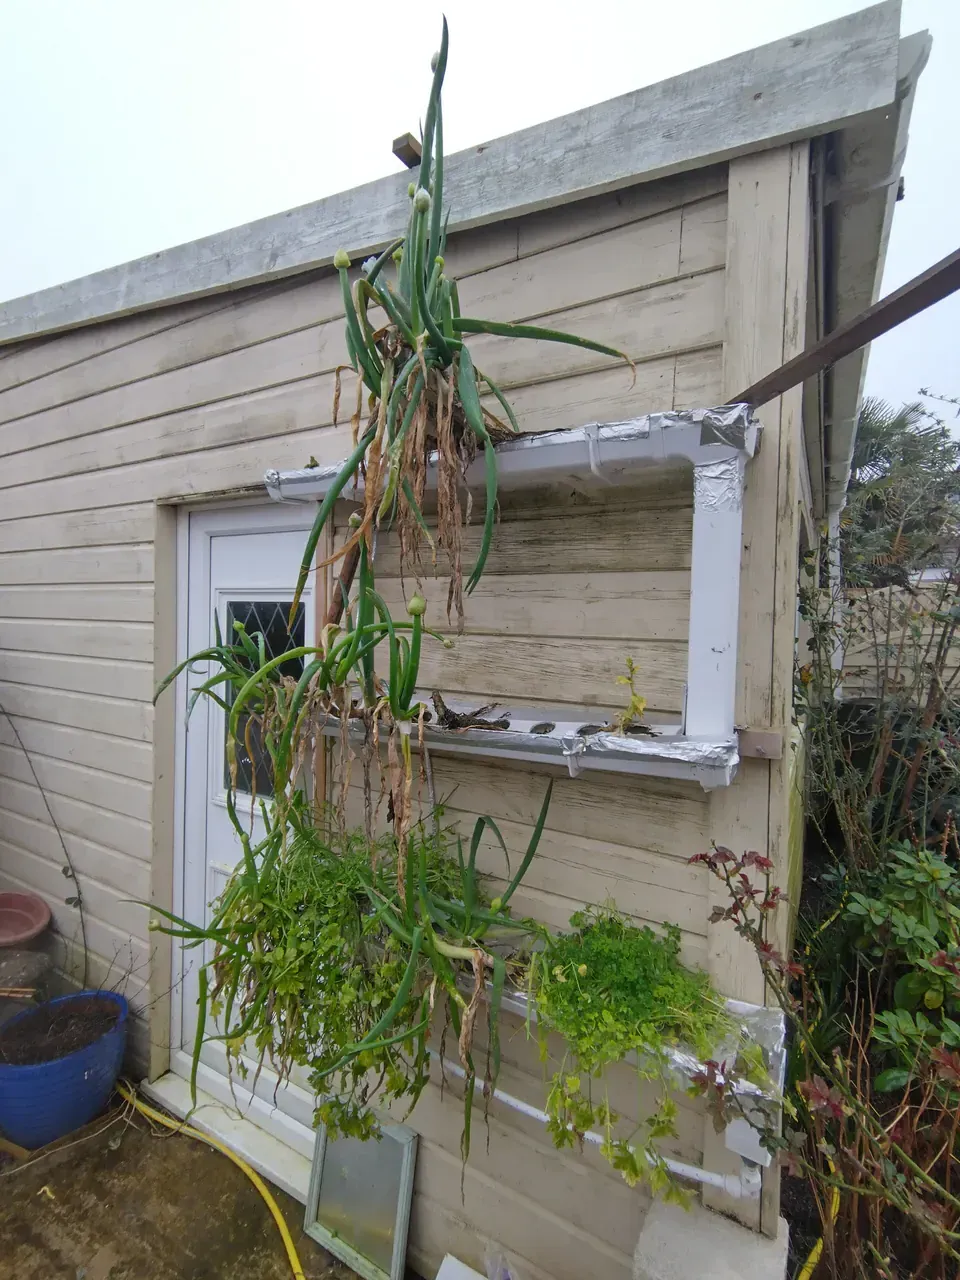
Even now, in February, I can walk out to the system, chop big pieces of green off the spring onions, and they still spring back. I need to completely take the system apart soon and clean it for next year's growing — but since it was all still alive, I just kept harvesting off it. The lesson: if you plant the right crops and let them establish properly, an NFT system can produce food well beyond the growing season.
Spacing and the LEGO Advantage
No growing medium means plants pop in and out freely — it really is like gardening with LEGO. I initially spaced the holes about 10cm apart, which turned out to be too close as the plants matured. Later I almost doubled the spacing, and the wider-spaced positions produced better results — more airflow, more light, healthier plants.
But here is the trick: the close-spaced holes became useful as a nursery. Start small plants in the tight spacing, and as they grow, thin them out and move them to wider-spaced positions further down the system. The extras get eaten, moved to another system, or planted in the soil garden. The ability to rearrange everything with zero transplant shock is one of the biggest practical advantages of NFT over any other growing method I have tried.
What I'd Do Differently
- DPC membrane instead of corrugated plastic. The corrugated plastic and hole saw approach works but it is fiddly to cut and not especially pretty. Done in v2 — see below.
- Better spacing from the start. 10cm between holes was too tight. Starting at 15-20cm would have saved a lot of shuffling plants around as they grew. The close holes still work as nursery positions, so it is not a disaster — but wider spacing from the outset would be smarter.
- Experiment with nutrients and EC levels. I kept the same vegetative mix at EC 1.7 the whole time. Different crops may benefit from different concentrations. Going to run some comparisons this year.
- Try solar panel and timer. A small solar panel keeping a car battery topped up, with the pump on a timer running during daylight hours only. Plants survived fine for months with the pump off entirely — a few hours overnight without flow would be nothing.
- Black tubing to prevent algae. The clear pump pipe lets light into the water line, which encourages algae growth. Done in v2 — replaced with black silicone tubing.
Version 2: Making It Good
Make it exist first. Make it good later. The v1 system proved NFT works on a shed wall with cheap guttering and a tiny pump. It ran for an entire growing season, produced kilograms of food, and survived the winter. It also looked like a prototype, because it was one.
Version 2 addresses the rough edges. Same gutters, same pump, same principle. Better cradles, cleaner covers, bigger reservoir, no more algae in the lines.
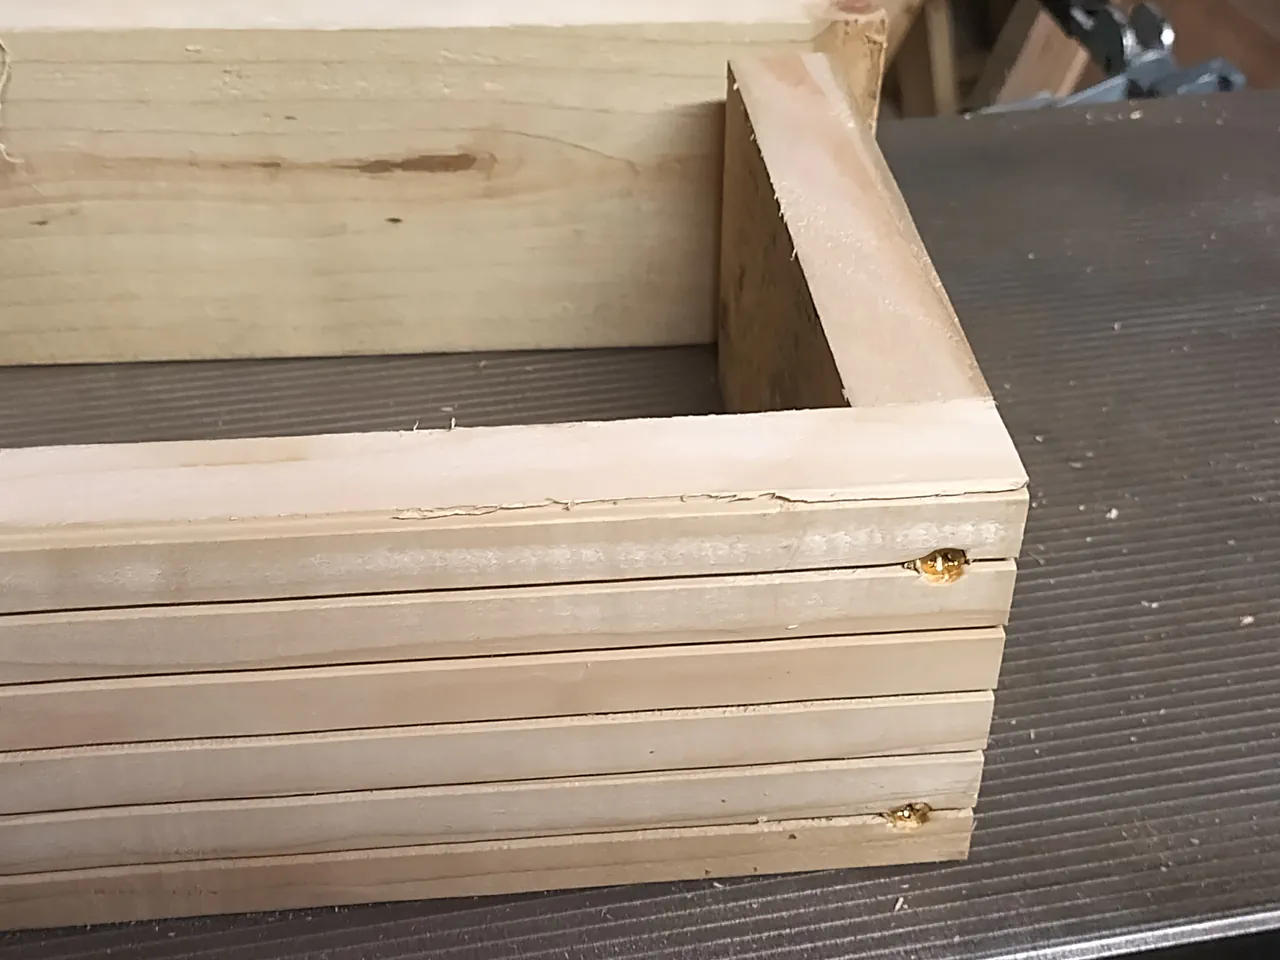
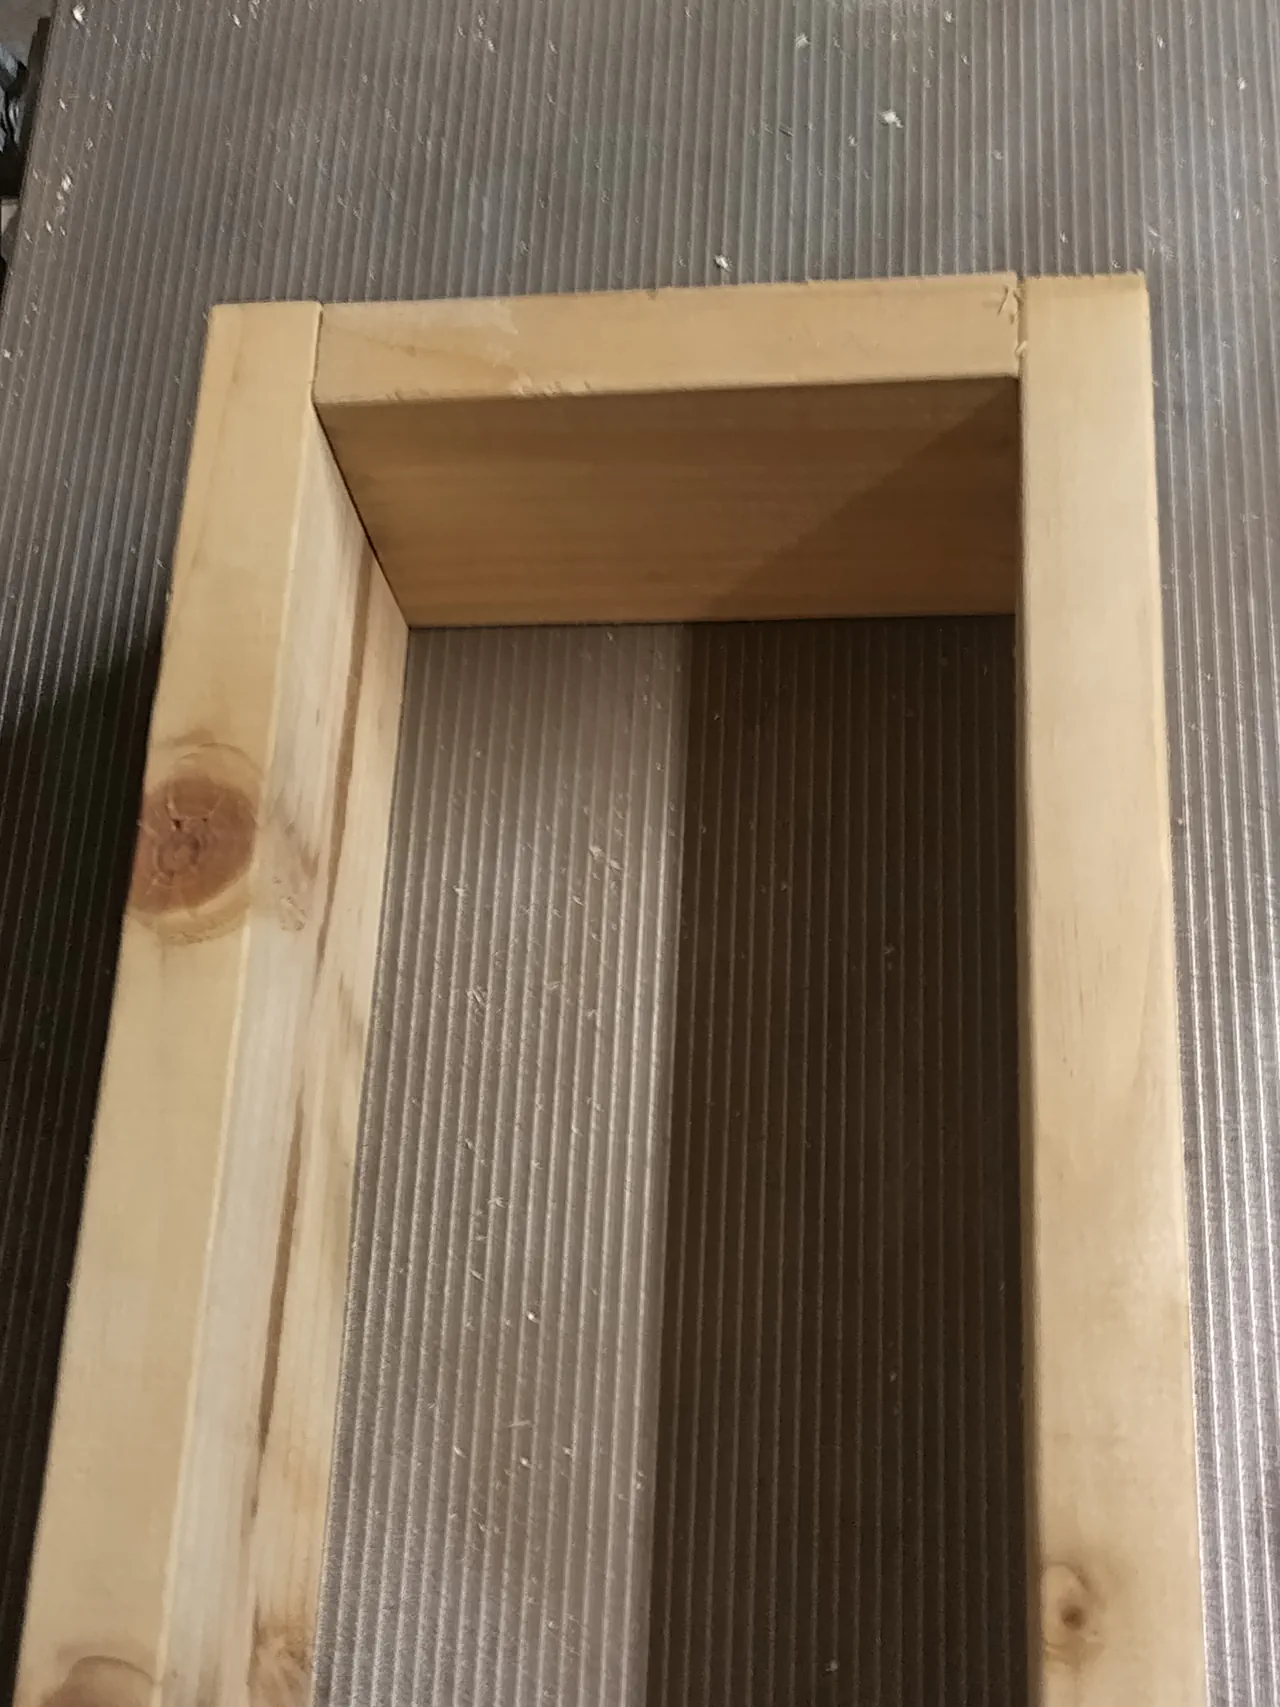
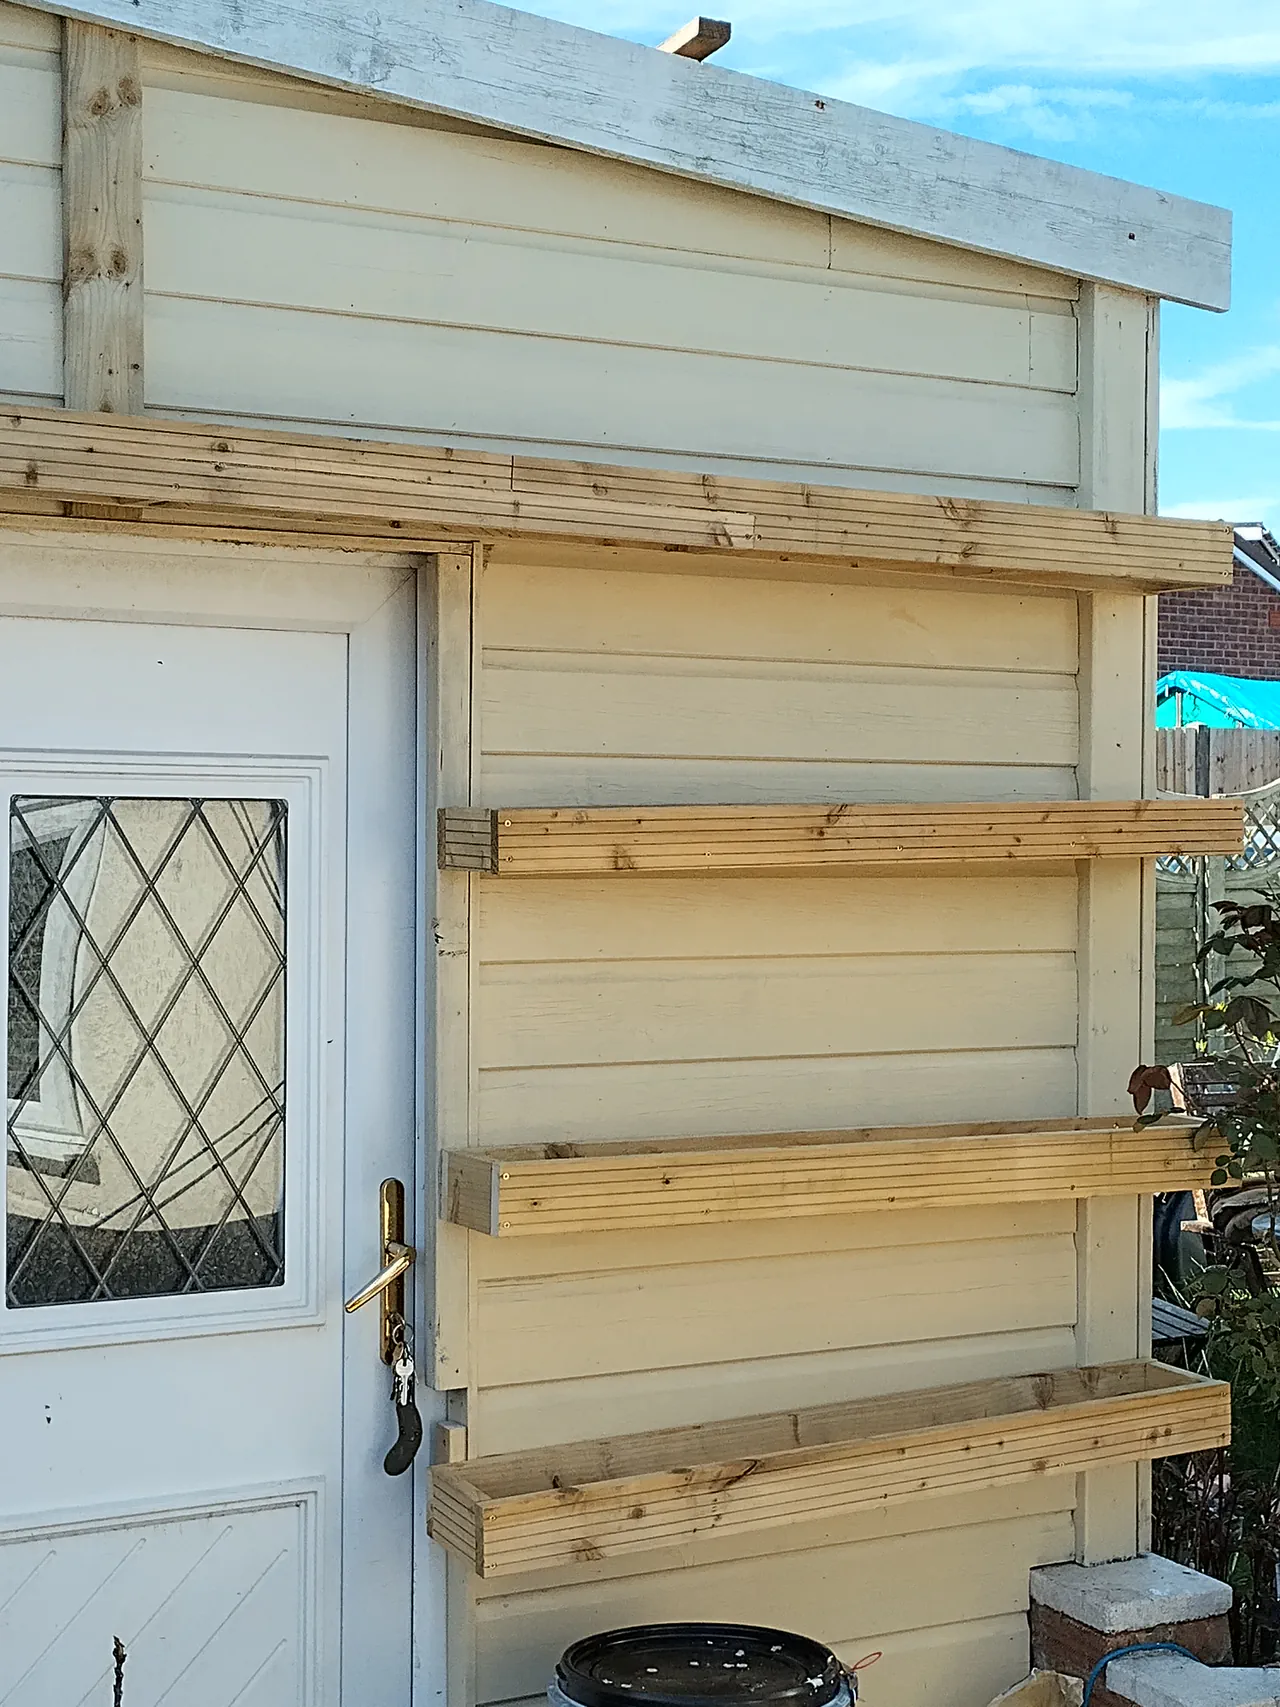
The Timber Cradles
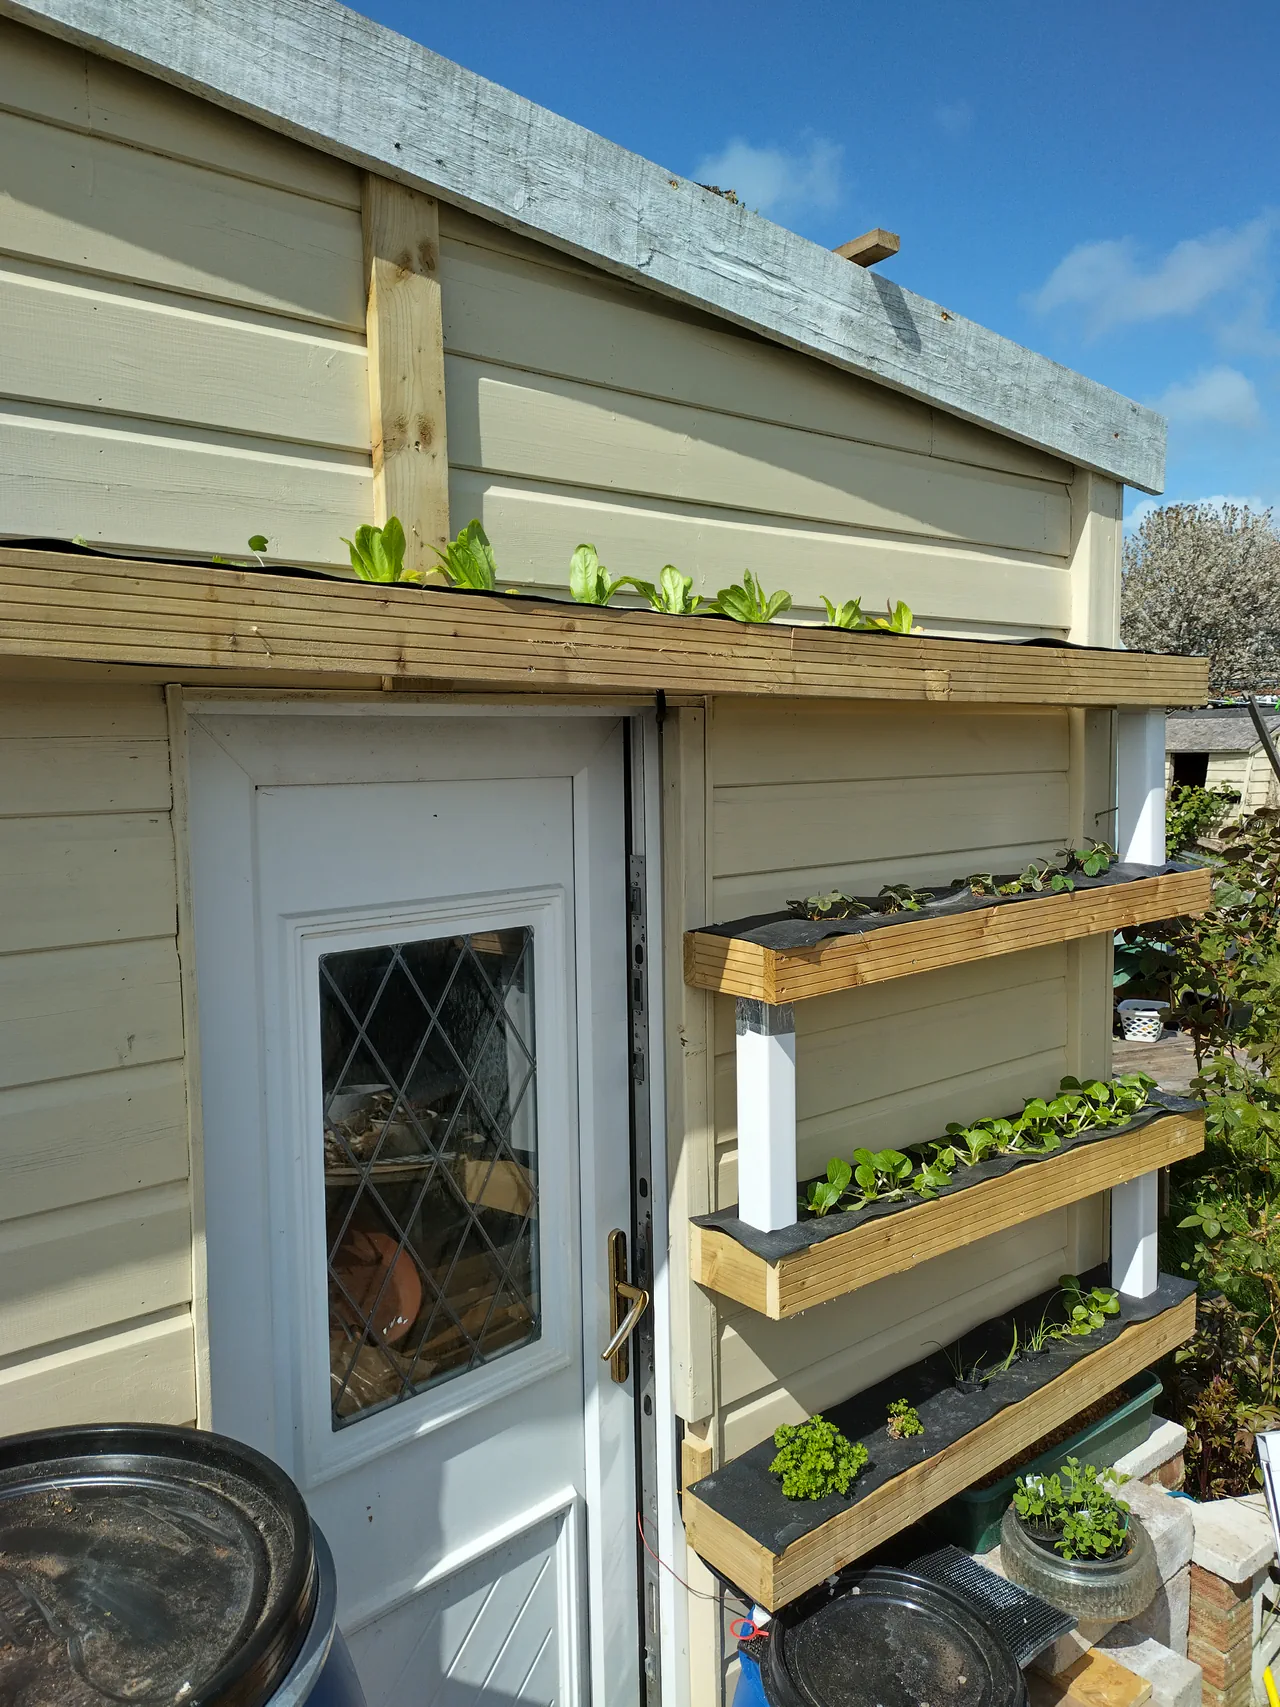
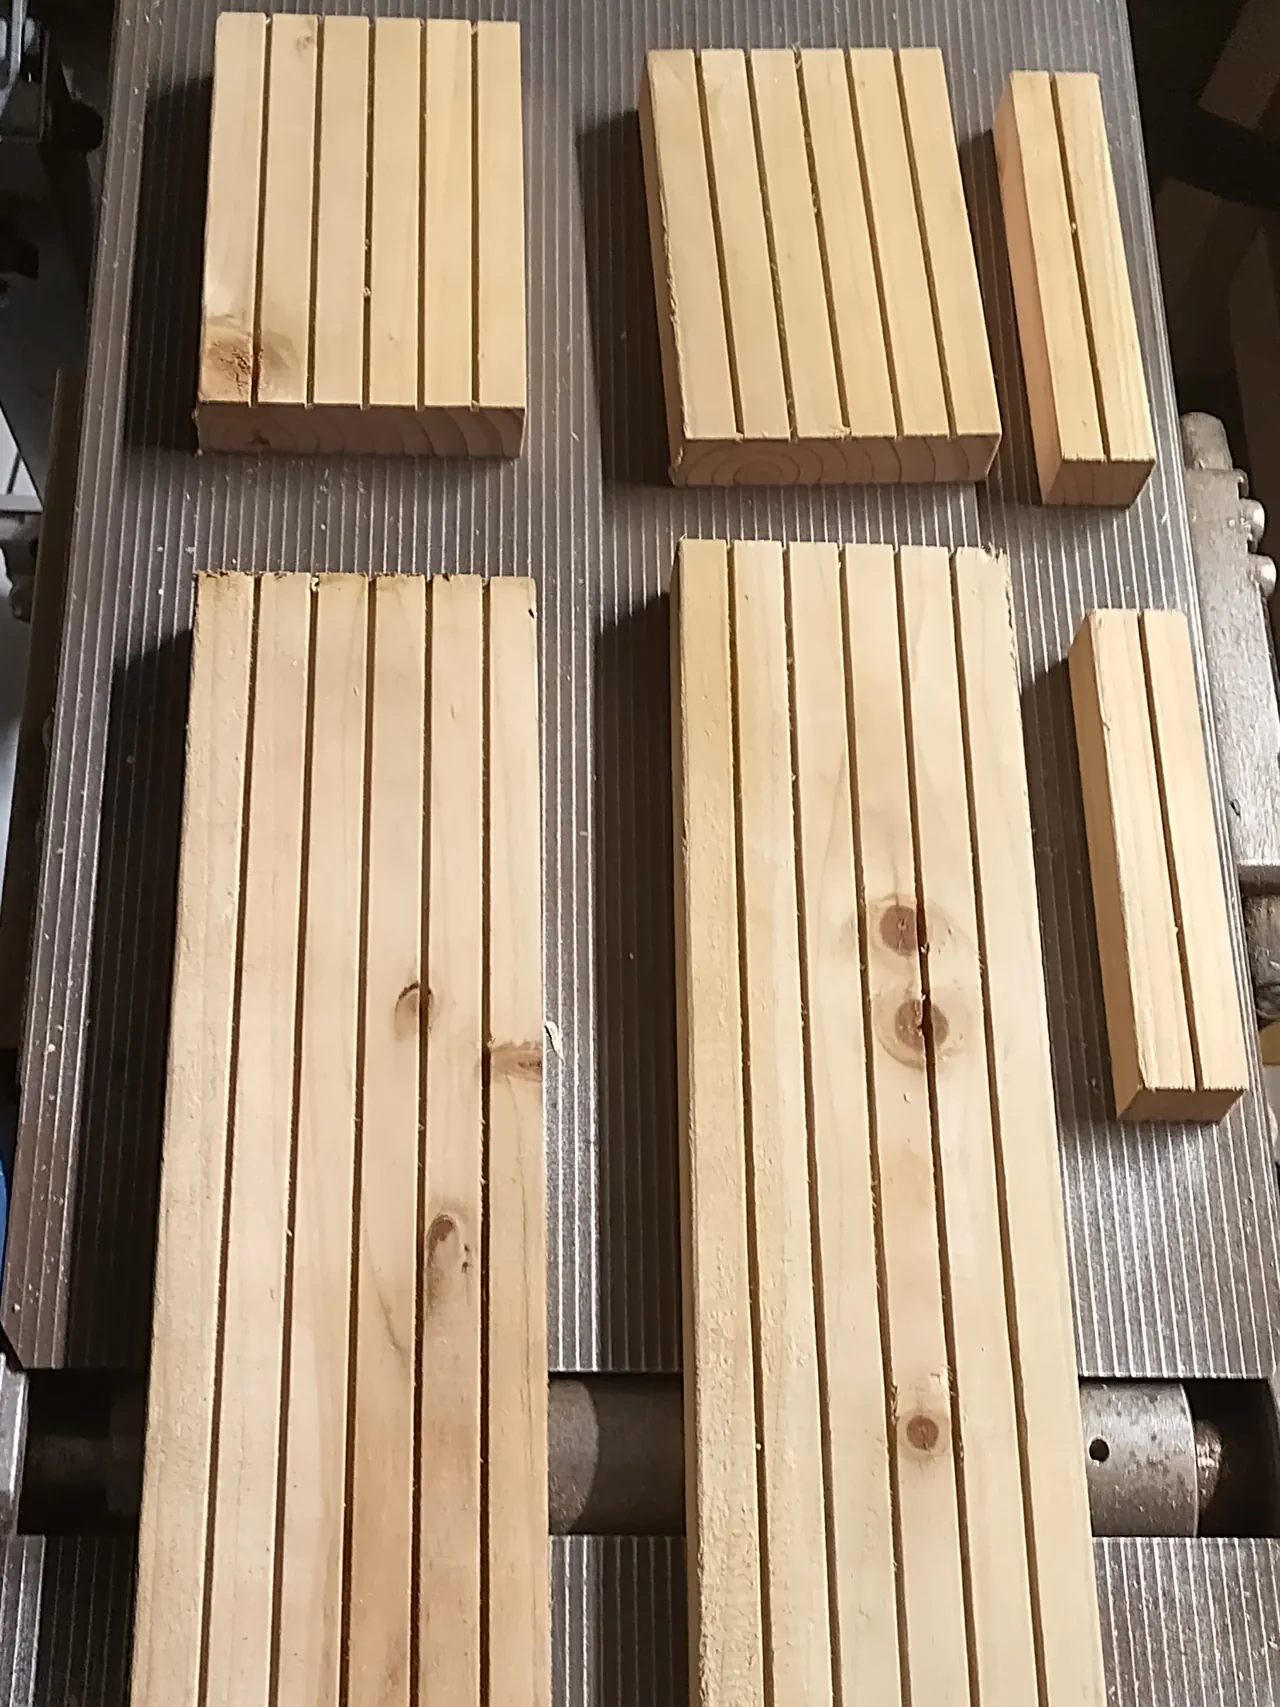
The v1 system hung from fascia brackets screwed into the shed wall. It worked, but the brackets are designed for fascia boards, not shed cladding, and the whole thing looked temporary. For v2 I built proper timber cradles from 22mm decking planks — seconds, so cheap at about £1.30 per metre. A few barky edges and bigger knots that would ruin your decking project but just add character here. You need about 2 metres of plank per metre of gutter.
I ripped them on the table saw to exactly the right height so the gutter sits flush over the top. The first test piece came out slightly above — close enough to keep, but I adjusted all the others to be exact. Cut 12 end sections to fit across the ends. The offcuts from ripping the planks were chopped into spacer blocks on the chop saw and used to space the two long lengths apart.
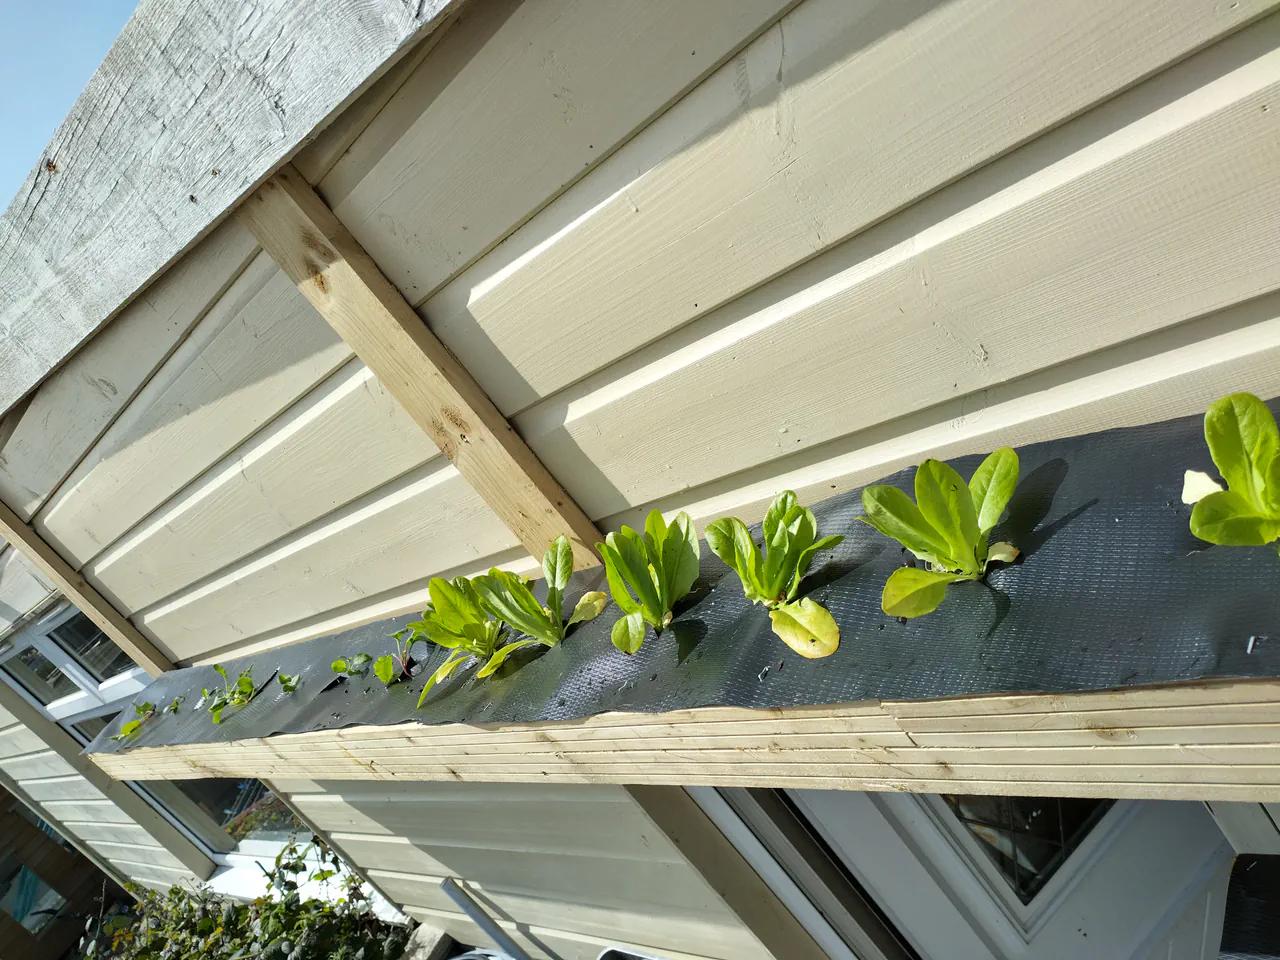
DPC Membrane Covers
The v1 system used corrugated plastic sheet cut to size, drilled with a hole saw, and covered in silver insulation tape. It worked but was fiddly and never looked great. For v2, DPC membrane stapled to the cradles with stainless steel staples, trimmed with a Stanley knife. To plant, just cut a cross in the membrane and push the plant through. No hole saw, no net pots, no fuss.
The membrane is left black for now because it is early season and cold — the black absorbs heat, which helps the plants establish. Once the first thinning is done and summer arrives, silver insulation tape goes over the top. It adheres well to the membrane and creates a reflective surface that reduces heat buildup. Same tape as v1, but over a much cleaner base.
Other Upgrades
- Reservoir: The plasterers bucket has been replaced with a food-safe blue UN barrel. Bigger capacity, more robust, purpose-built for holding liquids. One of those upgrades where you wonder why you did not do it from the start.
- Tubing: Clear pump pipe replaced with black silicone tubing. Keeps light out of the water line and prevents algae growth. A small change that eliminates a recurring annoyance.
- Extended system: A new, longer run at the top extends the system beyond the original v1 footprint. More growing positions from the same pump.
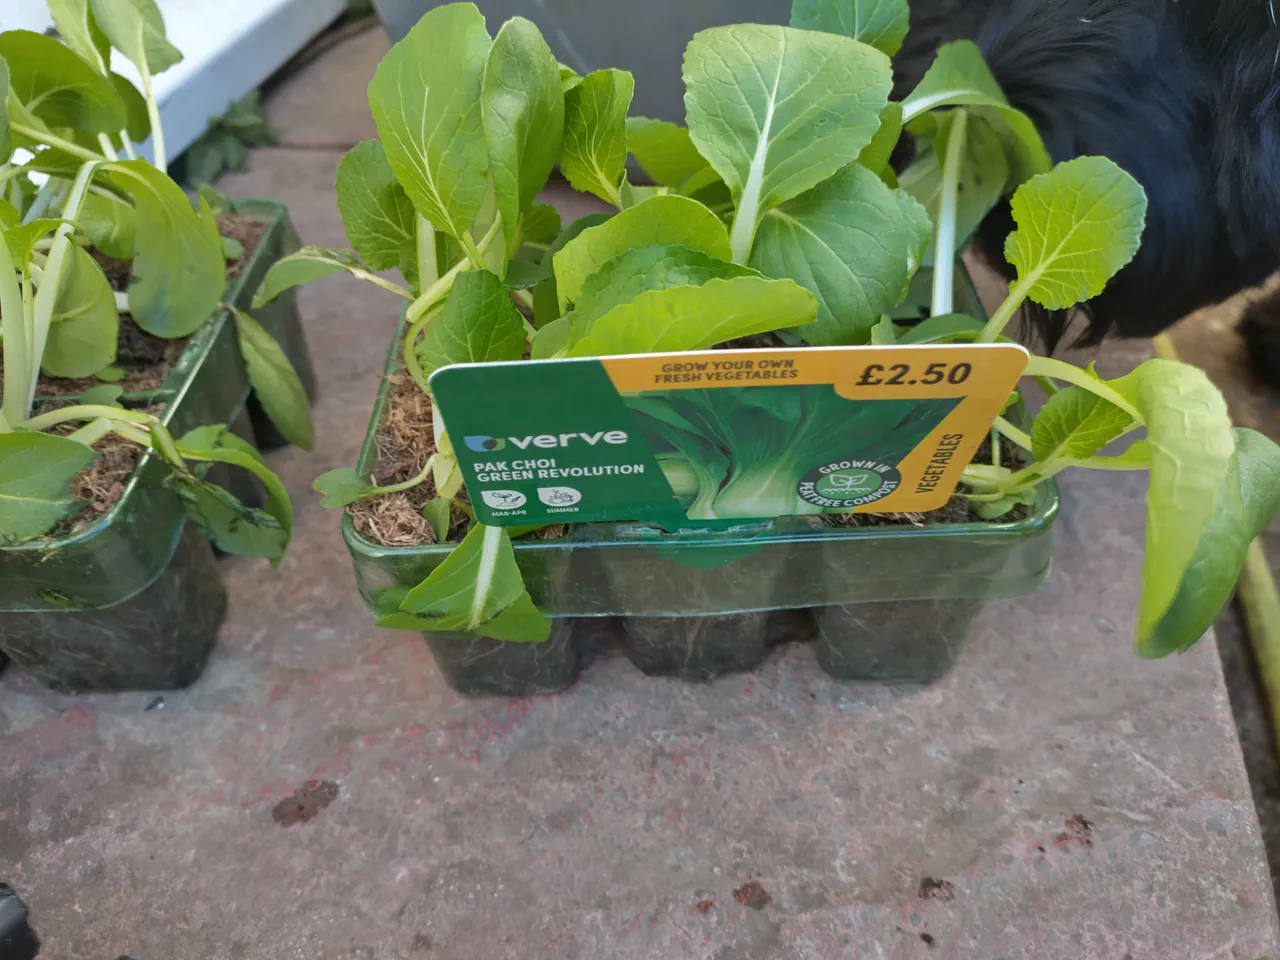
Early Season Planting
Planted with Verve pak choi plugs (£2.50 per tray) spaced deliberately tight. The plan is to thin them as they grow, eating the thinnings. Once the first round of thinning is done, the remaining plants have the right spacing for mature growth. It is the same principle as the LEGO advantage from v1, just applied from the outset rather than discovered by accident.
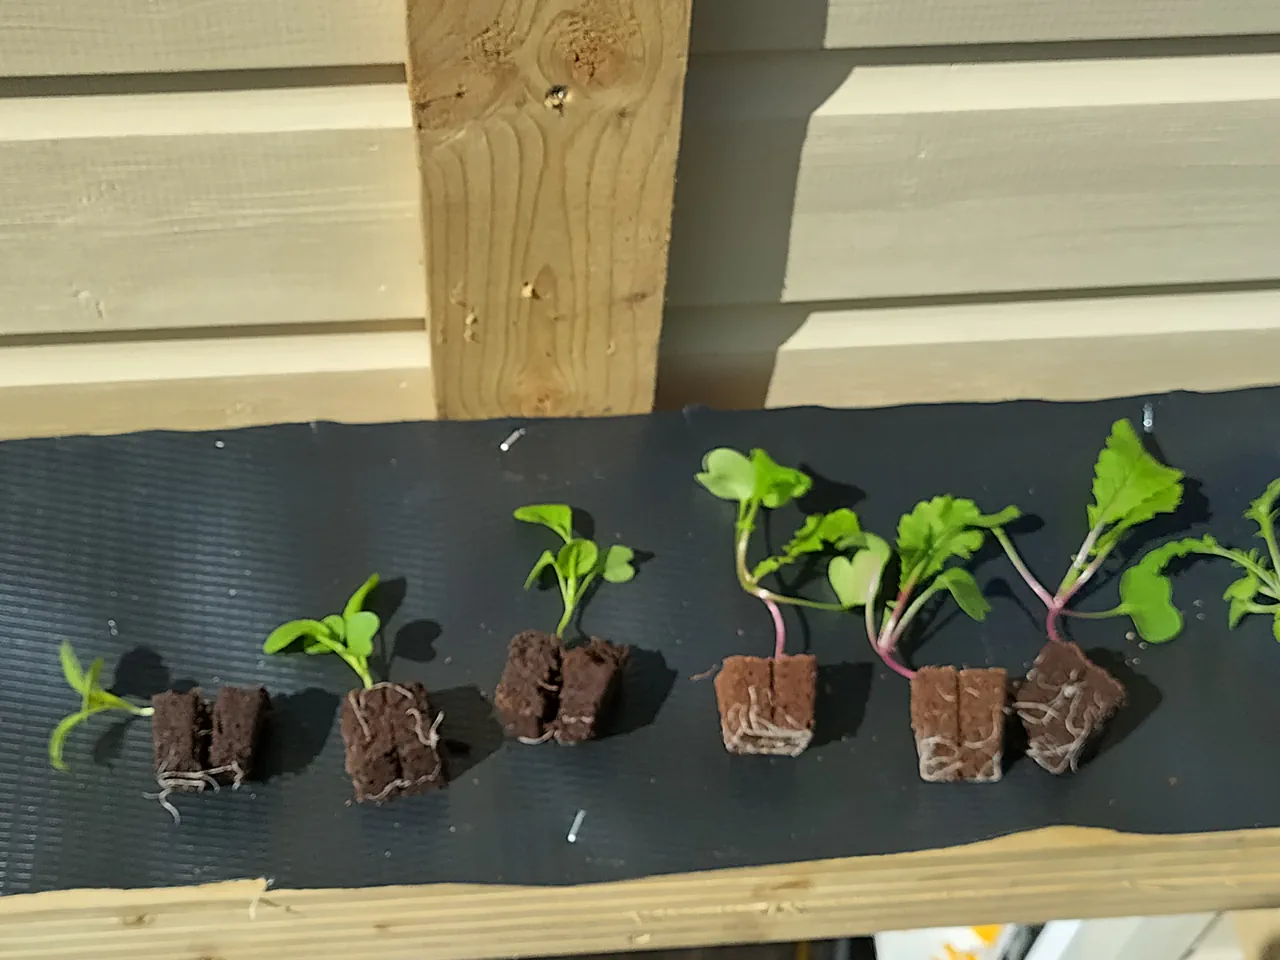
Alongside the pak choi, I started mustard greens, rocket, and mizuna from seed in coir plugs. Once the seedlings were big enough, they went straight onto the membrane to root through into the gutter below.
The Third Version
It is always the third version of things that seems to turn out to be the first really good one. This is v2 — demonstrably better than v1, but I can already see where v3 improvements would go. The v1 proved the system worked. The v2 makes it look like it belongs on the shed wall rather than being bolted to it as an afterthought. V3, when it comes, will probably address the things I have not thought of yet.
But that is the whole point. You do not need to build the perfect version first. You need to build a version that works, grow food from it, learn what matters and what does not, and then make it better. The corrugated plastic and silver tape were ugly but they grew extraordinary food for an entire season. Do not let the pursuit of a polished build stop you from starting.
Frequently Asked Questions
What can you grow in an NFT hydroponic system?
Leaf crops and herbs: lettuce, pak choi, spring onions, parsley, basil, mizuna, and kale seedlings. Not suitable for heavy fruiting crops — for those, see the gutter grow tomato wall. Full crop list and seasonal planting in the what to grow section.
How much does an NFT hydroponic system cost to build?
About £130 all-in for a three-tier wall-mounted system — the cheapest of the three systems on this site because there is no growing medium to buy. See the full materials list with prices.
Do you need electricity for hydroponics?
Depends on the system. The gutter grow tomato wall is fully passive with no pump at all. This NFT system uses a tiny 5W pump you can run from a £10 transformer or a car battery. See the power options section for details.
How often do you change hydroponic nutrient solution?
About every 10 days, when the EC drops from 1.7 to around 1.0. You will also need to adjust pH every couple of days. See the nutrients and pH section for the full routine, including an important safety tip about turning the pump off first.
Can you grow food hydroponically in winter in the UK?
Yes — spring onions and parsley survived in this system through the entire UK winter, even after the pump was turned off in November. The key is choosing hardy crops with established root systems. See the autumn and winter section for the full story.
Grew this? Cook this
Related Content
Triangle Wicking System
Three passive wicking planters in a triangle — the Lidl lettuce hack proved across two systems
DIY Gutter Grow Hydroponic Tomato Wall
The passive hydroponic system for heavy crops like tomatoes
Build a £20 Wicking Planter from Tesco
The cheapest system on the site — under £20, no pump, no electricity
All Growing Guides
Browse all guides by method, difficulty, and season