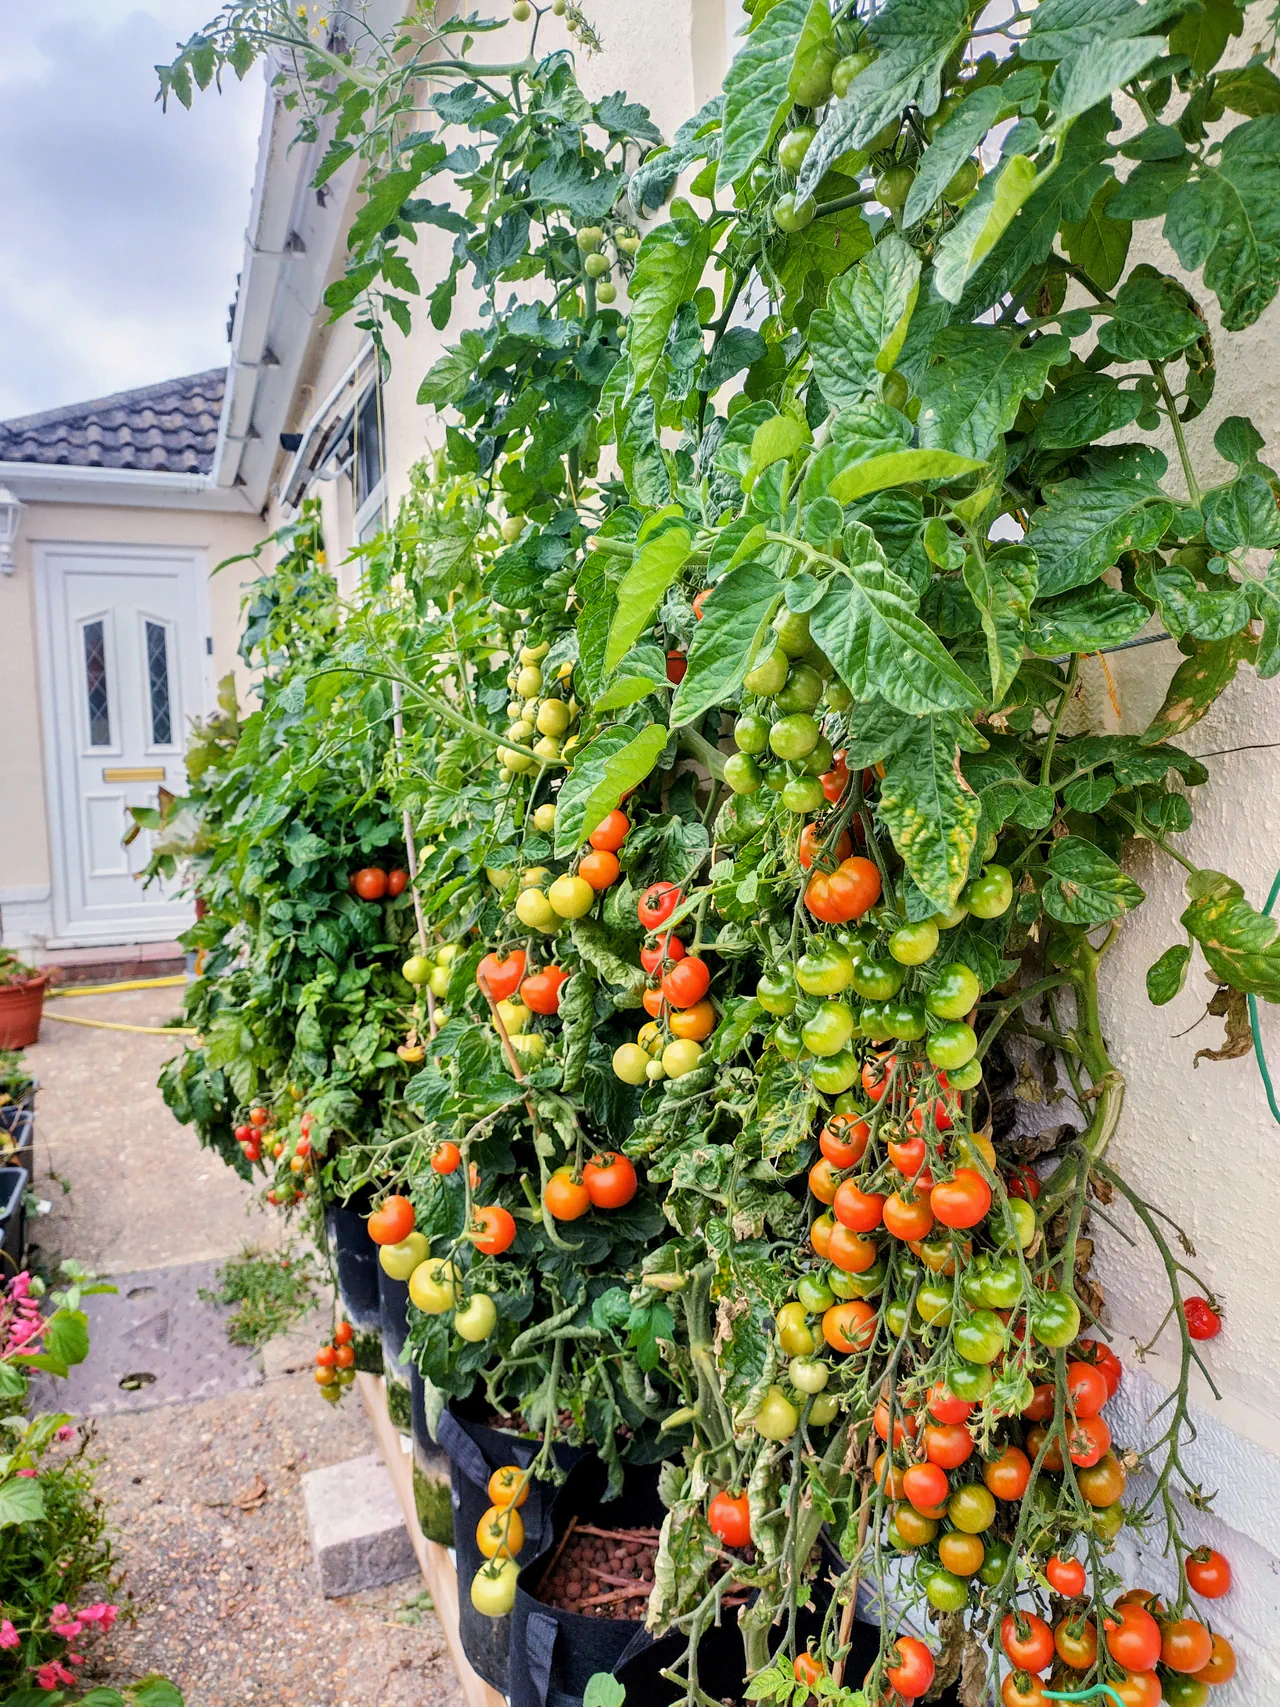
This is a passive, gravity-fed hydroponic setup using rain gutters, fabric pots full of coir, and wicking rope. It cost about £300 to build, runs almost entirely by itself, and produced the best tomatoes I have ever grown — by some margin, and with less effort than any previous year. Beefsteaks over 580 grams each. Cherries cascading down the wall in their hundreds. Flavour that made me permanently rethink what a home-grown tomato can be.
This guide exists because I posted a photo of the wall on r/GardeningUK and dozens of people asked how the system worked. Someone came back four months later specifically to remind me to document it before dismantling for winter. So here, finally, is the full method.
The “gutter grow” concept is a well-established hydroponic method. I got the original inspiration from an Australian YouTuber called Hoocho, who runs an excellent channel on passive hydroponics. I adapted his approach for UK conditions, a south-facing house wall, and whatever materials I could get cheaply.
Harvest Data
25.0kg+
Harvested (min.)
5 (vine, cherry, plum, beefsteak, heirloom)
Varieties
~£510 year one, ~£60/year after
Setup cost
“The best tomatoes I have ever tasted”
Why I Went Hydro
It was watering that pushed me into hydroponics. Every year, growing tomatoes in soil meant daily watering through summer, racing home if I had been out all day, and accepting that any week away meant coming back to stressed or dead plants. I was spending hours every week just keeping things alive.
The gutter grow system eliminated all of that. The float valves keep the nutrient solution topped up automatically from the tank. I refilled the 400-litre tank every 2-3 weeks, adjusted the pH and nutrients, and that was it. The system ran itself perfectly during the couple of times I was away for a week or more. No timers, no pumps, no electricity — just gravity and capillary action.
The Gutter Grow Concept
The principle is simple. Fabric pots full of coir sit on top of rain gutters. A wick made from PVC pipe wrapped in absorbent rope runs down through each pot into the gutter below. The rope draws nutrient solution up from the gutter by capillary action, keeping the coir consistently moist. Float valves in each gutter automatically top up the solution from a raised IBC tank — the same principle as a toilet cistern. The tank provides height for gravity feed, so the entire system has zero moving parts except the float valves.
I ran two 3-metre gutters on construction timber frames against a south-facing house wall. Gutter 1 was the dedicated tomato run — nine fabric pots over 3 metres, basically touching each other. Gutter 2 was more relaxed, with tomatoes alongside a fig tree in a washing machine drum, trailing yellow courgettes, and cucumbers. The results from gutter 2 taught me an important lesson about spacing, which I will come to.
What You'll Need
The Gutter System (~£300)
- 2x 3m rain gutter lengths with end caps — standard plastic guttering from any builders' merchant
- Construction timber — I cut U-shaped splits to create a track for the gutters to sit in, then propped the frames on walls and breeze blocks to get them level on sloped ground
- 9-14 fabric pots (10-15 litre) — 6-7 per 3m gutter is the recommended spacing. I used 9 on the first run and it was too many
- Coir blocks (coconut coir) — the growing medium. Hydrate the compressed blocks with water before use
- Wicking rope — £11 for 45 metres from Amazon. I used about 3 metres total for the entire system
- PVC water pipe — cut into short lengths as the core for each wick, wrapped tightly with the wicking rope
- Float valves with push-fit connectors — about £5-7 for three on Amazon. One per gutter. These worked flawlessly for the entire year with zero problems
- Damp-proof membrane (DPC) — about £10 for a 30-foot roll from Screwfix or Toolstation. Covers the gutters to block light and prevent algae
- Solvent cement — for creating a custom float valve fitting on the gutter end cap
- Catenary wire — run horizontally below and above the windows for plant support
- Thin polyester twine — tied vertically between the wires at each pot station
- Rubber-coated plant wire — from Amazon, for tying plants to the support twine
The Nutrient Reservoir (~£150)
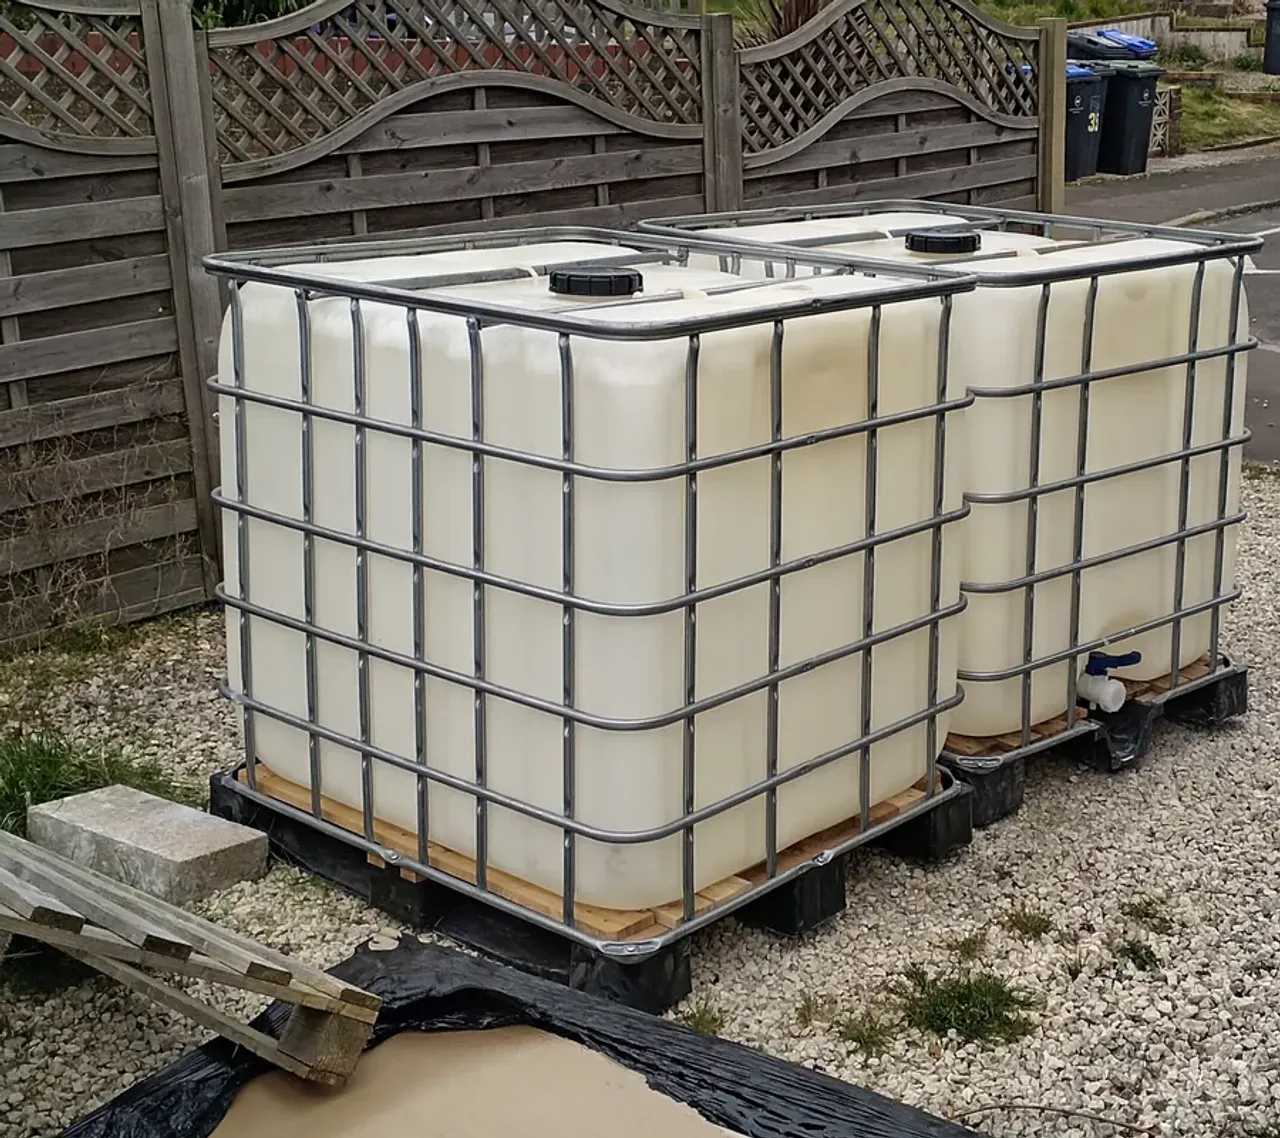
- 2x IBC tote tanks — secondhand from Facebook Marketplace. I paid £100 for two plus £50 delivery. Check they are food-safe — ask what was stored in them previously
- Hose and connectors — to link the tank to the gutter float valves
Nutrients and Monitoring (~£60)
- Two-part nutrient solution — I used Hydrofeed Complete from Home of Hydroponics (preferred) and Dutch Grow. Both worked well
- pH Down solution (phosphoric acid) — a few ml per tank fill
- pH and EC pen — about £30. This is the only precision equipment you need
Building the System
Step 1: Build the Timber Frames
I used construction lumber with a U-shaped split cut into it to create a perfect track for the gutters to sit in. The ground alongside the house wall was sloped, so I propped the frames on breeze blocks and walls to get everything level. The gutters need to be level (or with a very slight fall towards the float valve end) so the nutrient solution distributes evenly.

Step 2: Prepare the Gutters
Fit standard end caps to the gutters. For the float valve end, I made a custom fitting — stuck a vertical oblong of plastic to the end cap with solvent cement, then drilled through it for the float valve. The fitting sits above the gutter line, so there is no leak risk. The float valves themselves are incredibly cheap (about £5-7 for three on Amazon) and all three worked perfectly for the entire year.
Step 3: Cover the Gutters
This is a tip that came from making a mistake first. I initially used white corrugated plastic sheeting with holes drilled for the wicks. It looked tidy but I quickly realised the corrugated plastic was letting sunlight into the gutters — and you do not want that. Light in the nutrient solution means algae, and algae means problems.
The solution was rolled damp-proof membrane (DPC) — the type you put on top of bricks when building a wall. About £10 for a 30-foot roll from Screwfix or Toolstation. I rolled it out over the top of the gutters, stapled it down with a staple gun, and cross-cut it with a Stanley knife wherever a wick needed to go. Perfect light-blocking cover, and far simpler than the corrugated plastic it replaced.
Step 4: Make the Wicks
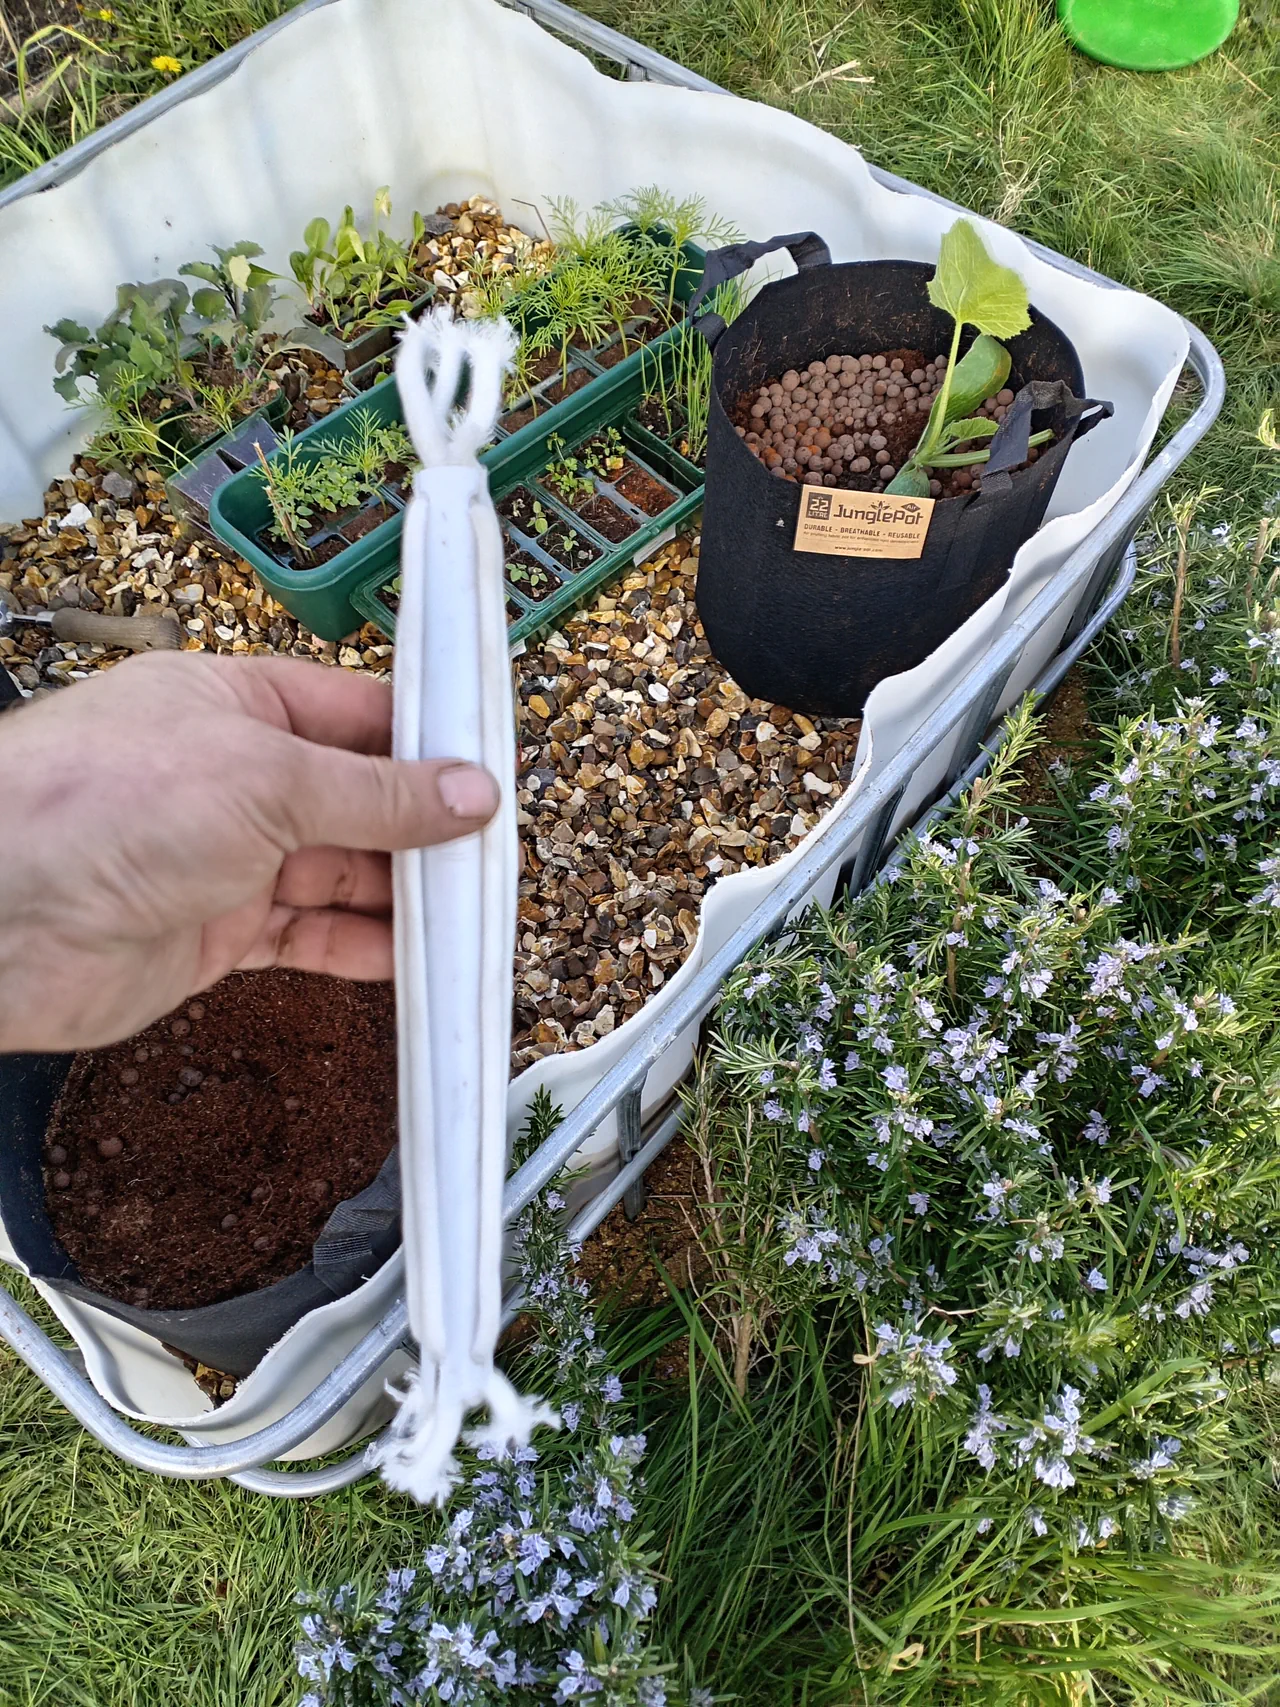
Cut PVC water pipe into short sections — one per pot. Wrap each section tightly with wicking rope. The rope needs to be in firm contact with the pipe so it can draw solution effectively. Each assembled wick runs down through the fabric pot (surrounded by coir) and out the bottom into the gutter. The wicking rope cost me £11 for 45 metres from Amazon, and I used about 3 metres total for the entire two-gutter system.
Step 5: Set Up the IBC Tank
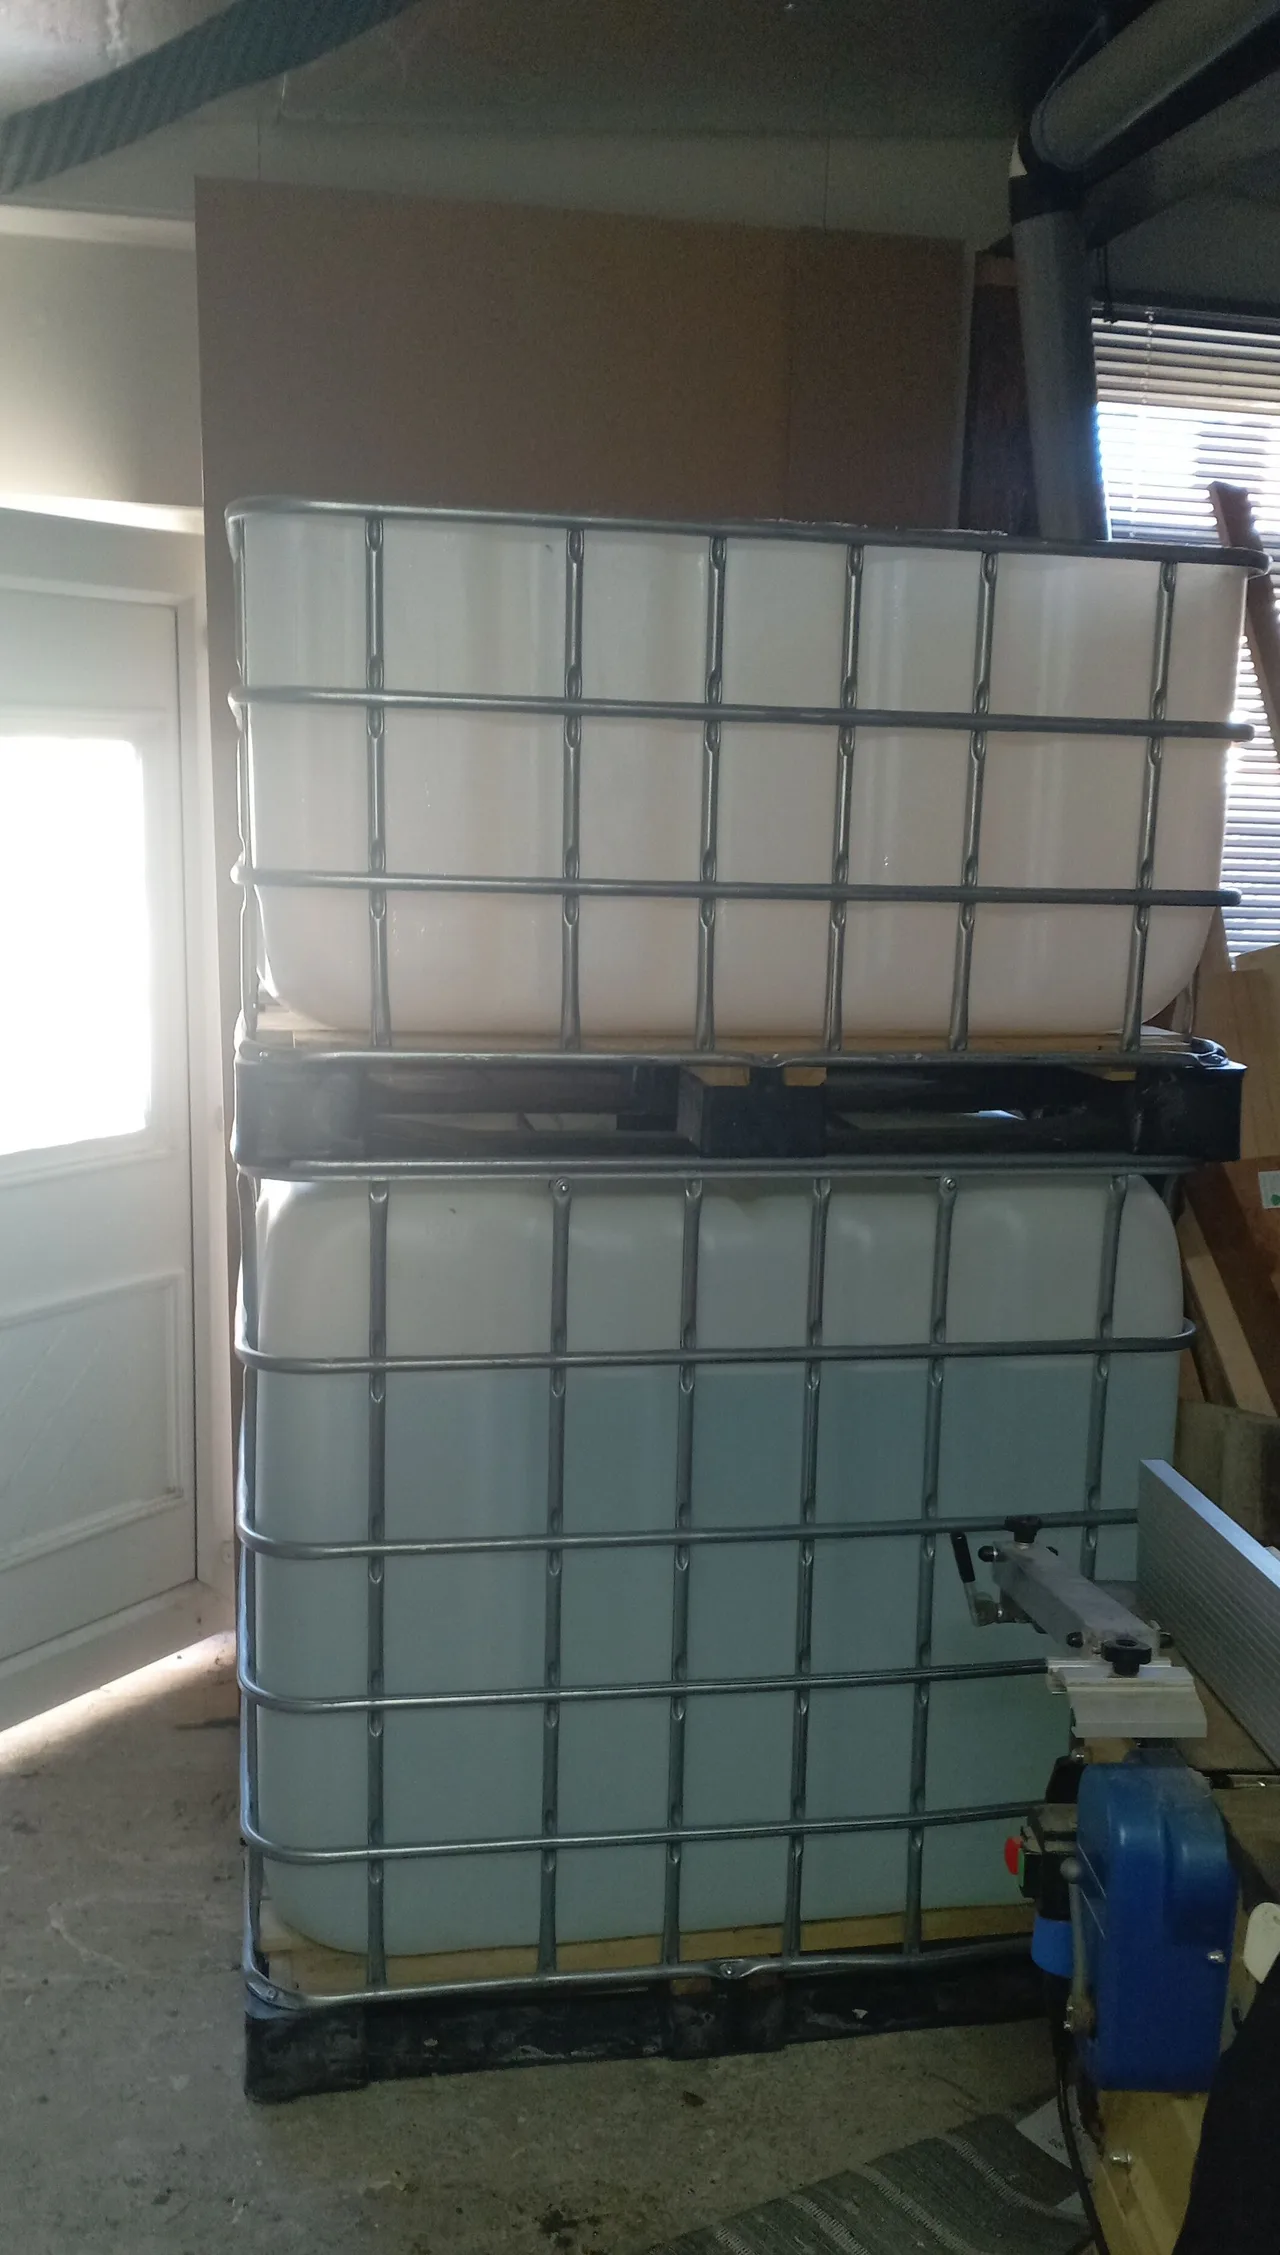
I chopped the top third off one IBC. The bottom two-thirds became a separate gravel bed hydroponic system. The top third, holding roughly 400 litres, became the nutrient tank for the gutter grow.
I stood this tank section on top of the second (uncut) IBC, giving it the height needed for gravity feed. Two reasons for this: the nutrient tank needs to be higher than the gutters for gravity to work, and the full IBC below will eventually become a rainwater harvesting tank fed from the roof gutters. For now, it just provides height.
Connect the nutrient tank to the gutter float valves with standard hose and push-fit connectors. That is the entire system. The tank feeds the gutters by gravity, the float valves maintain the level, the wicks draw solution up into the coir, and the plants look after themselves. The only moving parts in the whole setup are the float valves.
Planting
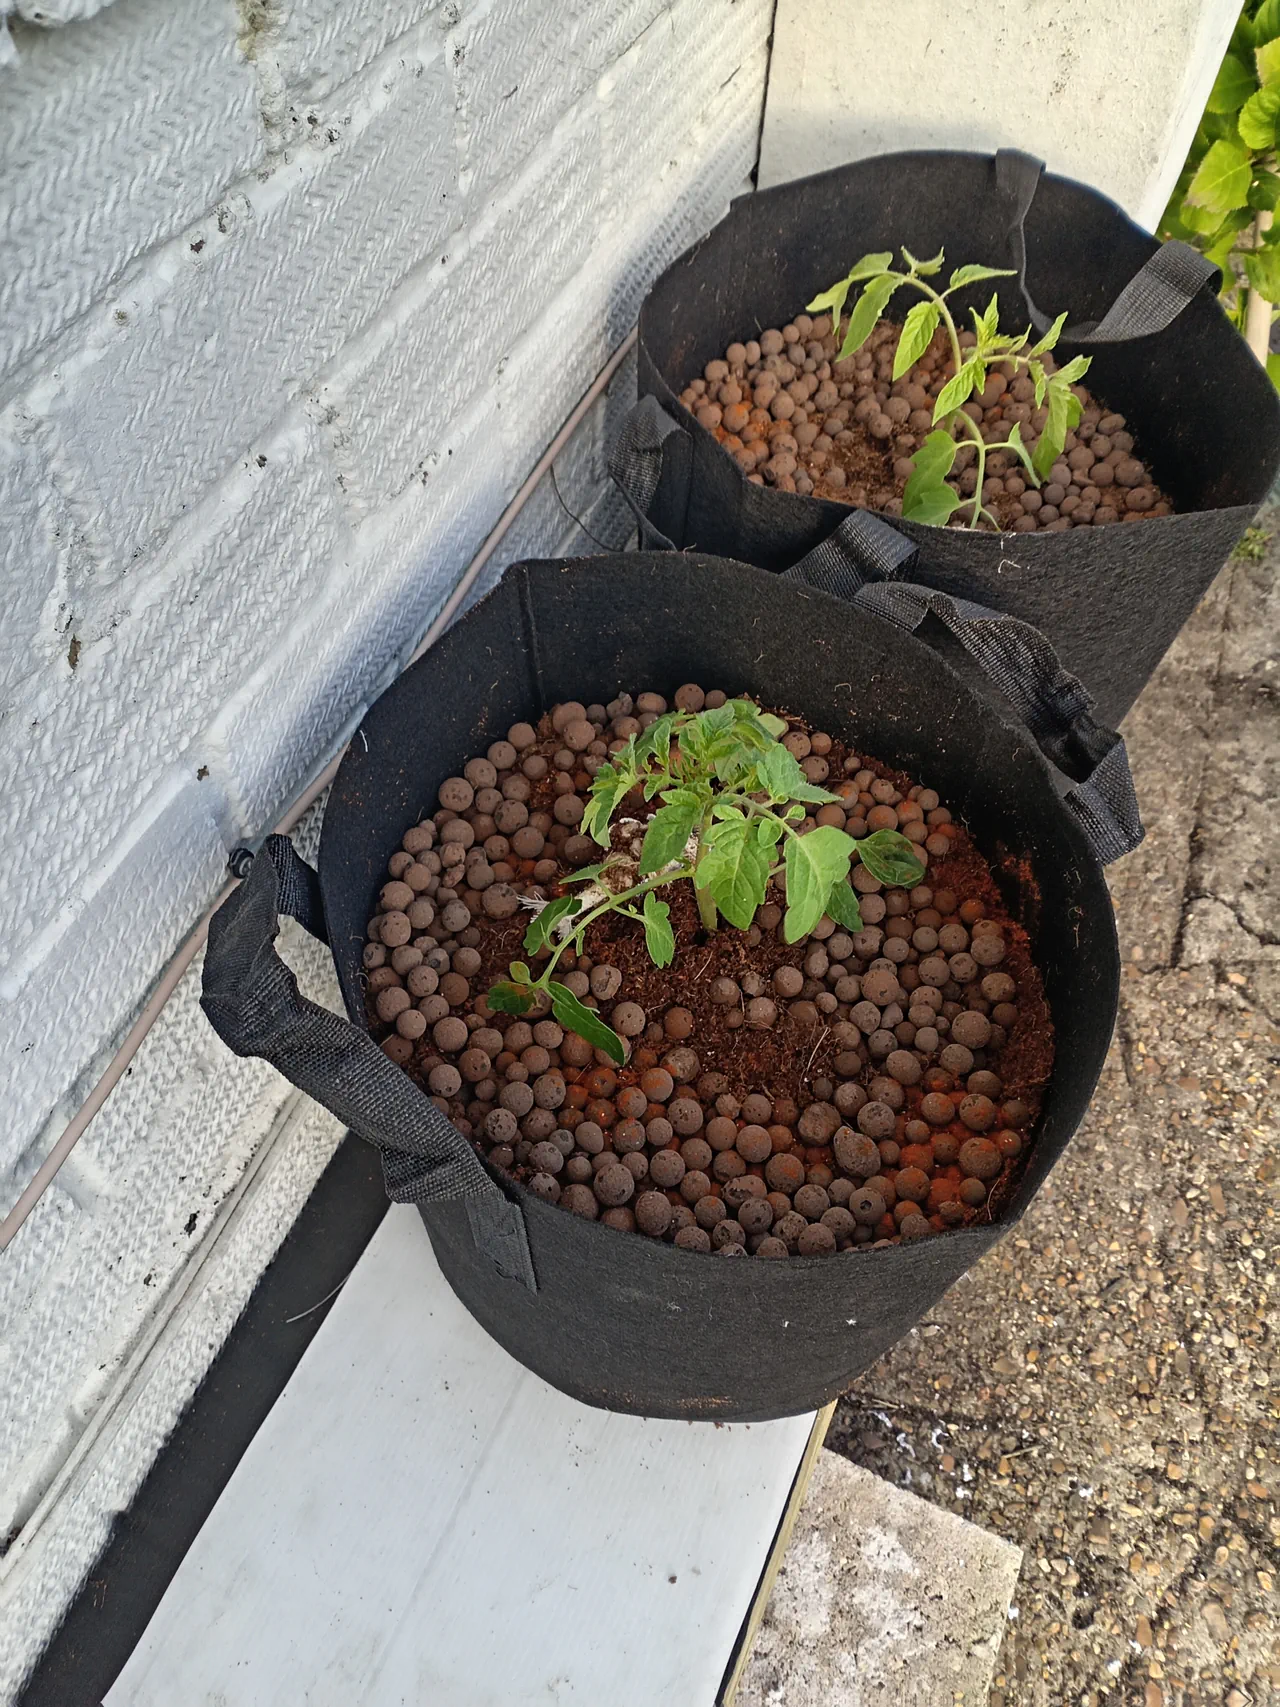
I used plug plants from the local garden centre — Moneymaker, Gardener's Delight, a plum variety (possibly Roma), and an unknown beefsteak variety. That last one is my biggest regret of the whole season: I forgot to label it, and it turned out to be the best producer of the lot. Lesson learned — always label your plants.
To transplant, I ran the root ball under the tap to wash off as much soil as possible, then stuck them straight into the coir. The plants barely noticed the change. You can also start from seed in rockwool cubes and transplant those directly, avoiding soil entirely.
The Spacing Lesson
On gutter 1 (the dedicated tomato run), I crammed nine fabric pots into 3 metres — basically touching each other. On gutter 2 (the mixed-crop run), the tomato pots were more spaced out alongside the fig, courgettes, and cucumbers.
Here is what I discovered: the more spaced-out tomato pots on gutter 2 yielded about the same per metre of gutter as the crowded ones on gutter 1, but were far more manageable. Better ventilation, less disease pressure, easier pruning, and no fighting for light. The crowded run required extra-thorough removal of lower leaves and constant attention to airflow. The spaced run just got on with it.
Nutrients and Feeding
I tried two two-part nutrient solutions over the season: Hydrofeed Complete from Home of Hydroponics (my preference) and Dutch Grow. Both performed well. The process for mixing a tank:
- Fill the 400-litre tank with tap water
- Drop the pH to about 6.2 using a few ml of pH Down (phosphoric acid) — always adjust pH before adding nutrients
- Add the two-part nutrient solution, which will further lower the pH — typically down to about 5.5
- Check EC: aim for about 1.5 during vegetative growth, increasing to about 2.5 once the first fruits form
The pH naturally rises slowly over time. I monitored it occasionally and adjusted down if it climbed much past 6.0, though I rarely needed to between tank refills. I started the year with a weaker vegetative-ratio nutrient mix and gradually shifted to bloom ratios as the plants matured.
I have not gone deep on precision nutrition yet — that is for next year. But even this fairly relaxed approach produced extraordinary results. From frequenting the local hydroponics shop so often, I am half expecting a dawn raid at some point. I feel like I must be one of their few law-abiding customers.
Plant Support and Pruning
I ran catenary wire horizontally below and above the windows, then tied thin polyester twine vertically between the wires at each pot station. The tomato plants were tied to the twine with rubber-coated plant wire from Amazon as they grew upward.
Pruning was critical. All varieties were indeterminate (cordon), so I was religious about pinching out internodal shoots (suckers) from the very start. You need to be quite brutal — it feels like you are taking off too much sometimes, but you really do just want one main stem. I experimented with letting a couple of plants go to two stems, but it was not a good idea given the tight spacing on gutter 1. With wider spacing, a two-stem approach might work well — something to try next year.
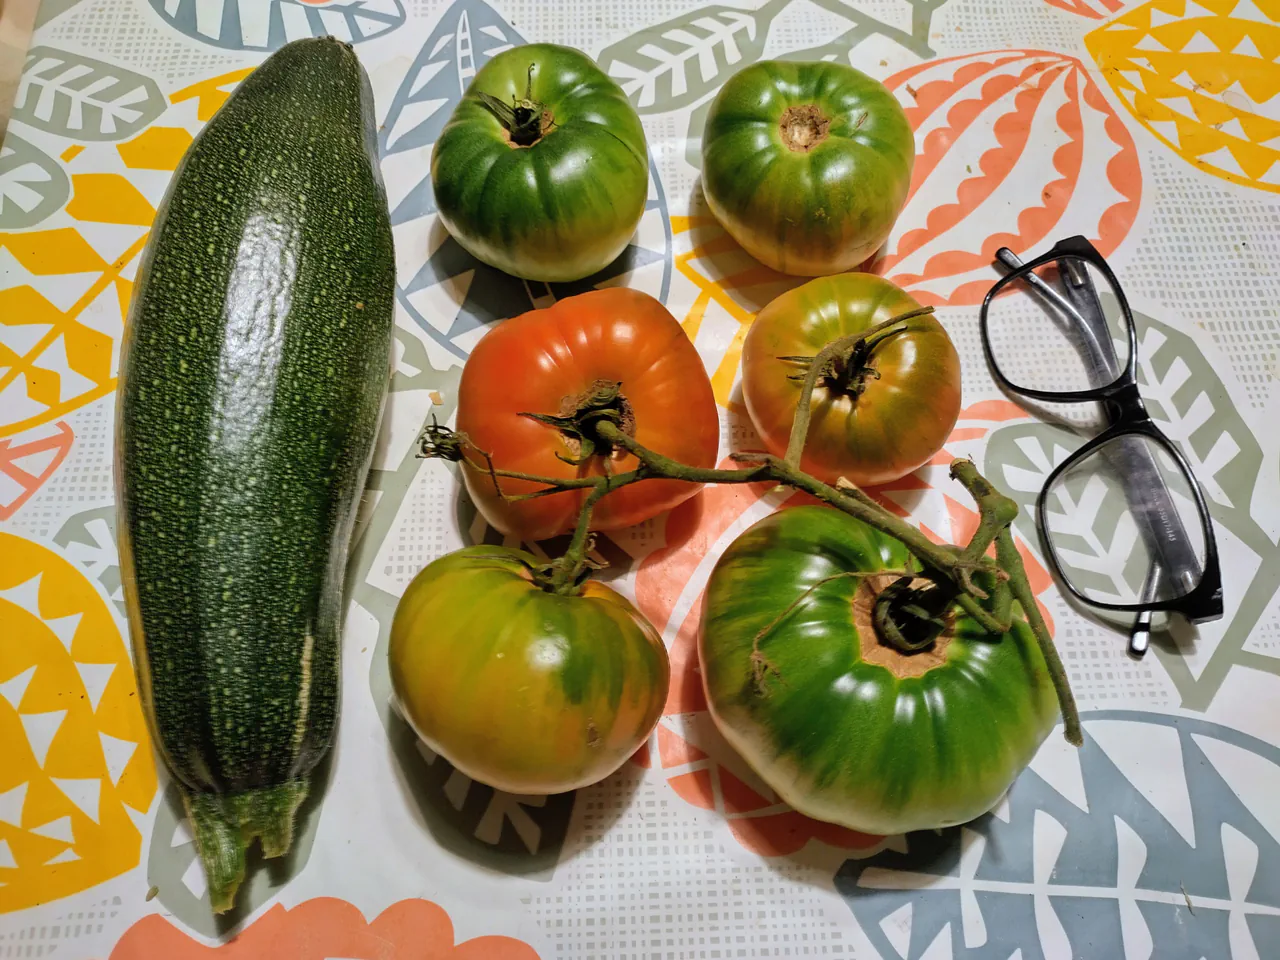
Once the first fruit set on each plant, I removed all leaves below the first truss. This was especially important on the crowded gutter 1 run, where airflow was poor. Later in the season, I pinched out the growing tips to redirect the plant's energy into ripening the remaining green fruit rather than producing new growth.
The Results
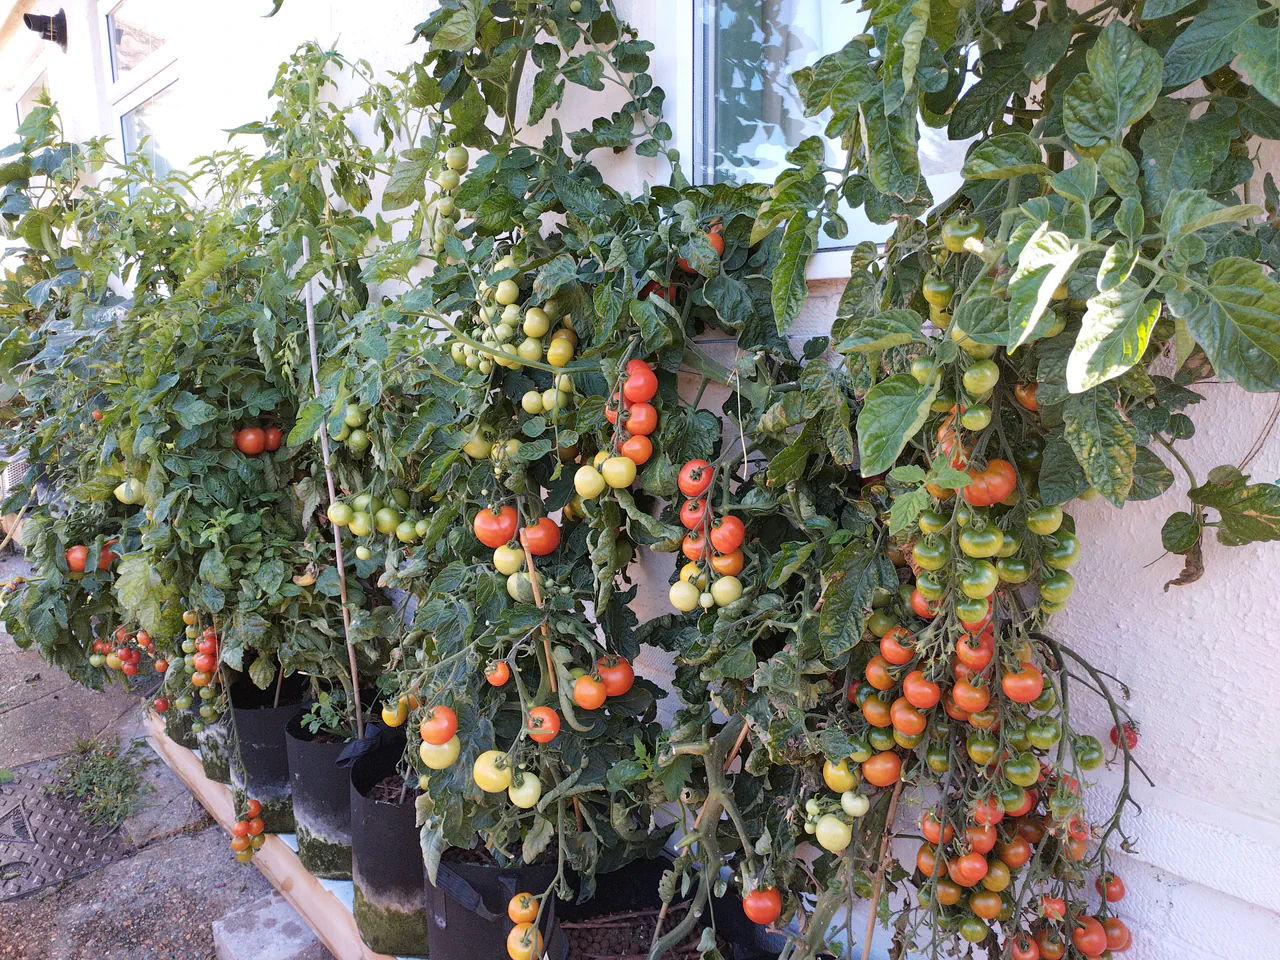
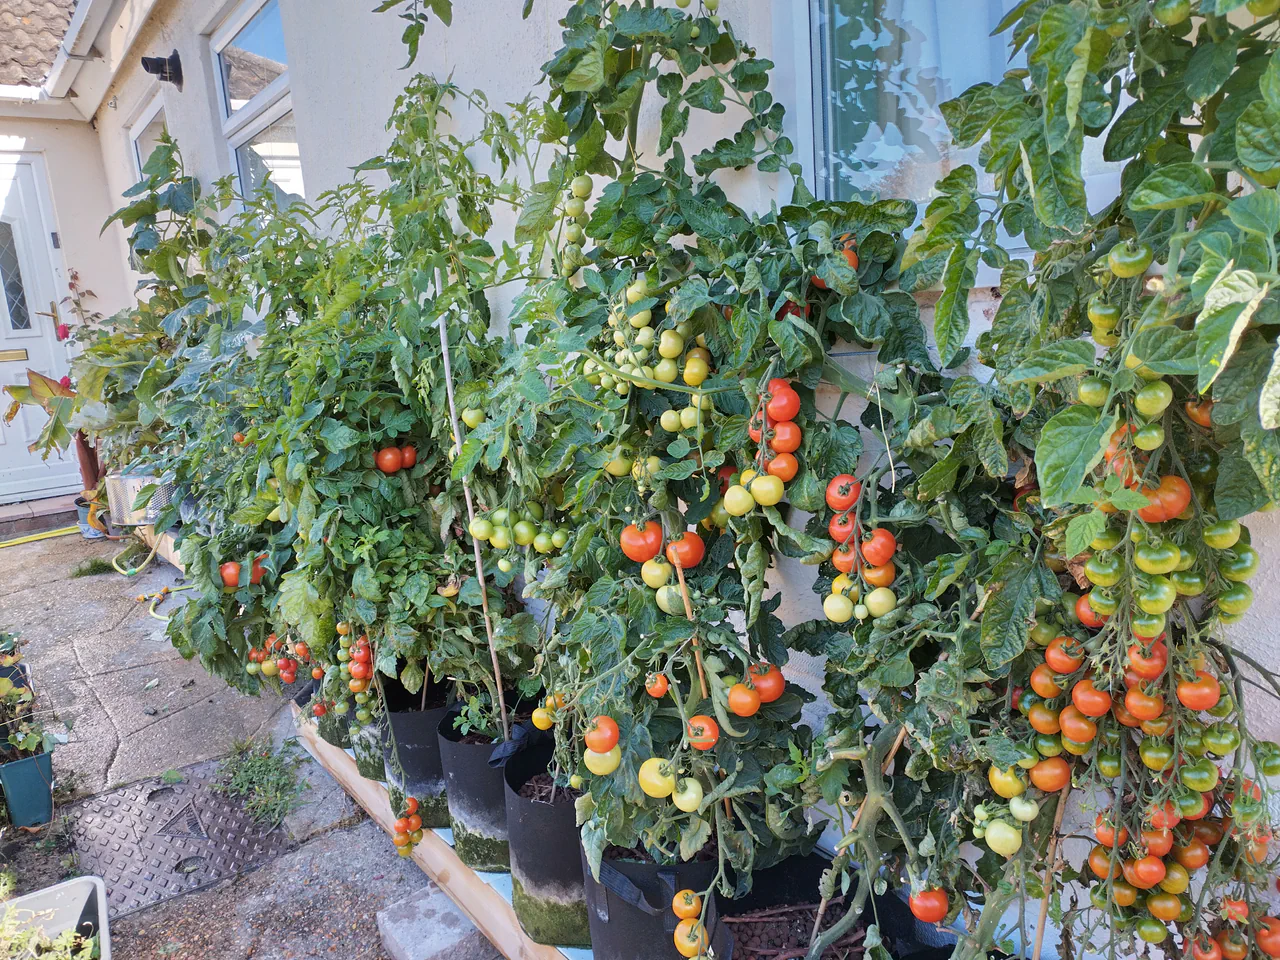
These were, without qualification, the best tomatoes I have ever grown. By some margin, and with less effort than any previous year.
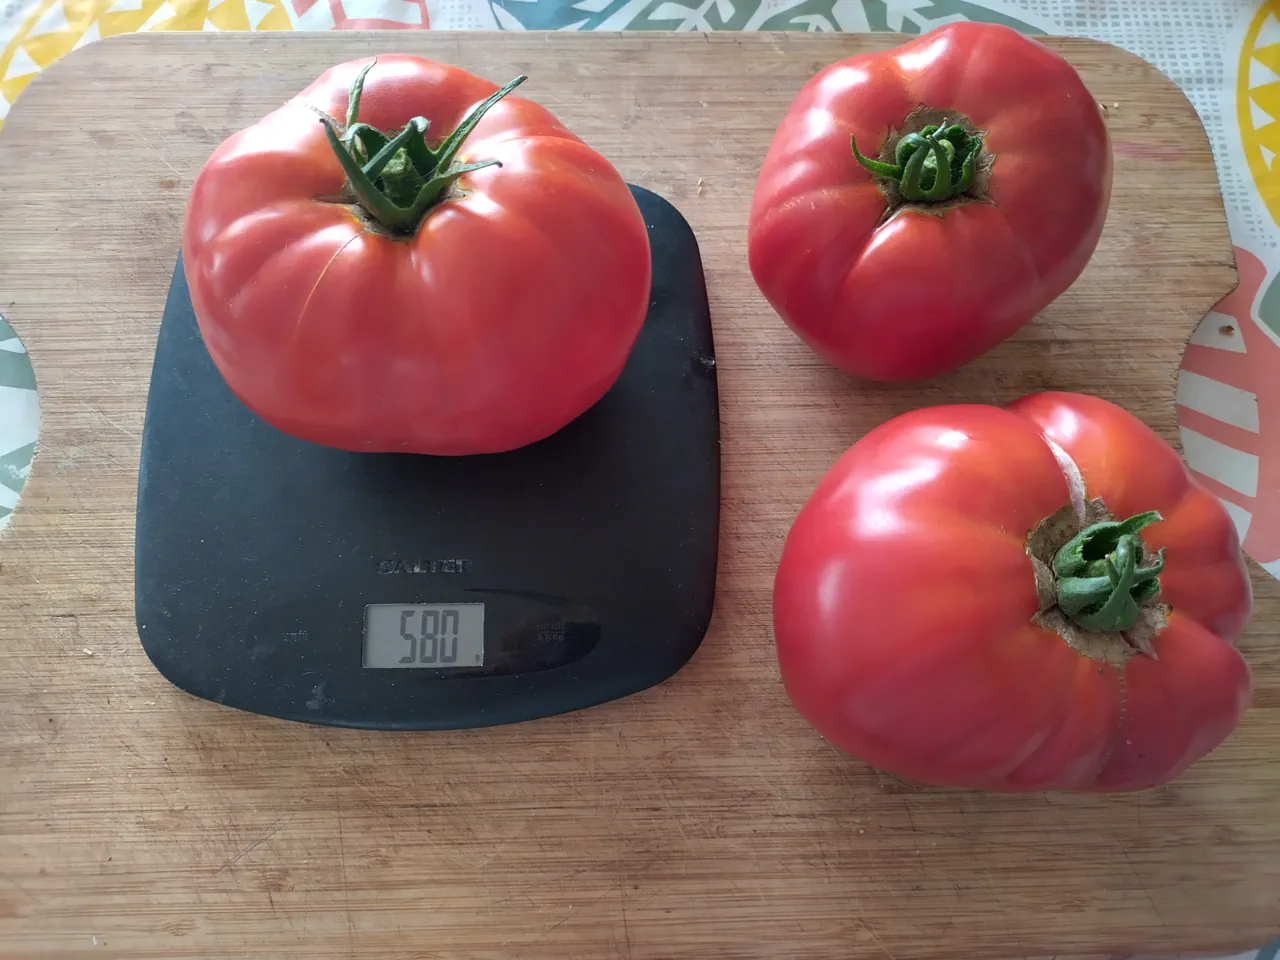
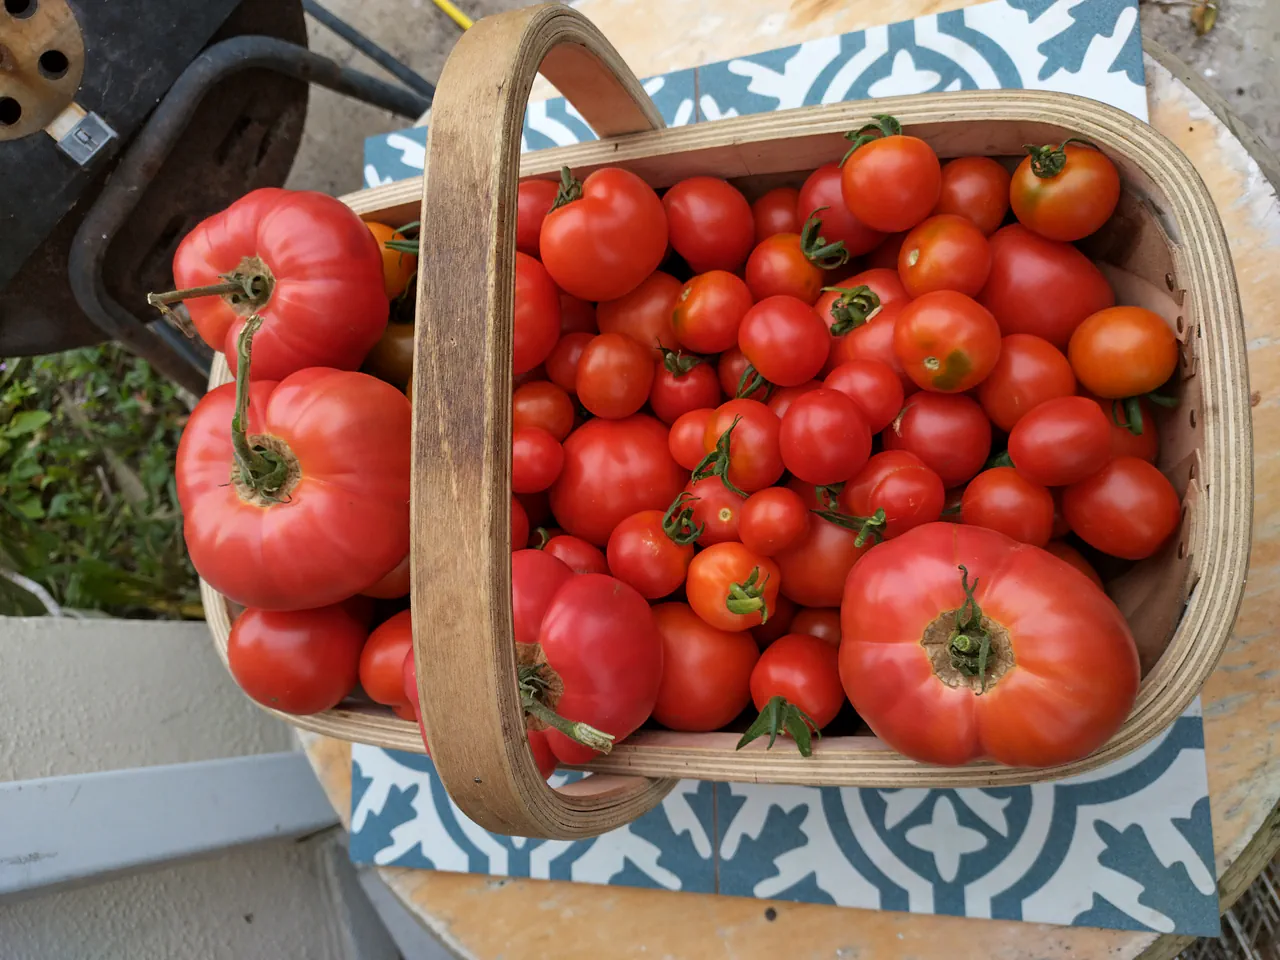
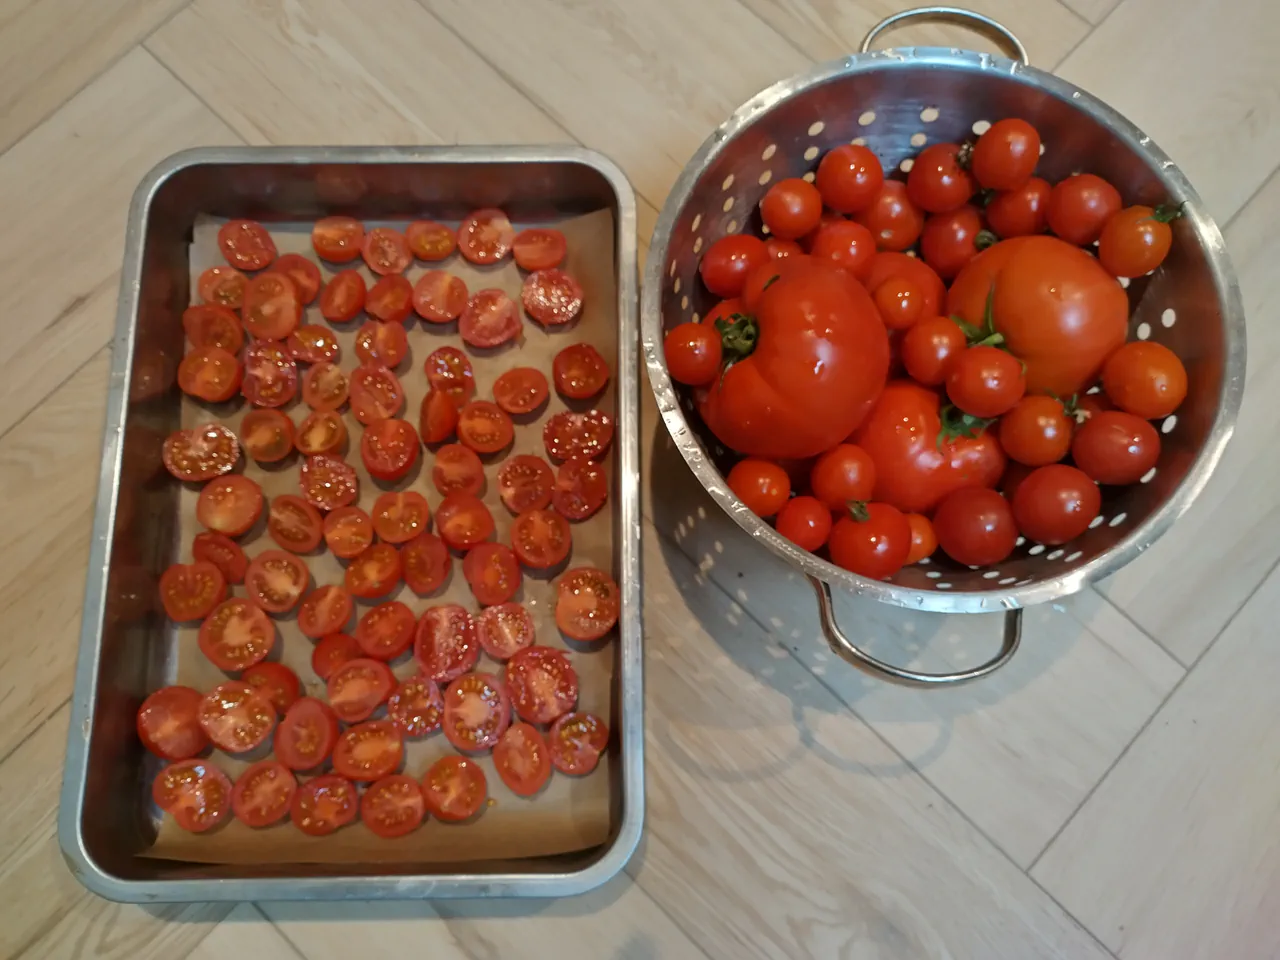
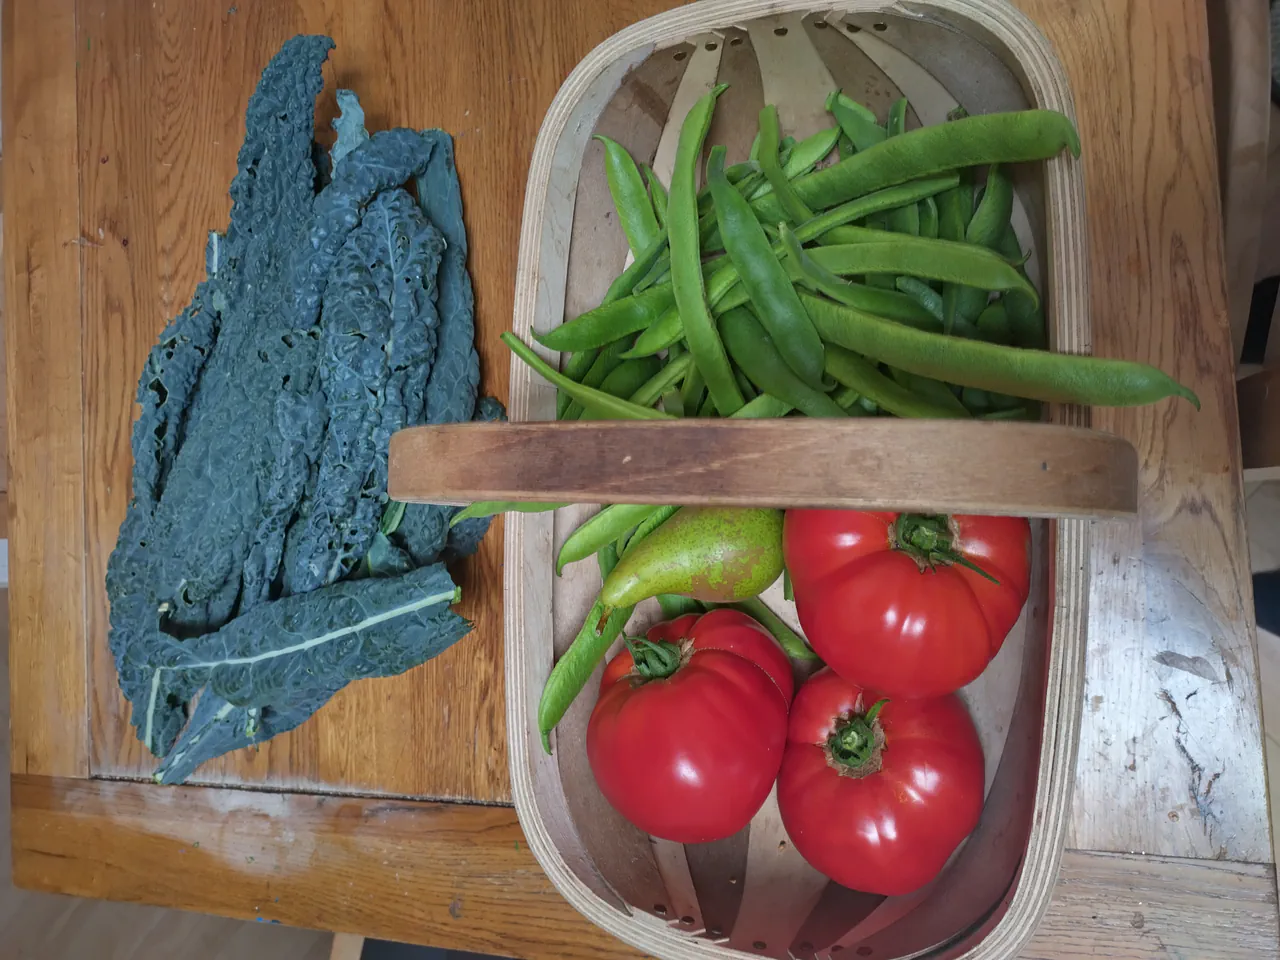
The biggest beefsteaks weighed over 580 grams each — proper two-hand tomatoes. The cherry varieties (Gardener's Delight and what I think was Moneymaker) produced cascading trusses that made the wall look like something from a Mediterranean market. Far more tomatoes than we could eat — we gave loads away and still ended up with a freezer full.
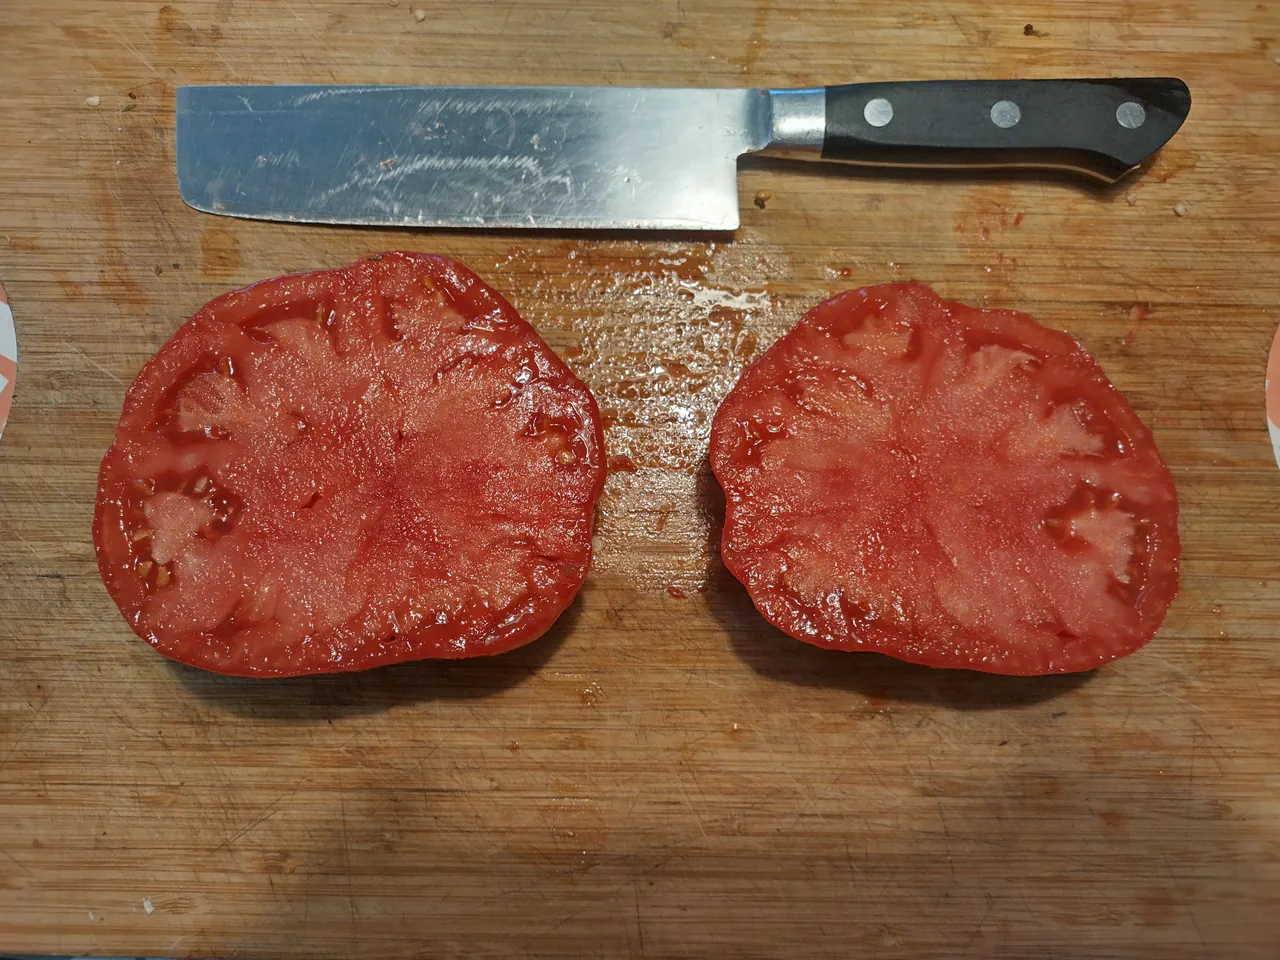
The Flavour Verdict
This was the question I worried about most. Everyone says hydroponic tomatoes are watery and tasteless — the kind you get in supermarkets that are red and round and taste of absolutely nothing. I was concerned that the rapid growth I was seeing might come at the expense of flavour.
It did not. These have been the tastiest tomatoes I have ever grown, with the possible exception of ones from previous years that were very badly treated and underwatered — which often seems to produce a very small crop of exceptional-tasting fruit. The gutter grow system gave me both: exceptional taste and a massive yield. The south-facing wall clearly helped, giving the fruit warmth and light to develop proper sugars and complexity.
The supermarket comparison is not even close. Those tomatoes were picked days ago, chilled, transported, and sat under strip lighting. Mine went from wall to chopping board in minutes. That picking-to-plate time of minutes rather than days produces a fundamentally different ingredient — not a subtle difference, but a different category entirely.

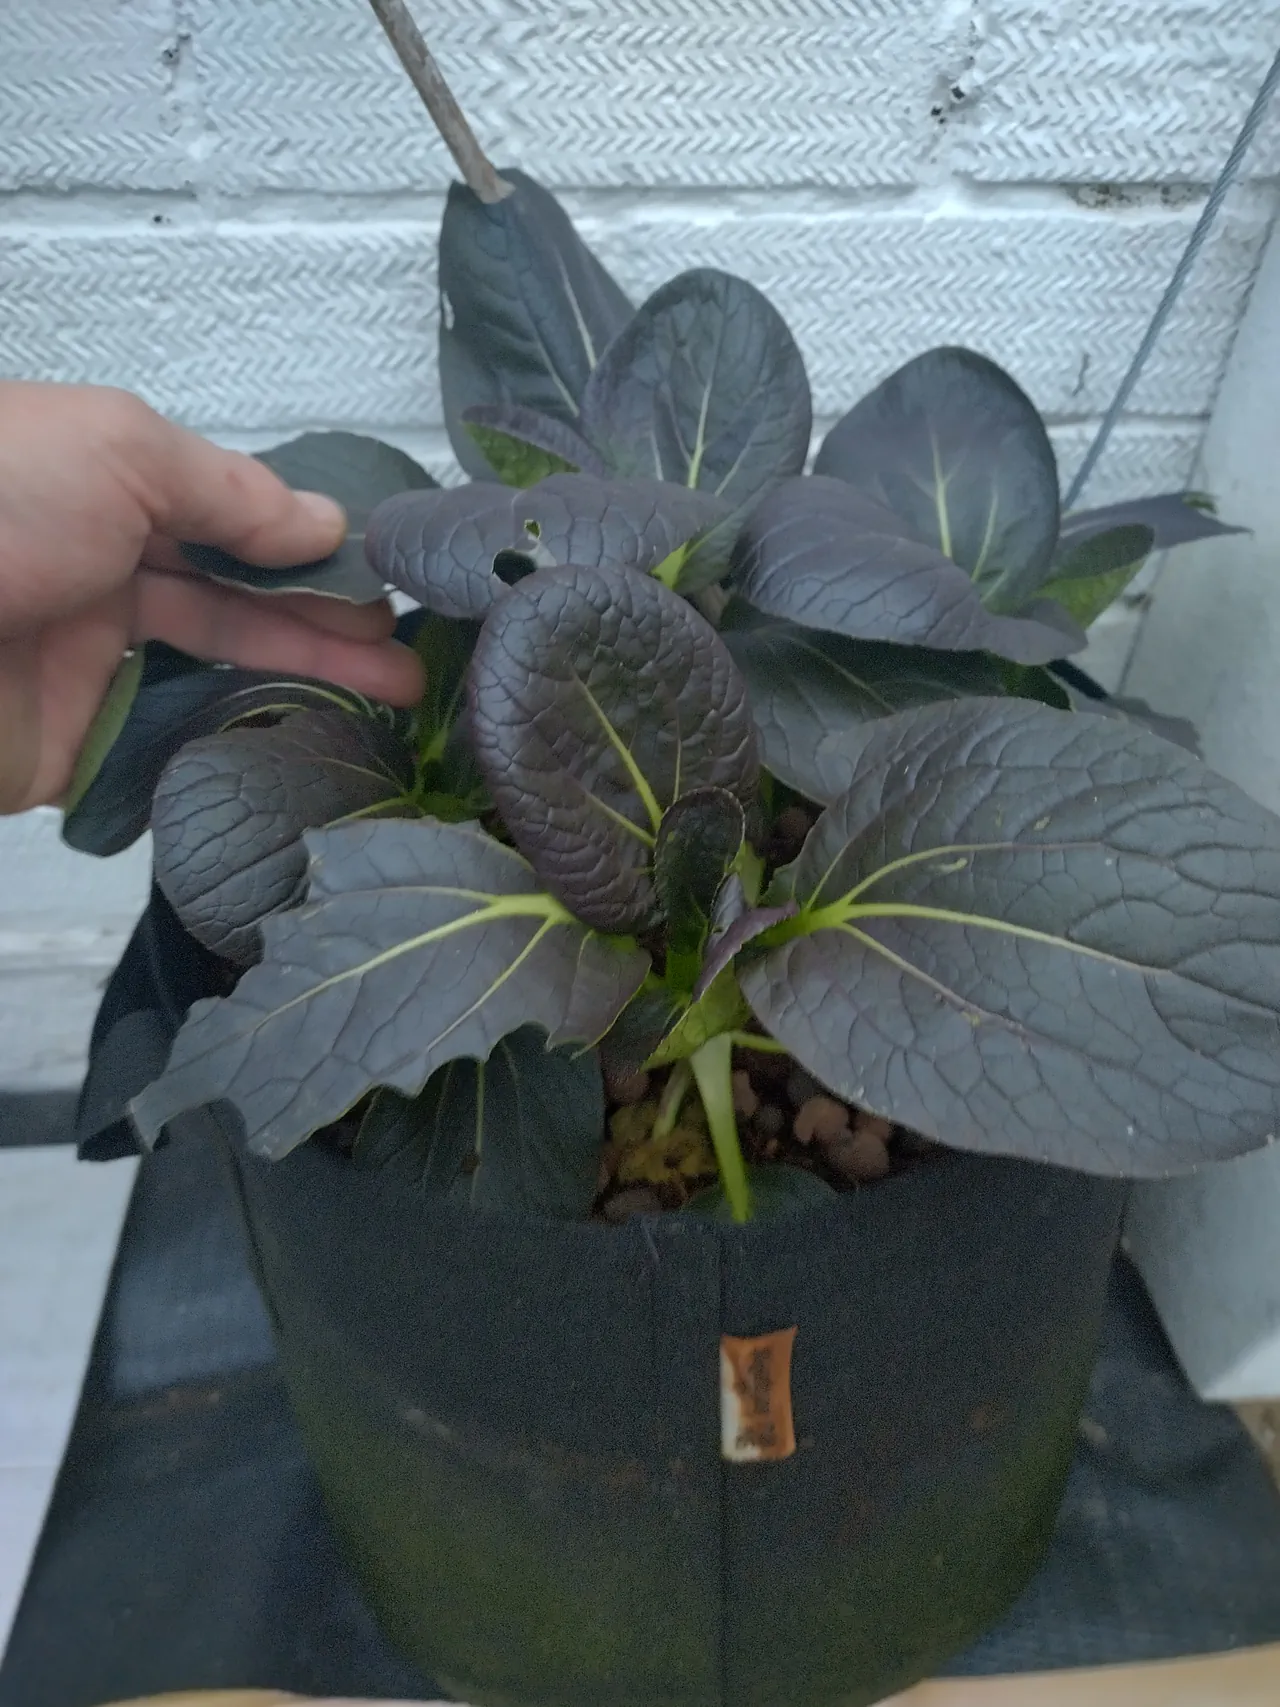
Succession Planting: Winter Pak Choi
As tomato plants finished and were removed through autumn, I replaced them with purple pak choi seedlings in the same coir, in the same pots, on the same gutters. The pak choi cropped happily into winter, demonstrating that the gutter grow system is not just for summer — it can produce food year-round with the right succession planning.
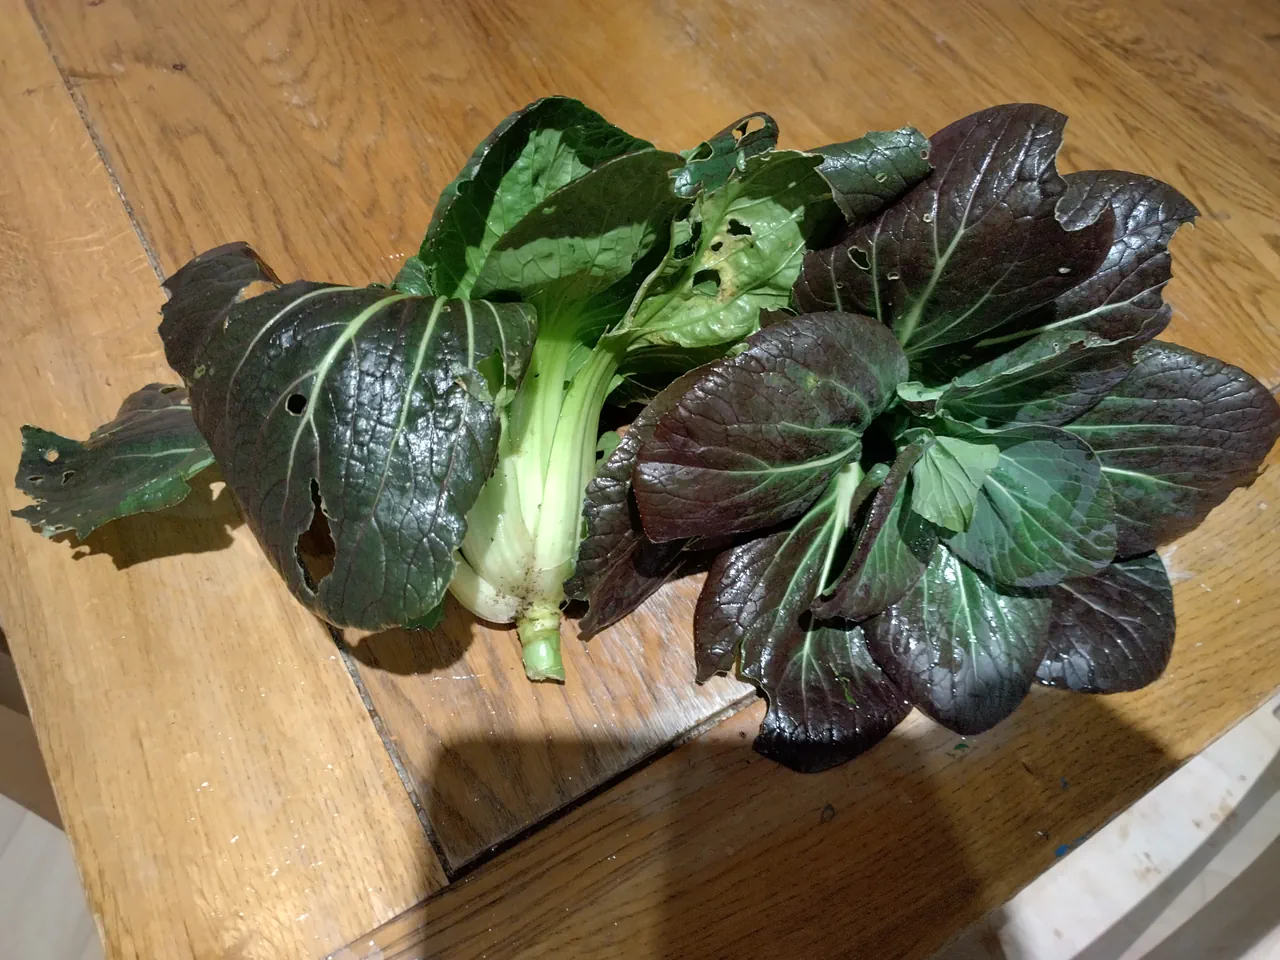
This is covered in more detail in the Purple Pak Choi guide (coming soon), including how to save seed from the bolted plants for a completely self-sustaining cycle.
What I'd Do Differently
- Fewer pots on the tomato gutter. Six or seven per 3 metres, not nine. The spaced-out run on gutter 2 produced the same yield per metre with better ventilation, easier management, and less disease risk. This is the most important practical lesson from year one.
- Label every plant. The mystery beefsteak was the star of the season and I have no idea what variety it was. This still haunts me.
- Try two-stem training with wider spacing. Single stem worked well but was partly forced by the overcrowding. With 6-7 pots per gutter, there would be room to experiment with letting each plant develop two main stems.
- Get more precise with nutrition. My approach was fairly relaxed — vegetative nutrients early, bloom nutrients later, rough EC targets. Next year I want to be more systematic about nutrient ratios and timing.
- Connect rainwater harvesting. The lower IBC is sitting there doing nothing. Next year I plan to connect the roof gutters to it as a rainwater collection tank, further reducing the cost and environmental footprint.
- Experiment with coir reuse. Fresh coir every year works but is an ongoing cost. Hydrogen peroxide treatment could make the coir reusable — worth testing, at least for crops outside the solanaceae family.
Preserving Your Harvest
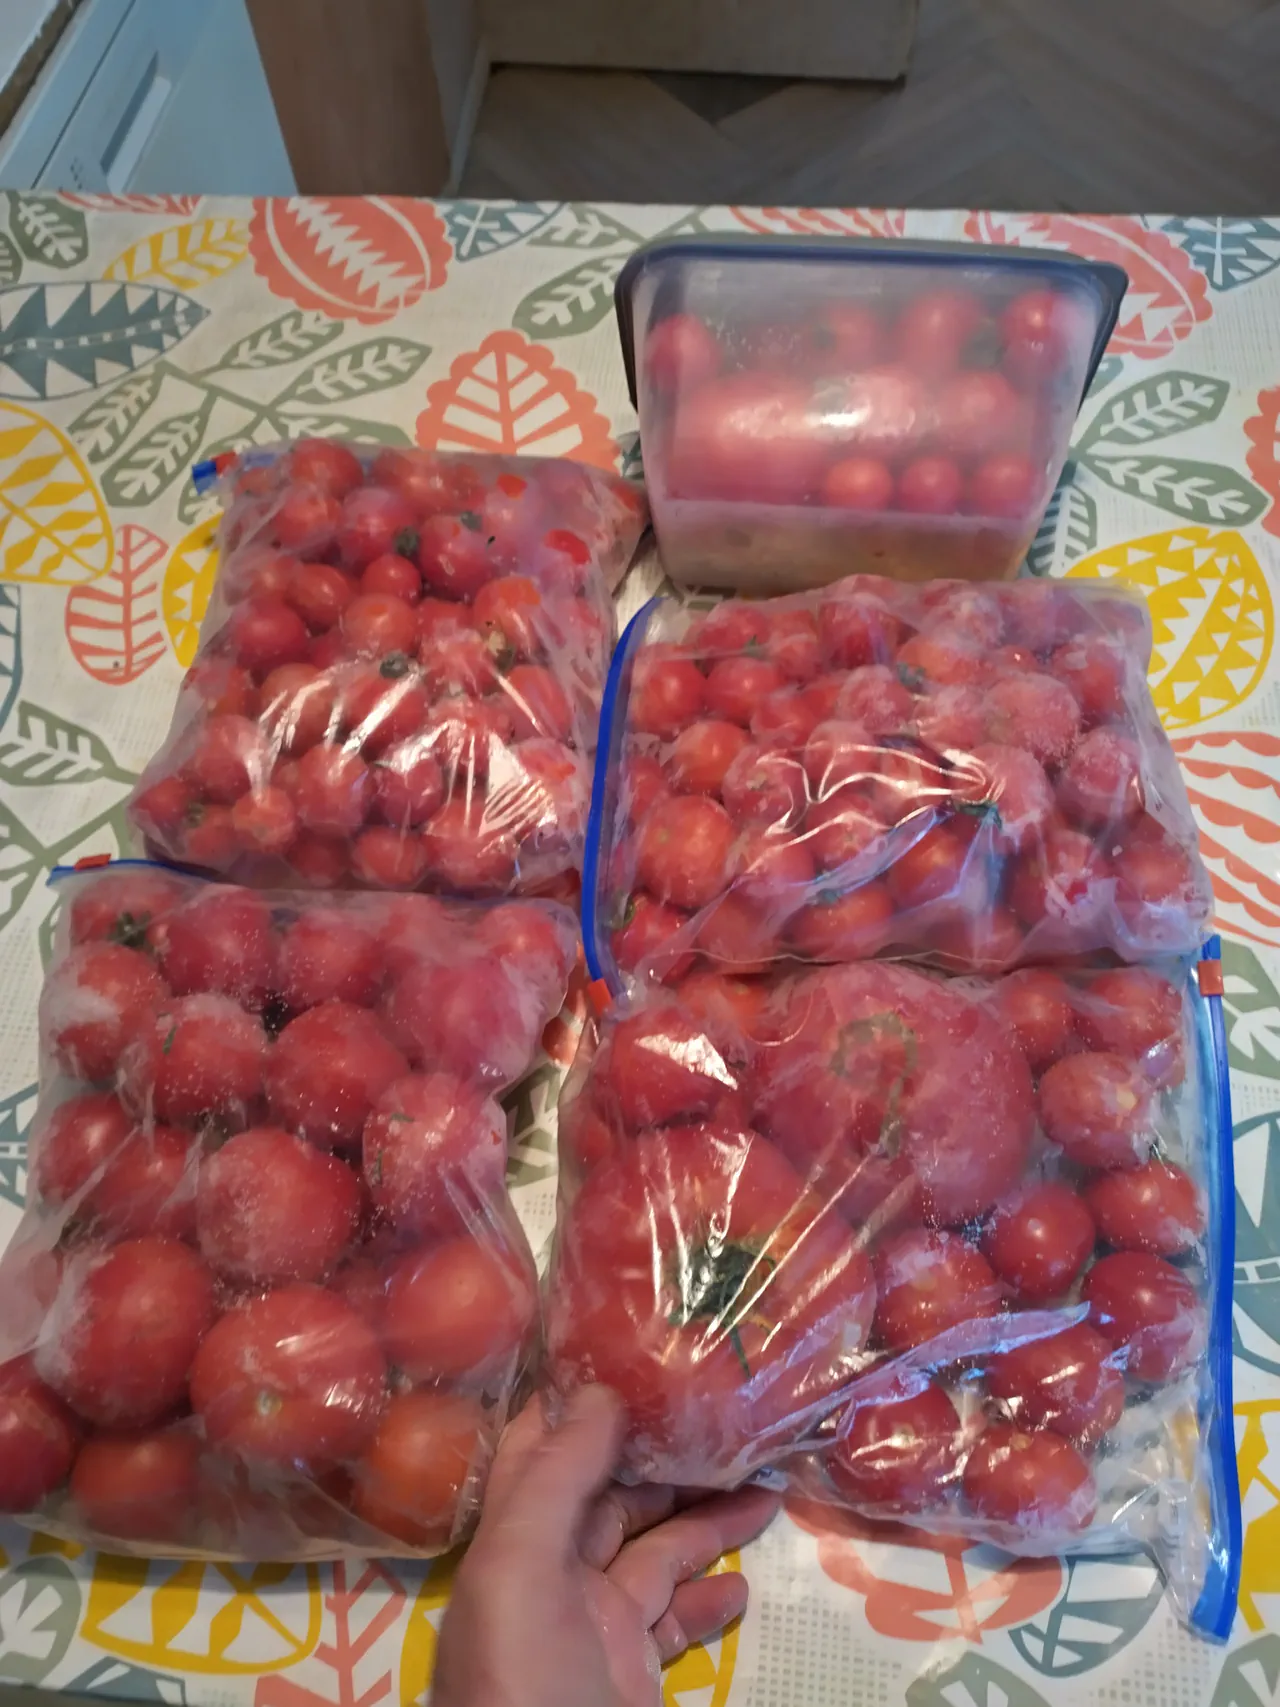
When you have more tomatoes than you can eat — and with this system, you will — the best preservation method is one most people do not even consider: freeze them whole.
Take a whole plant's worth of tomatoes, put them in a ziplock bag, and put them straight in the freezer. No blanching, no cooking, no messing around. Just straight in, whole.
They preserve amazingly well. The small ones still eat like fresh tomatoes when defrosted, with great flavour. Larger ones go a bit mushier but still have their flavour — defrost those for sauces. And here is the best bit: when you take frozen tomatoes and drop them in boiling water, the skin comes straight off — even quicker than peeling fresh tomatoes. Perfect for sauce-making in the middle of winter.
Something very satisfying about frozen tomatoes in the freezer — they are like bags of billiard balls. They sound exactly like billiard balls when you clack them around together.
Late Season and Disease
I harvested the last handful of tomatoes in the first week or two of December — a particularly warm year that was ideal for outdoor tomatoes. The plants were completely healthy until about mid-October, when the first plant was lost to a wilting virus. Then another, then another over the following weeks.

I expected to lose the whole lot, but after 3-4 plants died, the remaining six or seven never caught it and continued producing into December. This is not indicative of a problem with the gutter grow method — wilting viruses are just something you get with tomatoes sometimes, regardless of how they are grown.
Because of the virus, I will not reuse any of the affected coir for solanaceae family plants (tomatoes, potatoes, peppers, aubergines). The spent coir will go into soil beds to improve structure, or be used for crops in a completely different family.
What It Costs
| Item | Cost |
|---|---|
| Gutter system (gutters, timber, pots, coir, wicks, DPC, valves, wire) | ~£300 |
| 2x IBC tote tanks (secondhand + delivery) | ~£150 |
| Nutrients, pH kit, EC pen (first season) | ~£60 |
| Year one total | ~£510 |
| Year two onwards (new coir, pots, nutrients) | ~£60 |
A tomato picked 30 seconds ago is a different ingredient entirely. The flavour, the texture, the warmth still in the skin from the sun — no shop, market, or restaurant can sell you this. Heirloom varieties you cannot buy at any price, vine-ripened cherry tomatoes that burst with sweetness, beefsteaks the size of your fist. This is why you build the system.
The building itself is one of the most enjoyable things I have ever done. Designing the wicking system, mixing nutrients, pruning and training plants, walking out each morning to check on a wall of cascading tomatoes you built from gutters and fabric pots and wicking rope. It is a deeply satisfying project.
As for what it costs: about £510 in year one, dropping to roughly £60 per year after that for new coir, pots, and nutrients. Everything else — the gutters, timber, tanks, wicks — lasts for years.
Frequently Asked Questions
How does the wicking system work?
PVC pipe wrapped in absorbent rope runs through each pot into the gutter below — capillary action draws nutrient solution upward, like a paraffin lamp wick. Float valves keep the gutter level topped up automatically. See the wick-making section for build details.
What nutrients do you use for hydroponic tomatoes?
Two-part solutions (I used Hydrofeed Complete and Dutch Grow). EC 1.5 for vegetative growth, rising to 2.5 from first fruit. Drop pH to 6.2 before adding nutrients. Full routine in the nutrients and feeding section.
Does growing tomatoes hydroponically affect the flavour?
No — these were the best-tasting tomatoes I have ever grown, with both exceptional flavour and a massive yield. The combination of consistent nutrition and a south-facing wall produced fruit that was in a different category entirely. See the flavour verdict for the full assessment.
Can you reuse the coir after the season?
Yes, with hydrogen peroxide treatment (3%, 10ml to a gallon). But if plants had disease, do not reuse for the same family. Spent coir is excellent for improving soil structure in raised beds regardless.
How do you transfer soil plants into hydro?
Wash most soil off the roots under a tap and plant straight into the coir — the plants barely notice. You can also start from seed in rockwool cubes. See the planting section for the full process.
How much maintenance does the gutter grow system need?
Very little — top up the 400-litre tank every 2-3 weeks and pinch out suckers regularly. No daily watering, no pumps. The system ran itself perfectly during week-long holidays. See how the system works for why it is so hands-off.
What pH and EC should I run for tomatoes?
pH 6.2 before adding nutrients (they drop it further to about 5.5). EC 1.5 for veg growth, 2.5 from first fruit. A basic pH/EC pen (~£30) is all you need. Full details in the nutrients section.
Where do you get IBC containers and are they safe?
Secondhand from Facebook Marketplace — I paid £100 for two plus £50 delivery. Always check what was previously stored in them and only buy food-safe containers. See the IBC setup section for more.
What do you do with all the tomatoes?
Freeze them whole in ziplock bags — no blanching, no fuss. Small ones still eat like fresh when defrosted; larger ones are perfect for sauces. See the preservation section for the full method.
Grew this? Cook this
Related Content
All Growing Guides
Browse all guides by method, difficulty, and season
Fresh Tomato Sauce from Scratch
Turn your harvest into a rich, slow-cooked sauce
DIY NFT Hydroponic Herb & Salad Wall
The active hydroponic system for herbs and salads
Pink Oyster Mushrooms in a Bucket
Another high-yield home growing project
Babbington Leeks: Plant Once, Harvest Forever
A perennial crop that keeps giving for decades