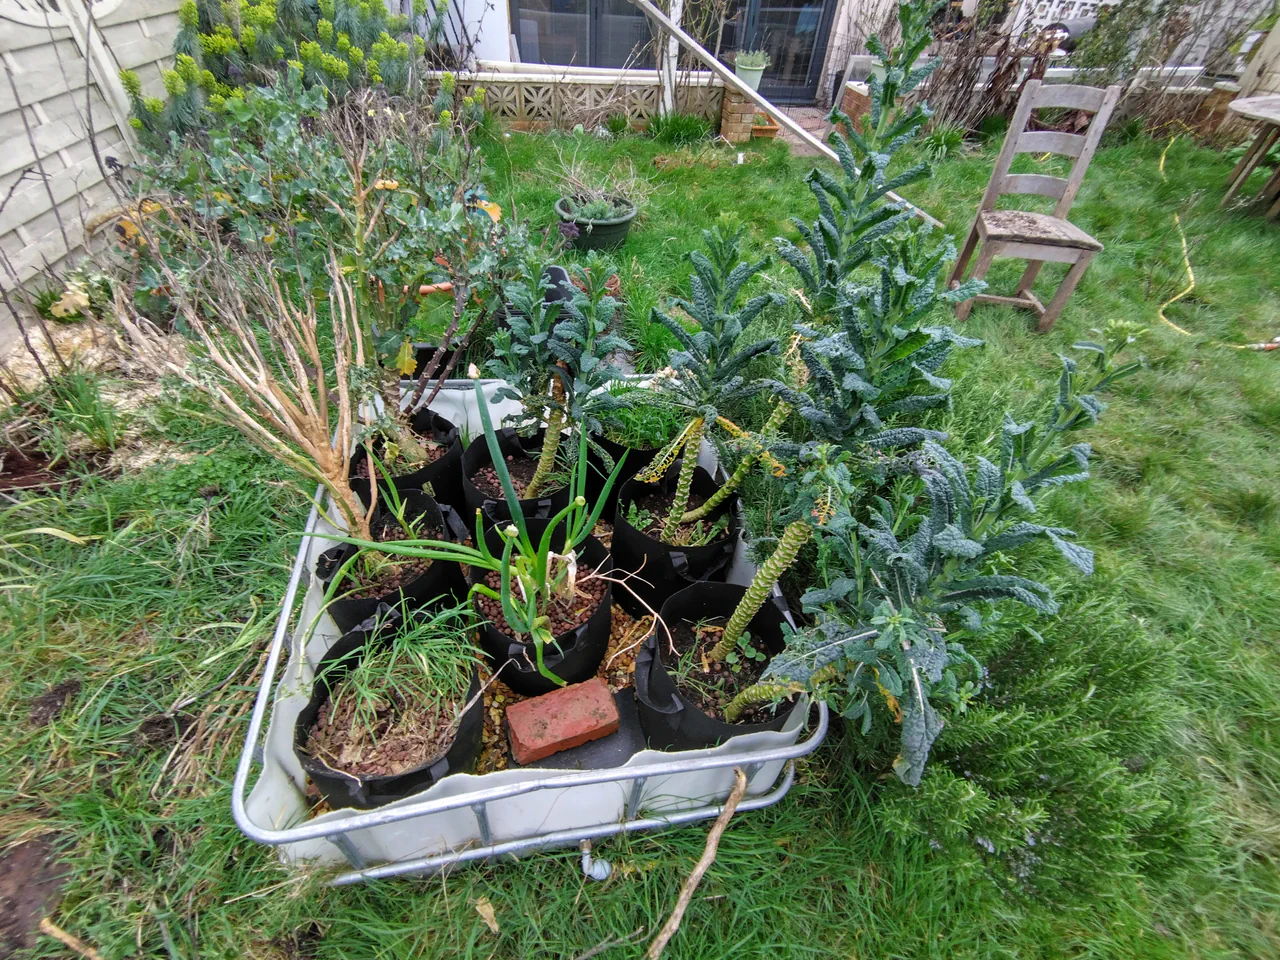
This is the lowest-maintenance growing system I have built. Planted in April, the only tasks across the entire growing year were topping up the nutrient tank every couple of weeks and harvesting. No pruning, no training, no weeding, no pest control. It grew the biggest kale and purple sprouting broccoli I have ever seen, and it did it with essentially no effort from me.
When the nutrient tank ran dry in November, the plan was to clear the bed and start fresh in spring. That is not what happened. The brassicas kept producing on nothing but rainwater for three more months. A second crop of purple sprouting broccoli appeared in February.
The system works because it is almost entirely self-regulating. A float valve maintains a constant water level. Plants take what they need through capillary wicks. The gravel prevents evaporation and blocks light from the water. Once it is set up, there is very little left for you to do.
How This System Connects
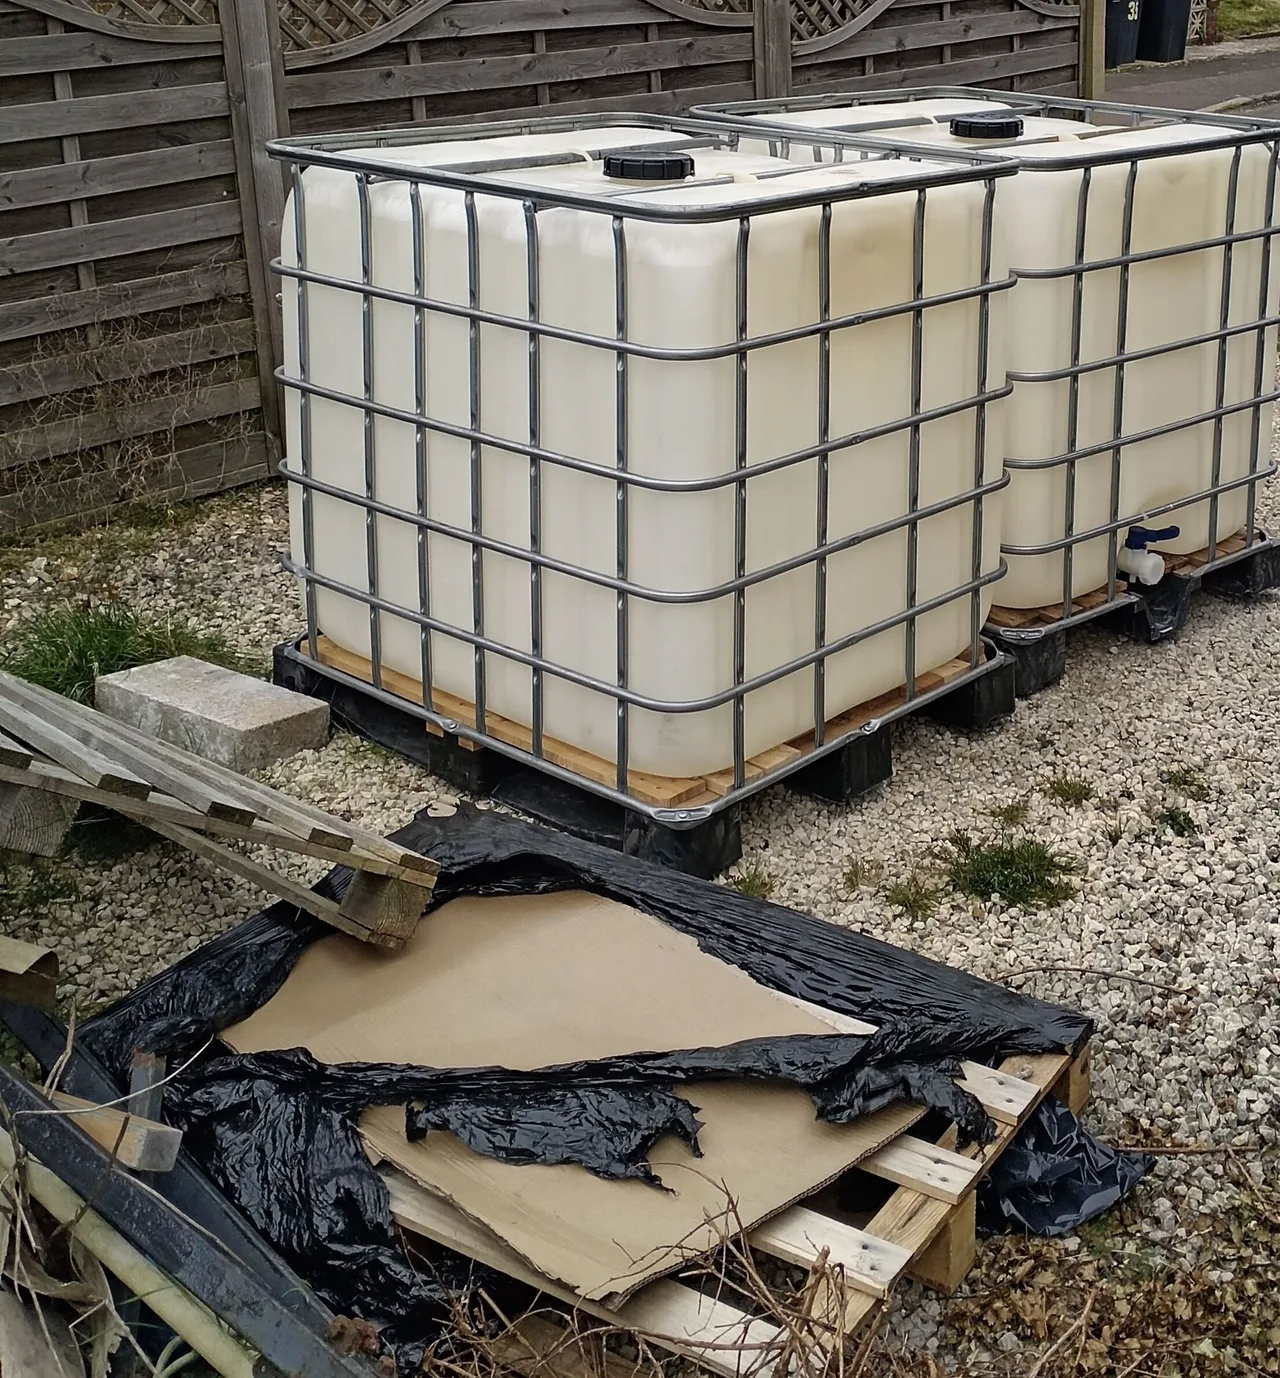
This bed is part of a linked setup. One IBC container was cut in two. The bottom two-thirds became the nutrient tank for the hydroponic tomato wall. The top third, flipped upside down, became this growing bed. Both systems share the same nutrient solution, fed by gravity from a single tank.
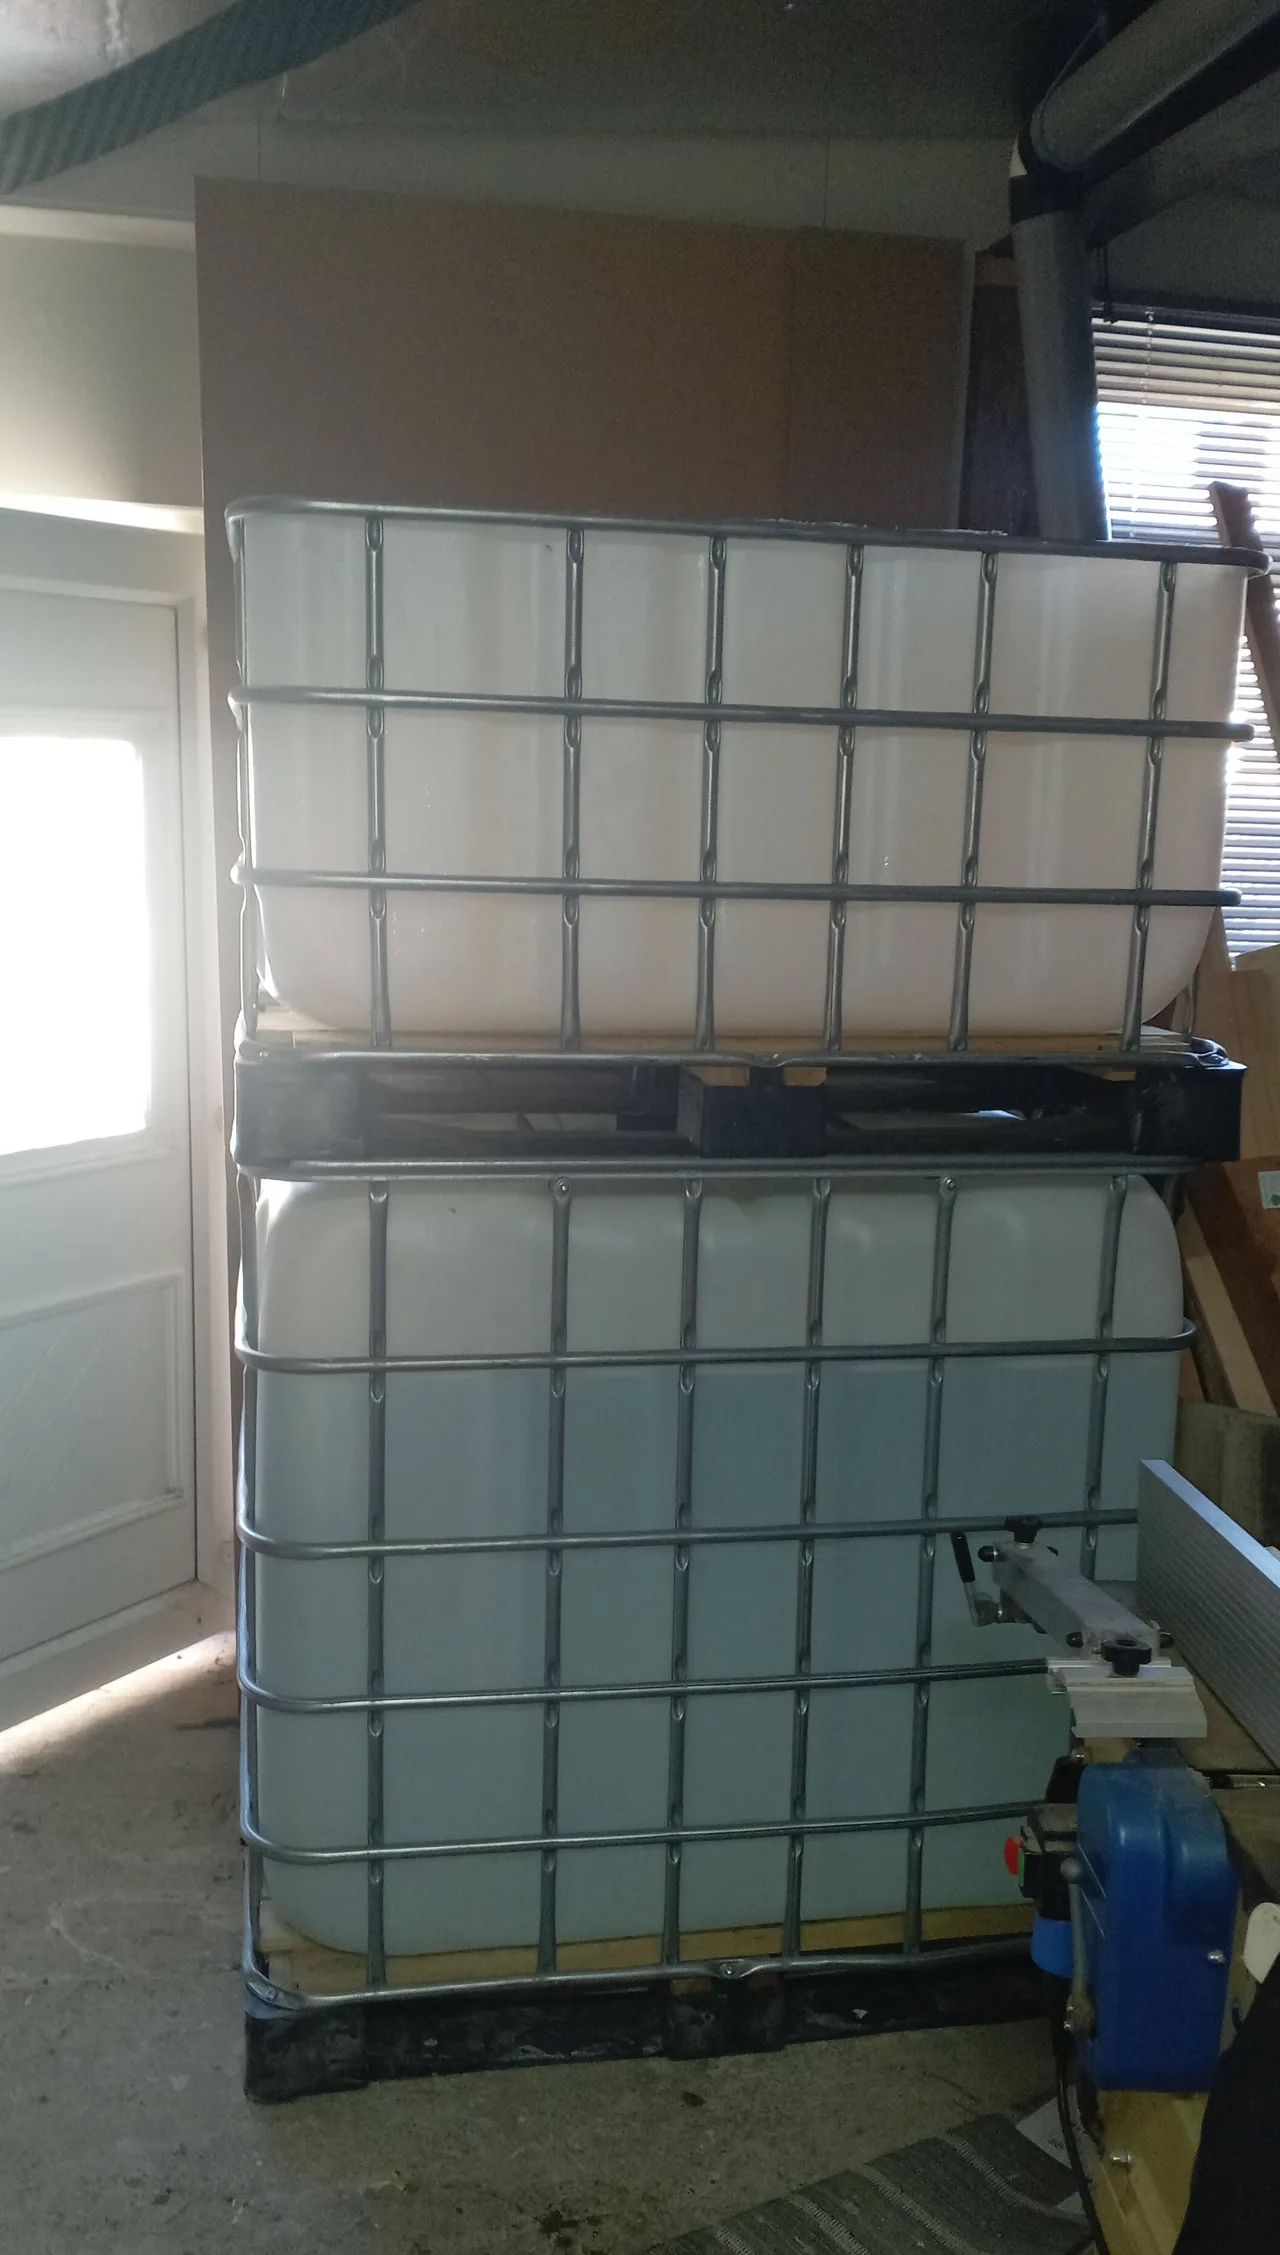
The second IBC (uncut) serves as a platform to give the nutrient tank the height it needs for gravity feed. It will eventually become a rainwater harvesting tank.
This means one pair of secondhand IBCs provides the infrastructure for two complete growing systems. The cost section below reflects the full IBC investment, but it is shared across both.
How Constant-Level Wicking Works
A float valve (the same type used in toilet cisterns) maintains a constant water level a couple of centimetres below the surface of the gravel. Fabric pots sit on the gravel surface. Wicks made from absorbent rope run down through each pot, through the gravel, and into the water below.
Plants draw water and nutrients upward by capillary action. The same principle as a paraffin lamp wick, but with hydroponic nutrient solution instead of fuel. Each plant takes exactly what it needs. Nothing more, nothing less.
The gravel does five jobs at once. It stabilises the water temperature (thermal mass). It prevents evaporation because the water level sits below the surface. It blocks light from reaching the water, which prevents algae growth. It provides a stable surface for the fabric pots. And it allows the wicks to be pushed down through it into the water.
What You'll Need
From the IBC (Shared Infrastructure)
| Item | Cost |
|---|---|
| 2x secondhand IBC containers (Facebook Marketplace) | ~£100 |
| Delivery | ~£50 |
| IBC subtotal | ~£150 |
One IBC provides both this bed and the tank for the tomato wall. The second IBC currently serves as a height platform. True cost attribution across both systems is arguable.
For the Gravel Bed
| Item | Cost |
|---|---|
| 10-12 bags of 20mm gravel (Wickes) | ~£40-48 |
| Food-safe silicone sealant | ~£5 |
| Sand for levelling | ~£5 |
| Plastic cutlery basket (float valve chamber) | ~£2 |
| 15mm float valve (Amazon) | ~£5 |
| Bed subtotal | ~£57-65 |
Per Growing Position
| Item | Cost |
|---|---|
| 22L Jungle Pot fabric pot (£40 for 15) | ~£2.67 |
| Coir + LECA growing medium | £2-3 |
| 50mm PVC pipe section + 1m of 6mm wicking rope | ~£1 |
| Per position | ~£5.67-6.67 |
Each pot and medium combination does at least two seasons, so £3-4 per growing position per year. Wicking rope is £10 for 50m from Amazon.
Total system setup: approximately £200-220 including IBC delivery. But the IBC infrastructure is shared with the tomato wall system, so the cost of this bed alone is closer to £100-120.
Building the Bed
Cutting the IBC
Disassemble the metal cage frame first. It is held together with Torx screws, about 8-10mm. Then cut the top third off the plastic tank with a multitool. The plastic is not thick, and decent scissors would probably work too. This gives you two pieces: the shallow top section (which becomes the growing bed) and the larger bottom section (which becomes the nutrient tank for the tomato wall, or a standalone reservoir).
Now trim the top third of the metal cage frame to create a support cradle for the cut bed section. An angle grinder is the fastest tool for this, but a hacksaw will do it. The trimmed frame sits around the bed and holds it rigid. Without it, the plastic bed section has nothing to stop it flexing when filled with gravel and water.
Sealing and Placing the Bed
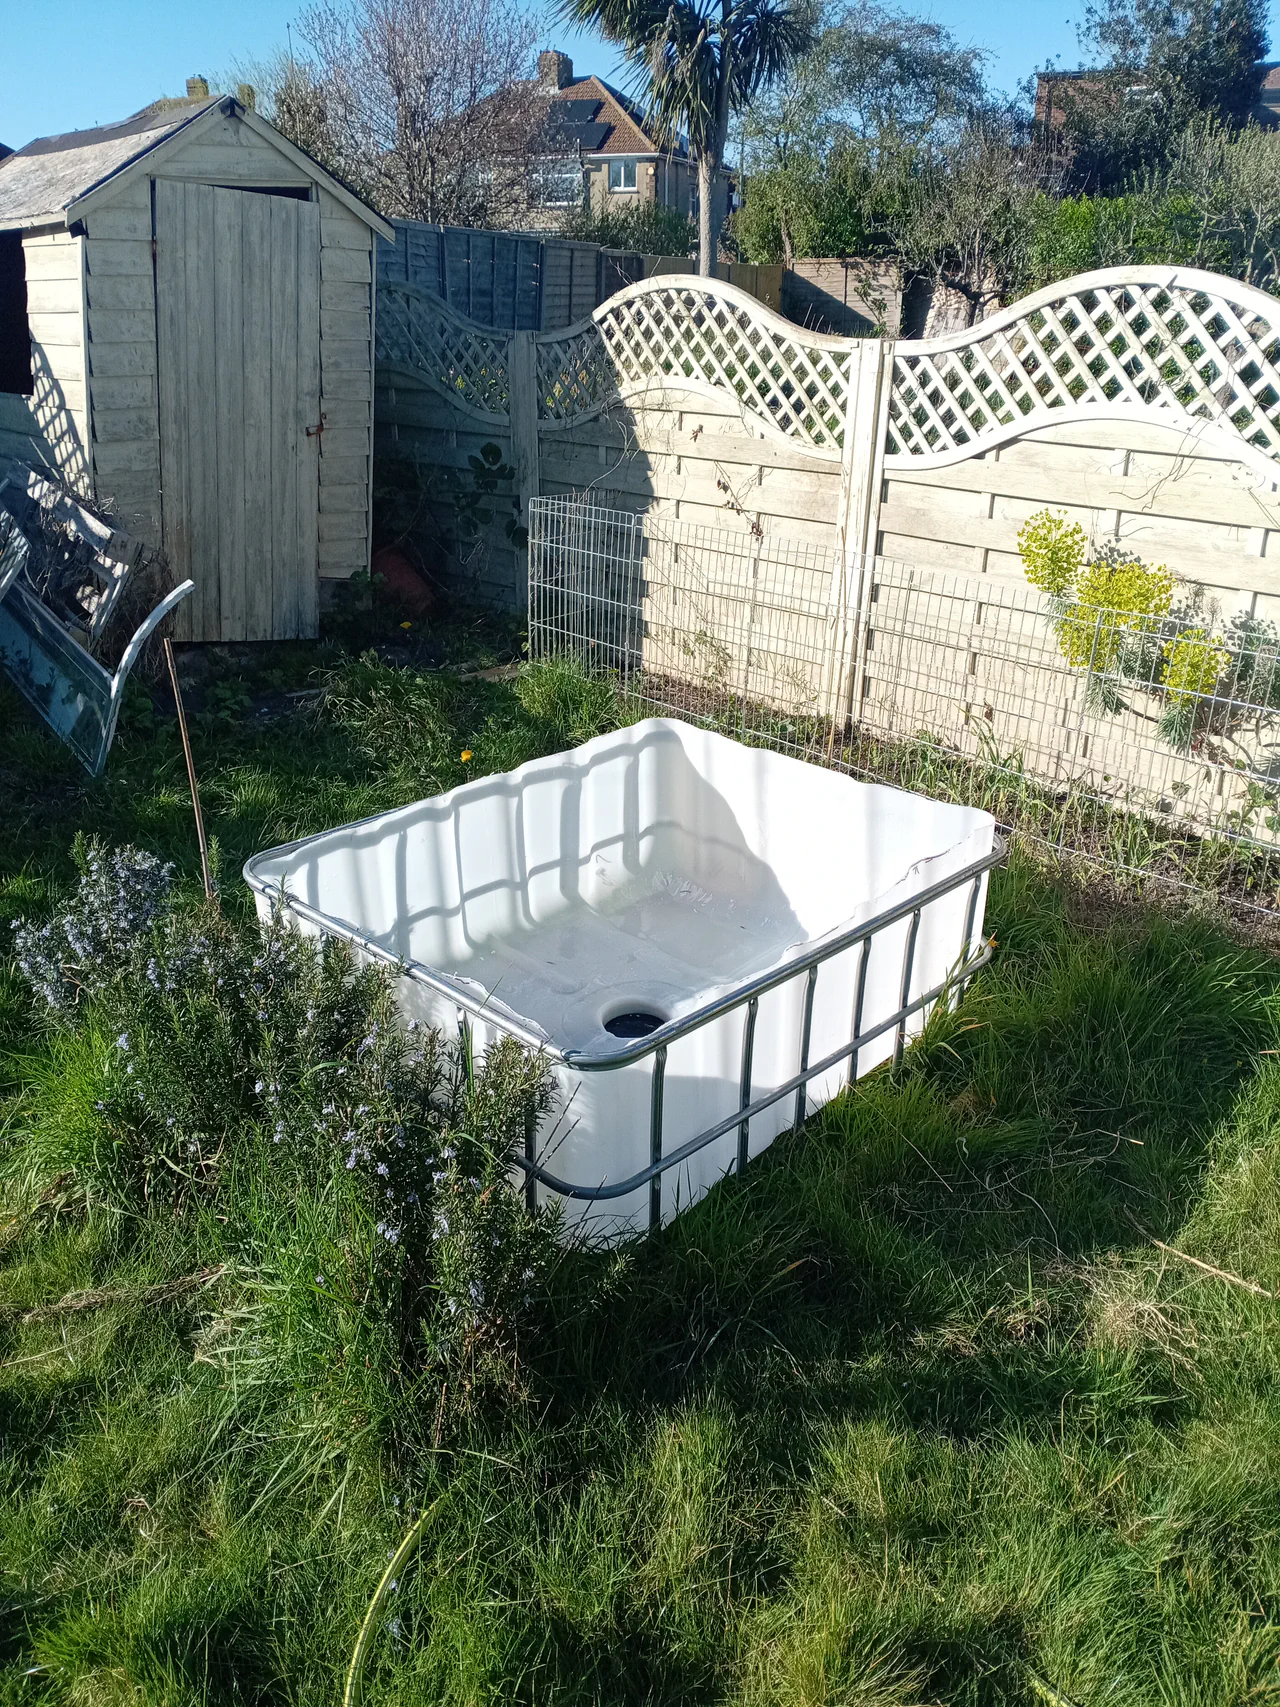
The cut section has a large bottle-cap style lid on one end. Remove this, fill the threads generously with food-safe silicone sealant, and screw it back on tight. This needs to be watertight.
Place the bed lid-side down in your chosen spot. Put down a layer of sand first to create a flat, even surface. The bed does not need to be perfectly level, but it should not be rocking.
Filling with Gravel
Fill with 20mm gravel from a builder's merchant or Wickes. Each bag goes into a wheelbarrow and gets rinsed down first, like washing rice before you cook it. Swirl water through, tip out the cloudy water, repeat until it runs reasonably clear. This removes the fine sediment and dust that would otherwise cloud your nutrient solution.
Fill the bed to a depth of about 12-15cm.
The Float Valve Chamber
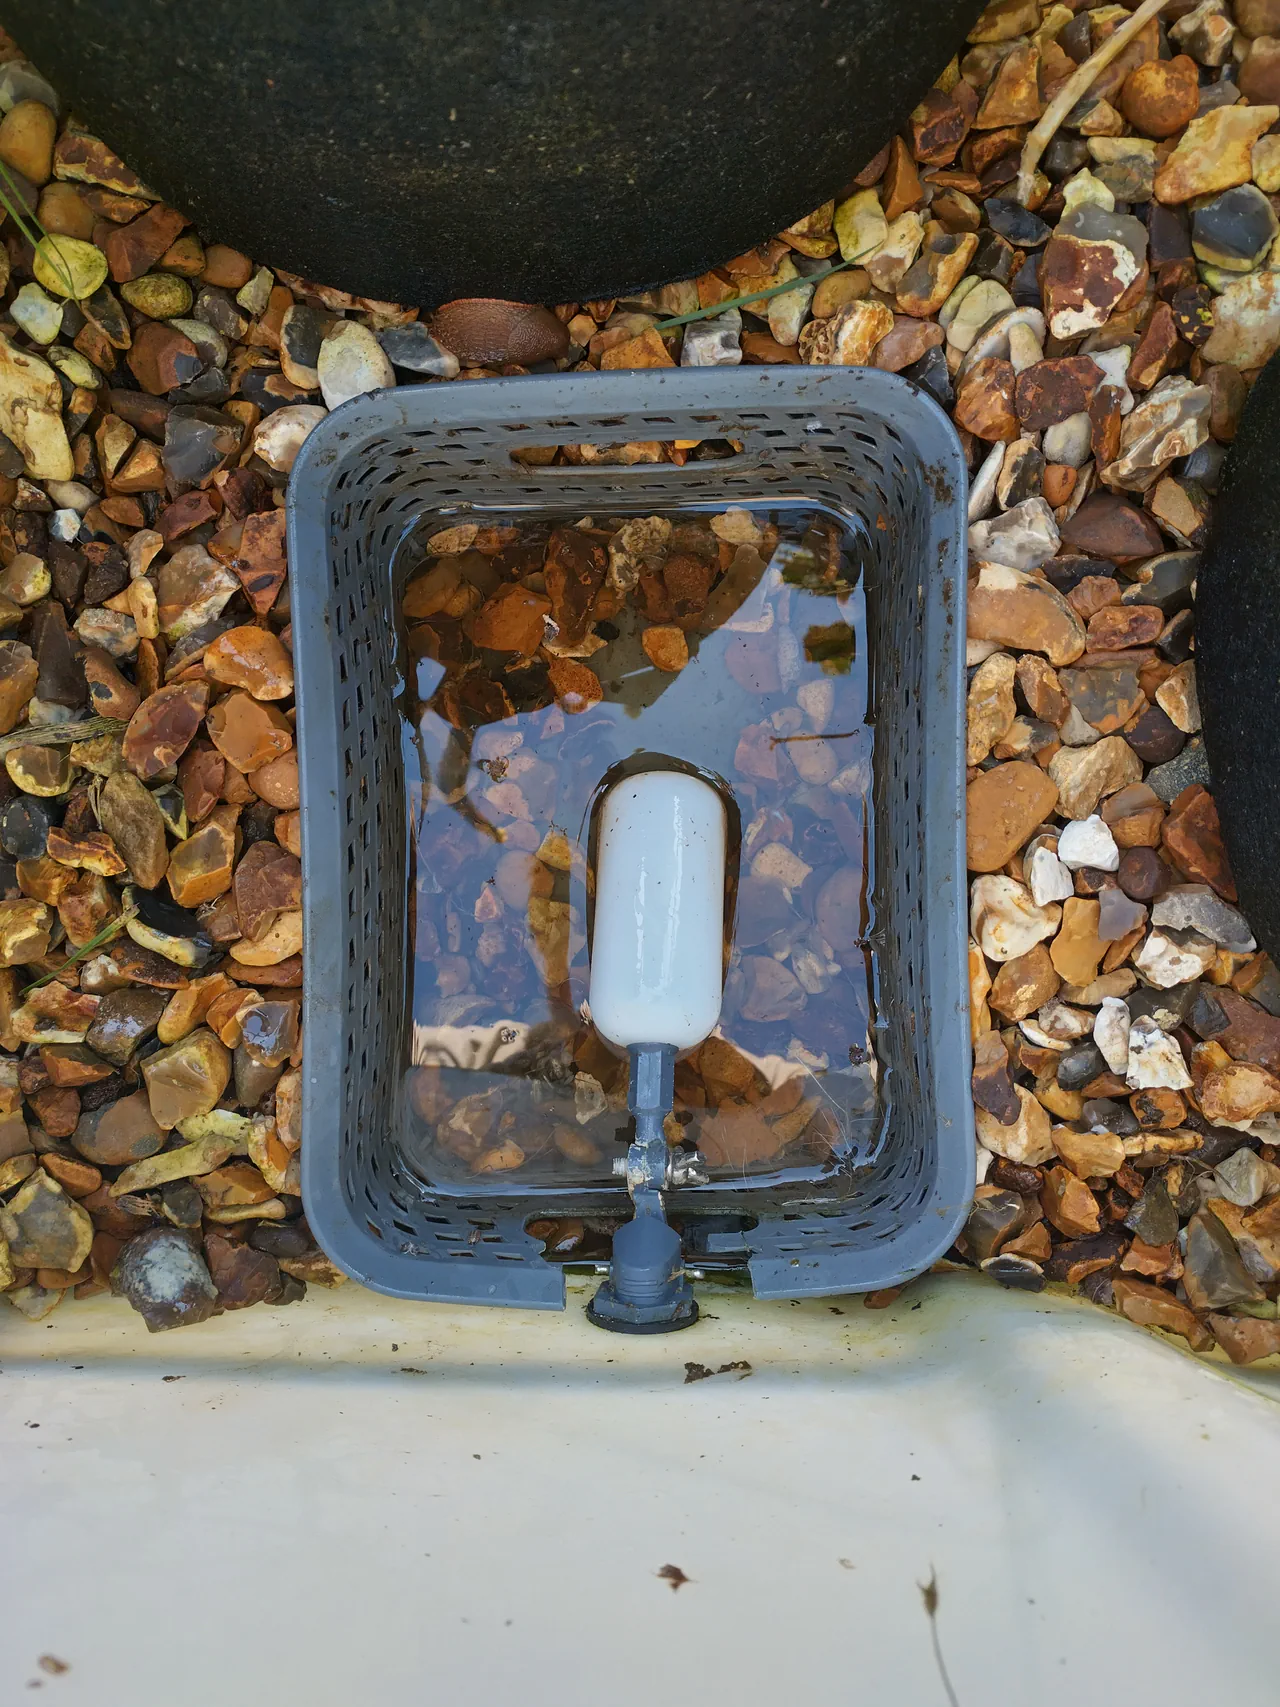
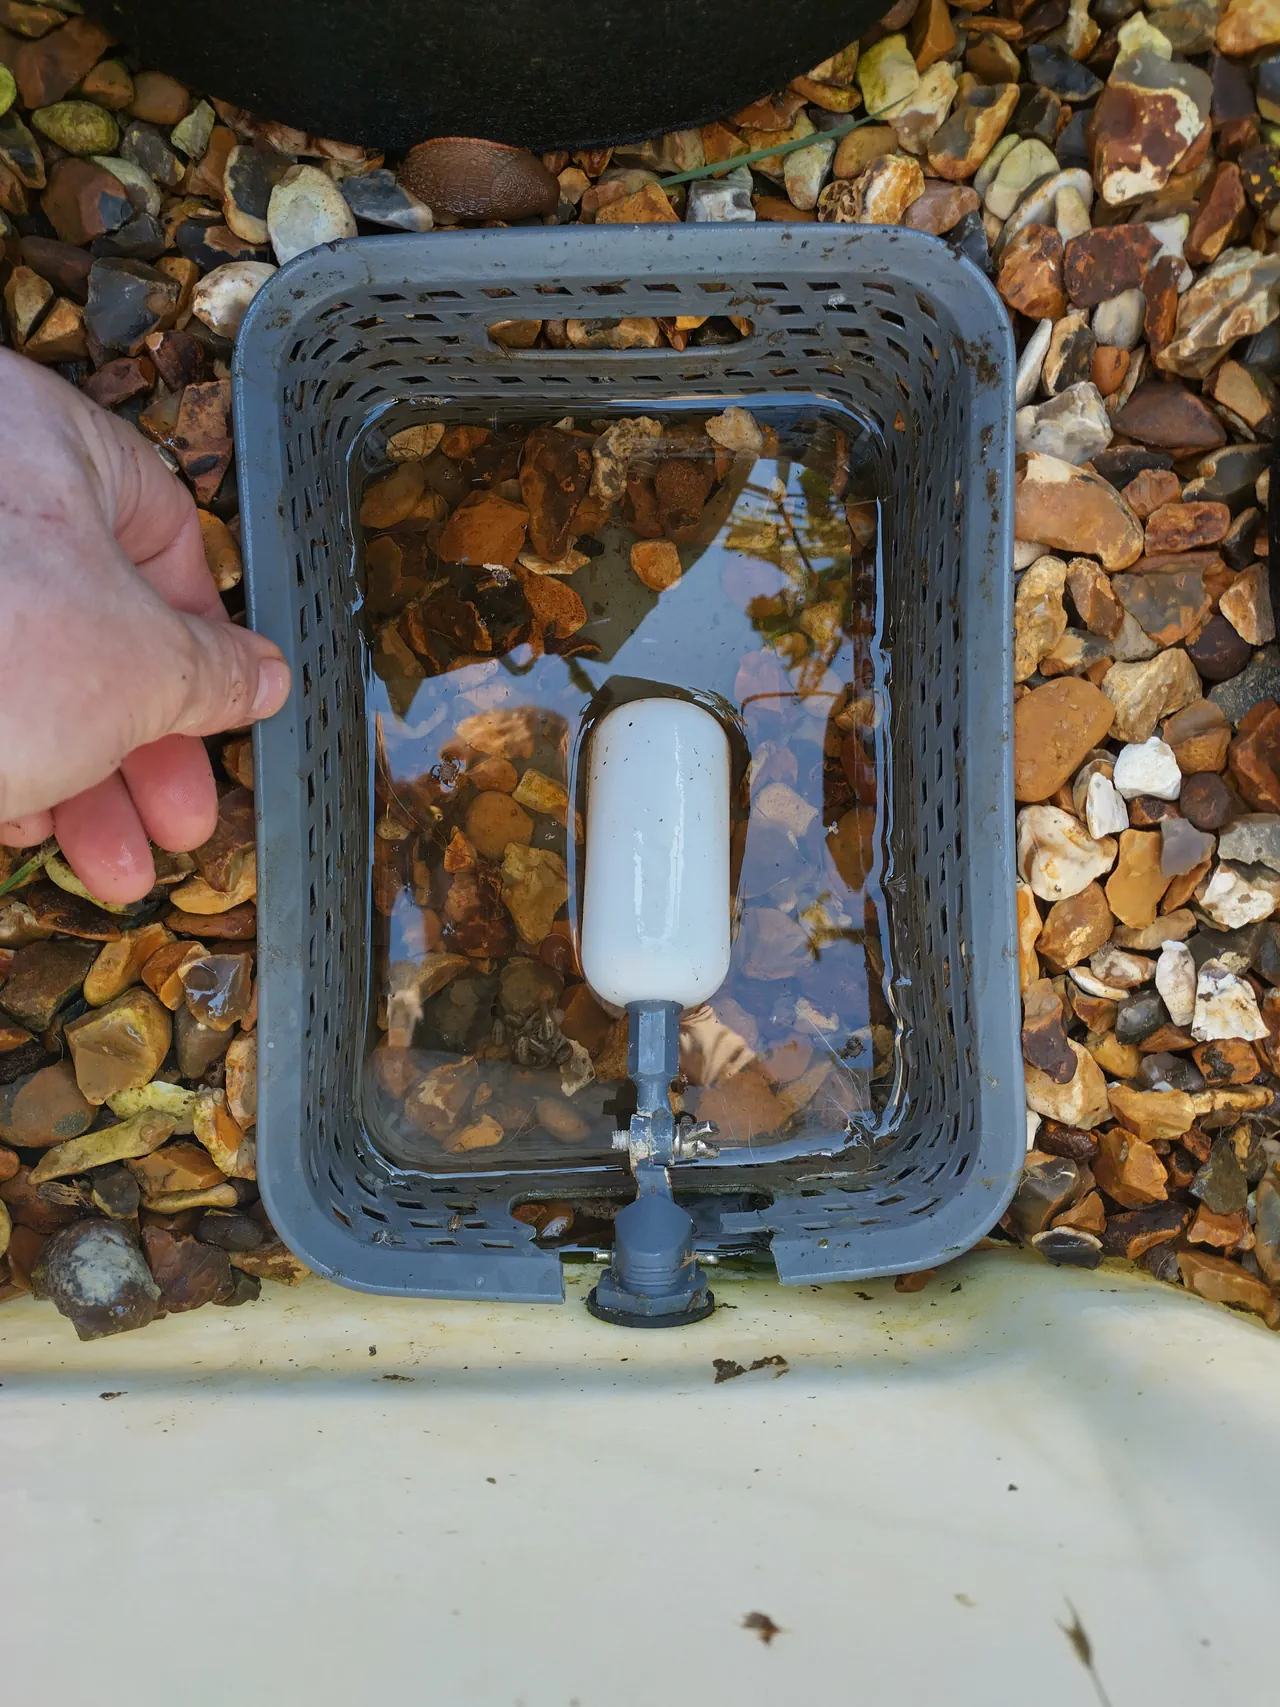
The float valve needs a small chamber in the gravel to operate freely. Use a plastic container with holes in it. I found a wicker-style cutlery basket from Tesco for about £2, which is perfect because it is full of holes and just the right size for the float valve.
Clear a space in the gravel at one end of the bed. Sink the basket so that the top sits just below the gravel surface. Drill a 15mm hole through the side of the IBC tank wall for the float valve inlet. The float valve sits inside the basket, connected to the hose from your nutrient tank.
The Overflow Drain
Drill a second, larger hole (about 20mm, using a hole saw) through the IBC wall. Position this just above the intended gravel level. This is the safety valve: if the float valve fails or the water level rises for any reason, water drains out here rather than flooding the bed.
Also place a piece of heavy black plastic or similar over the float valve basket to block light from reaching the water. Light plus nutrients equals algae.
Making the Wicks
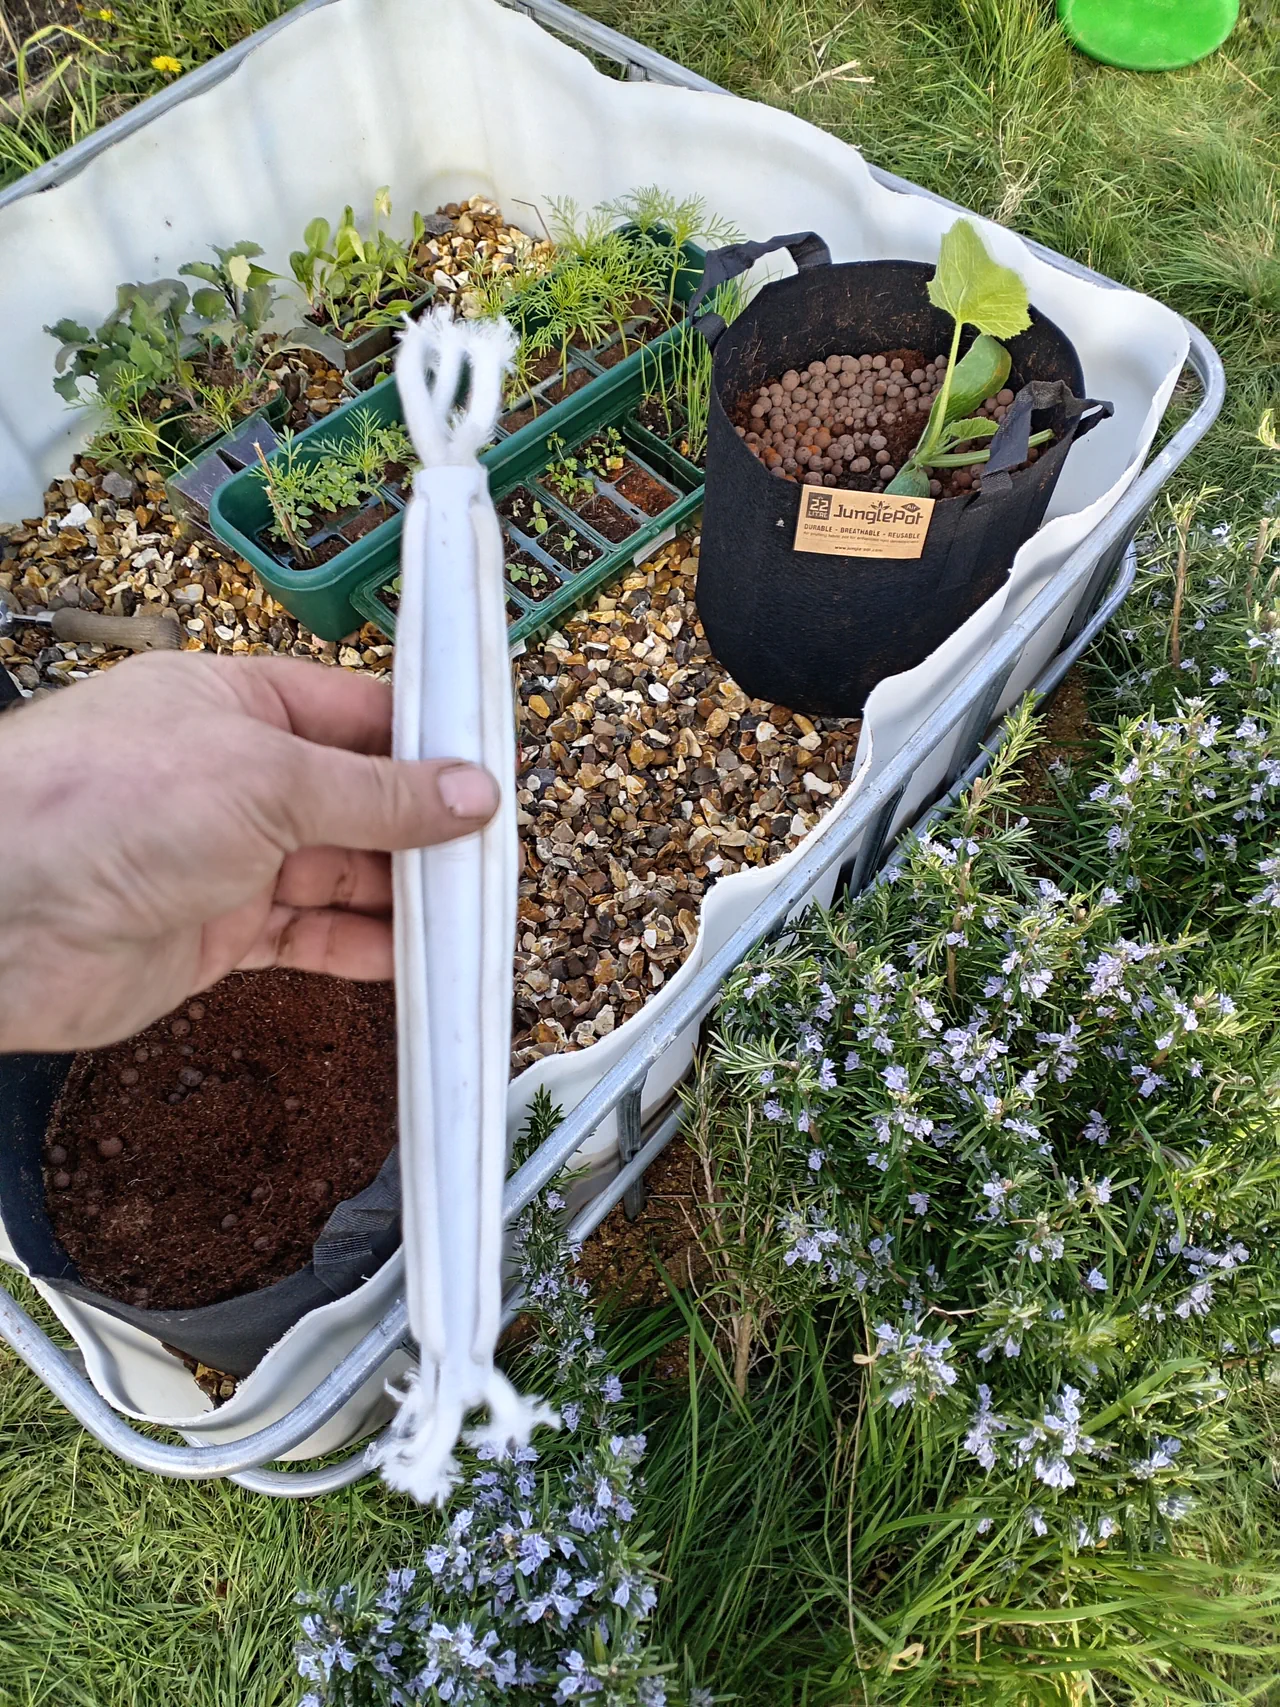
Take a piece of standard 50mm plastic water pipe and cut it to about 30cm. Cut slots into both ends so that wicking rope can be threaded and wrapped around. Use 6mm wick rope, about 1 metre per wick. The wick sits down through the gravel into the water below, and comes up into the fabric pot and growing medium above.
The rope acts as the capillary bridge between the nutrient solution and the plant roots. As the growing medium dries out, it draws more water up through the wick automatically. The same wicking principle used across all the passive hydroponic systems on this site, just scaled differently each time.
The Fabric Pots

22-litre Jungle Pot fabric pots. £40 for 15, so about £2.67 each. Fabric pots are designed for hydroponics. The advantage over solid plastic pots is side ventilation, which prevents root circling and produces healthier root systems.
Fill with a mixture of coir and LECA (expanded clay pebbles). I experimented with different ratios: some pots were 100% coir, some had about 10% LECA mixed through, some had about 20%. There was no noticeable difference in how well anything grew. Just use whatever ratio you have to hand.
Medium works out at about £2-3 per pot. Each pot and medium combination will do at least two seasons before it needs replacing.
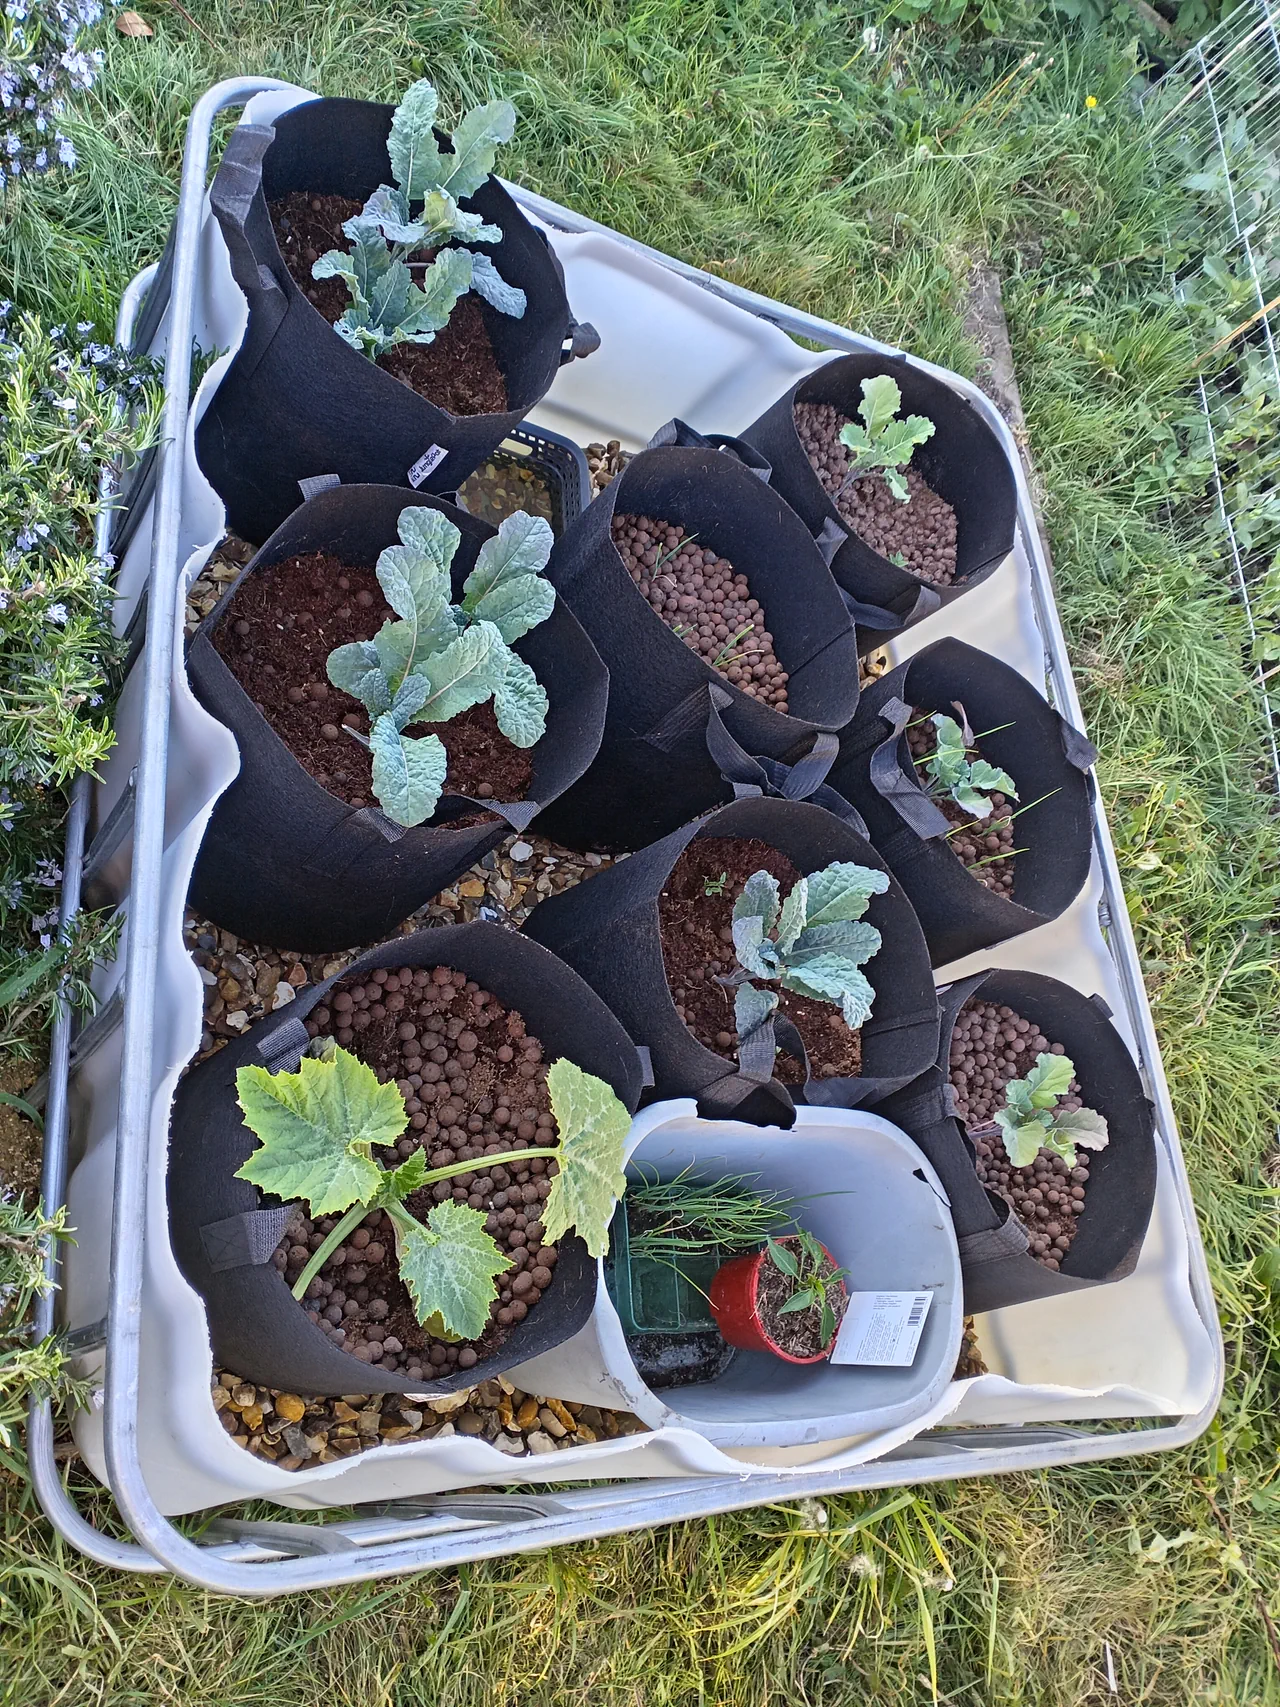
Planting
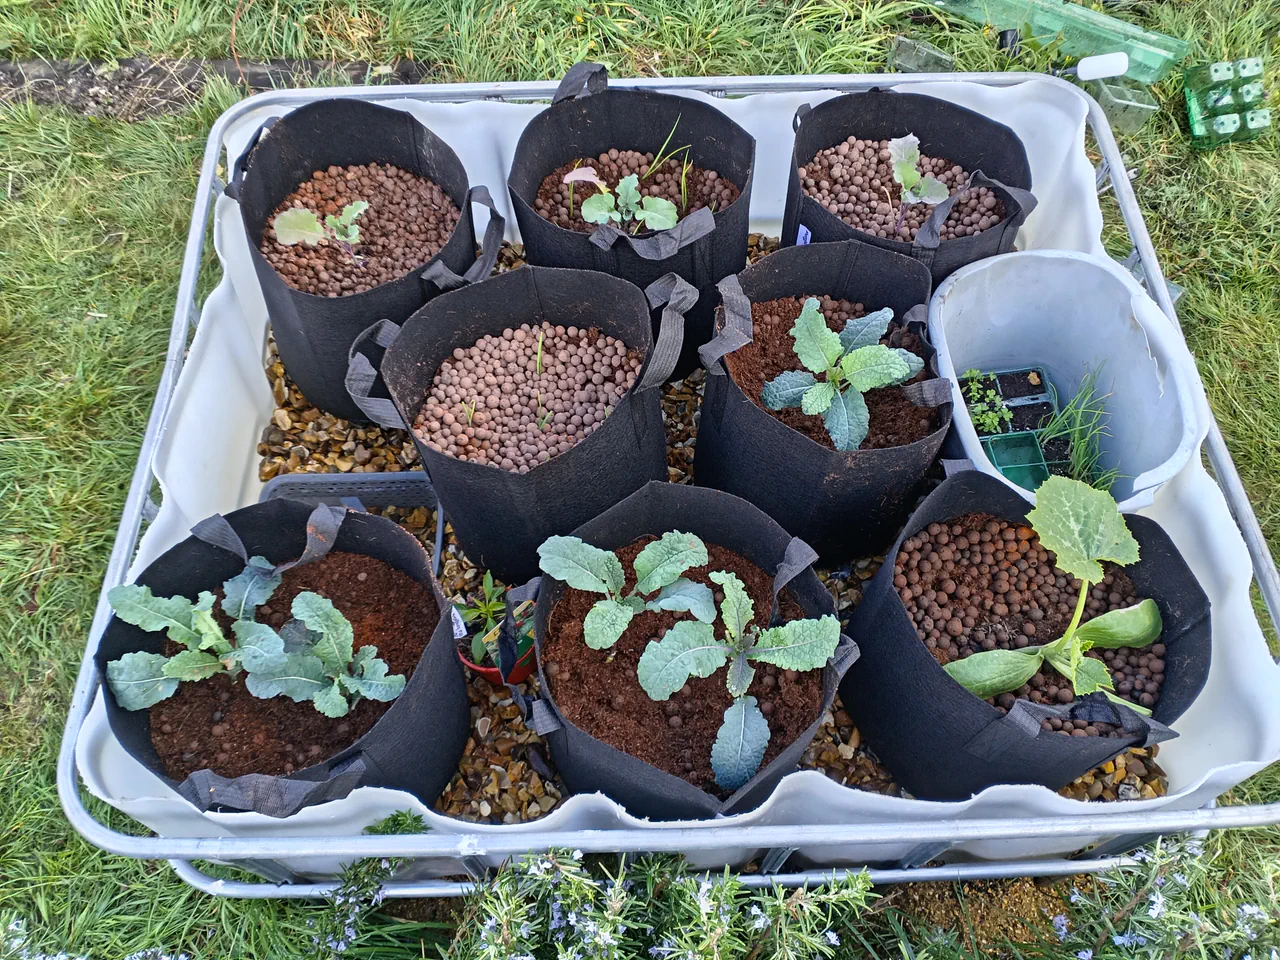
Bought small plug plants from the local garden centre. Washed most of the soil off the roots before planting. Do not stress about getting every last bit of soil off. In fact, leaving a little soil probably helps, because you get some of the beneficial microbiome that comes with it.
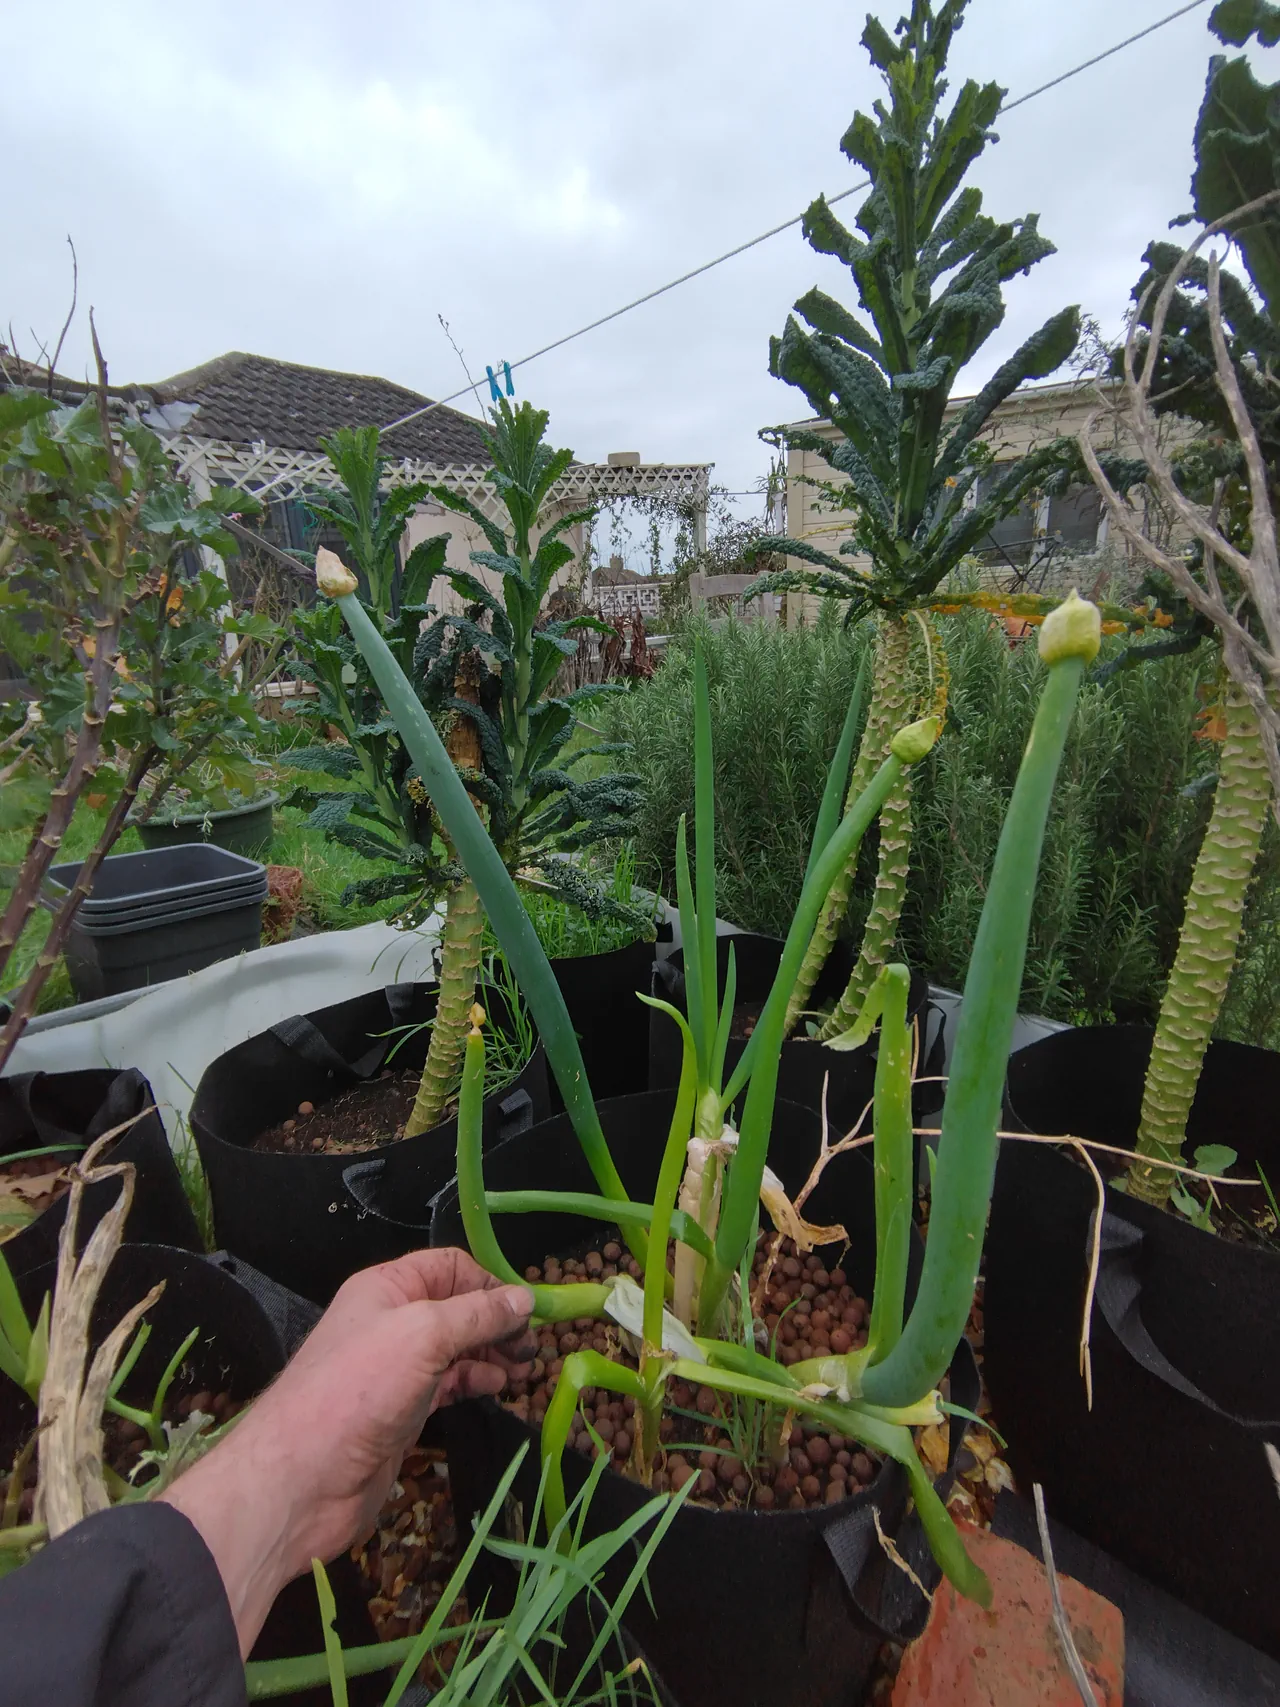
What went in: three purple sprouting broccoli, three cavolo nero kale, one courgette, and some spring onions. Nine fabric pots in total.
Nutrients and Feeding
The gravel bed is fed from the same IBC tank as the tomato wall gutter grow system. Dutch Pro two-part nutrient, equal parts A and B mixed following the instructions on the containers. Same tank, same gravity feed. The tank also supplied the odd watering can for soil plants around the garden, so one nutrient mix was feeding everything.
Started with the Dutch Pro vegetative growth set and switched to the flowering/bloom set when the courgettes began to set fruit. pH set between 5.5 and 6. EC started around 1.5, then increased to around 2.5 for the blooming phase.
The tank holds 300-400 litres per fill. At peak season in summer, it needed topping up every 10-14 days. That single tank was feeding the tomato wall, this gravel bed, and the occasional watering can for soil pots. Total water usage across all three was dramatically less than would be needed to water a comparable number of crops in conventional soil beds over the same period. Passive hydro is remarkably water-efficient because almost nothing is lost to evaporation or run-off.
Being honest: nutrient management was not very precise this year. Got the levels roughly where they needed to be and left it at that. The kale probably did not need bloom-level EC, but it did not seem to do it any harm. Everything grew enormously regardless.
Next year: three separate nutrient tanks feeding three separate gravel beds, so each crop type gets nutrients tailored to what it actually needs.
Why Zero Maintenance Works
The only tasks across the entire growing year were topping up the nutrient tank (roughly every couple of weeks) and harvesting. That is it. No pruning, no training, no weeding, no pest control, no watering. Here is why.
- Self-regulating water. The float valve maintains a constant level. Plants take what they need through the wicks. There is nothing to adjust.
- No evaporation. The water level sits below the gravel surface. Almost no water is lost to evaporation.
- No weeds. There is no soil for weeds to colonise. The gravel surface is inhospitable to anything you did not plant.
- No pests to speak of. The brassicas had minor caterpillar interest but nothing that required intervention. The plants were so vigorous they grew through any damage.
- Nothing to prune or train. Kale and PSB grow upward. The courgette spread where it pleased. Nothing needed tying, pinching, or cutting back.
The Growing Season
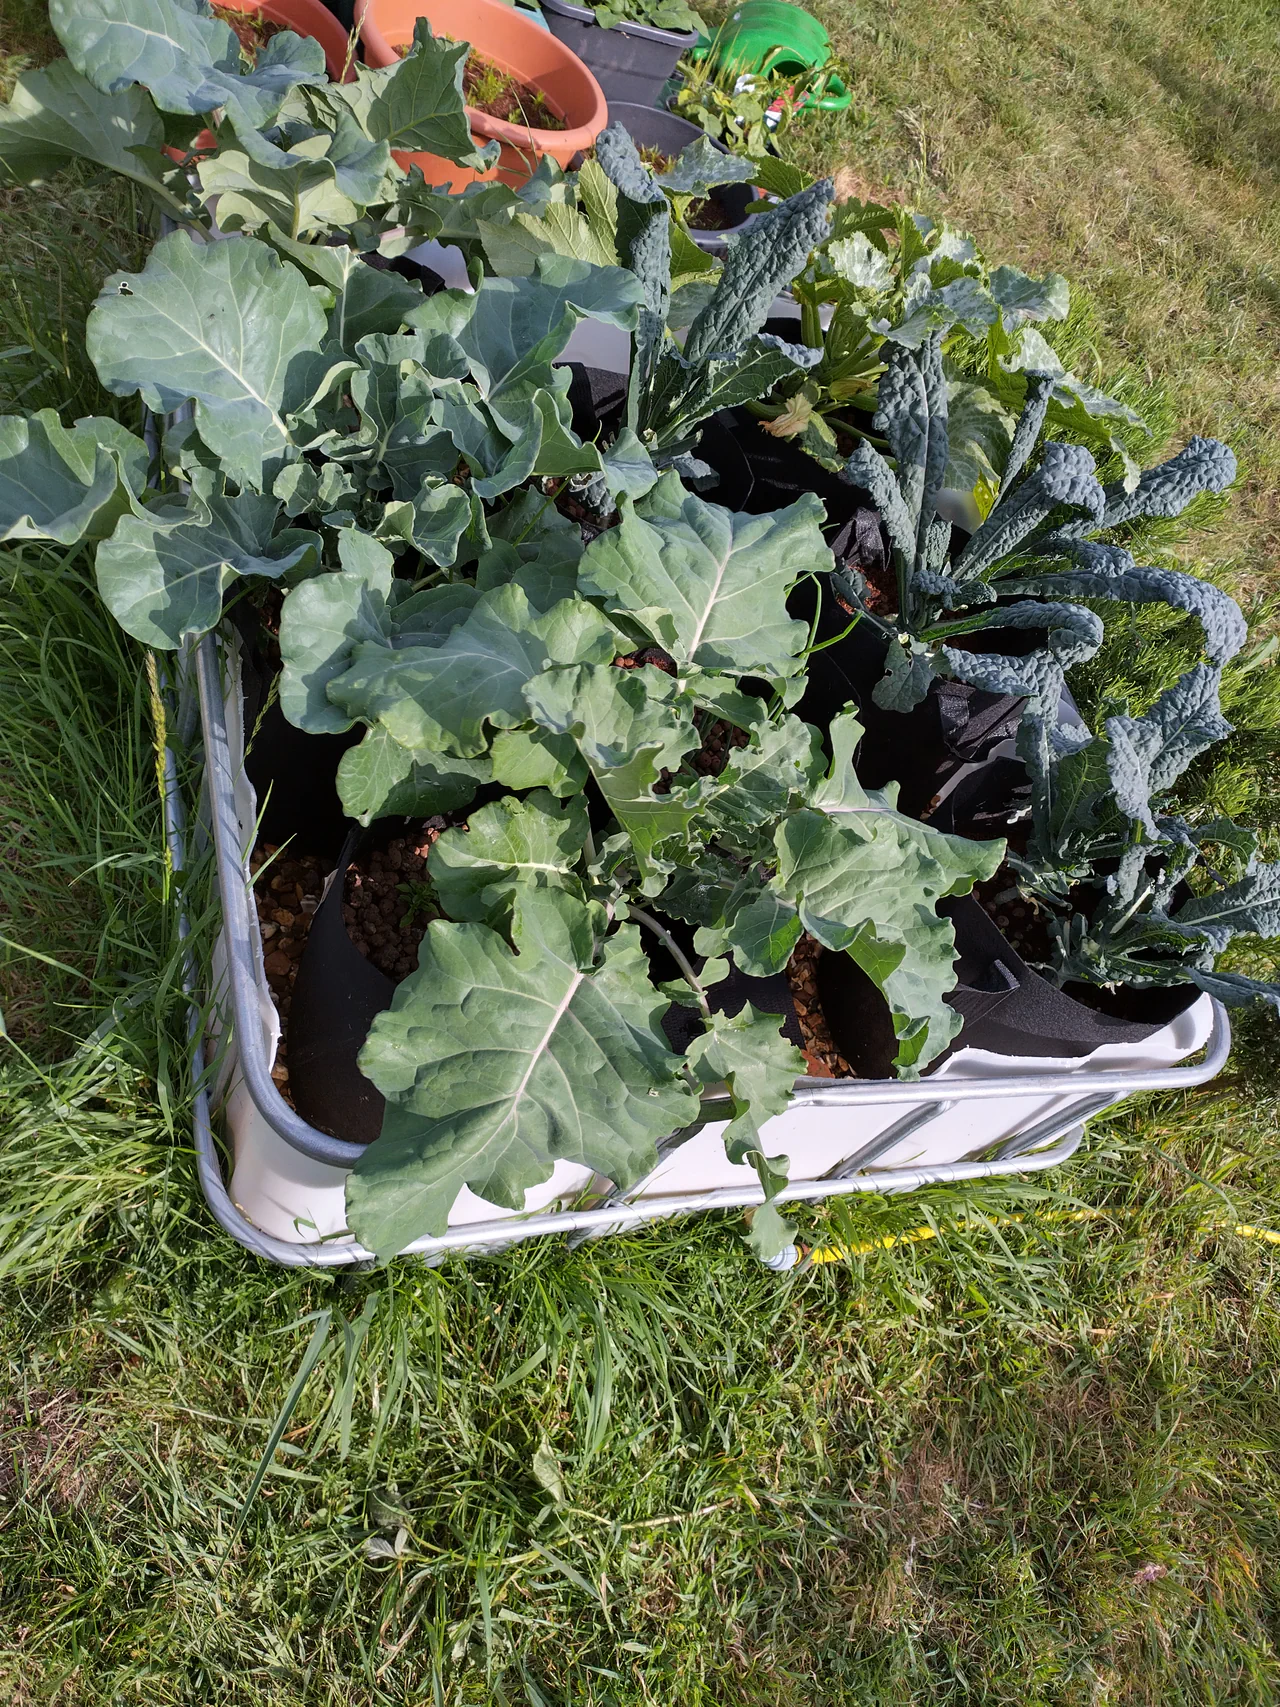
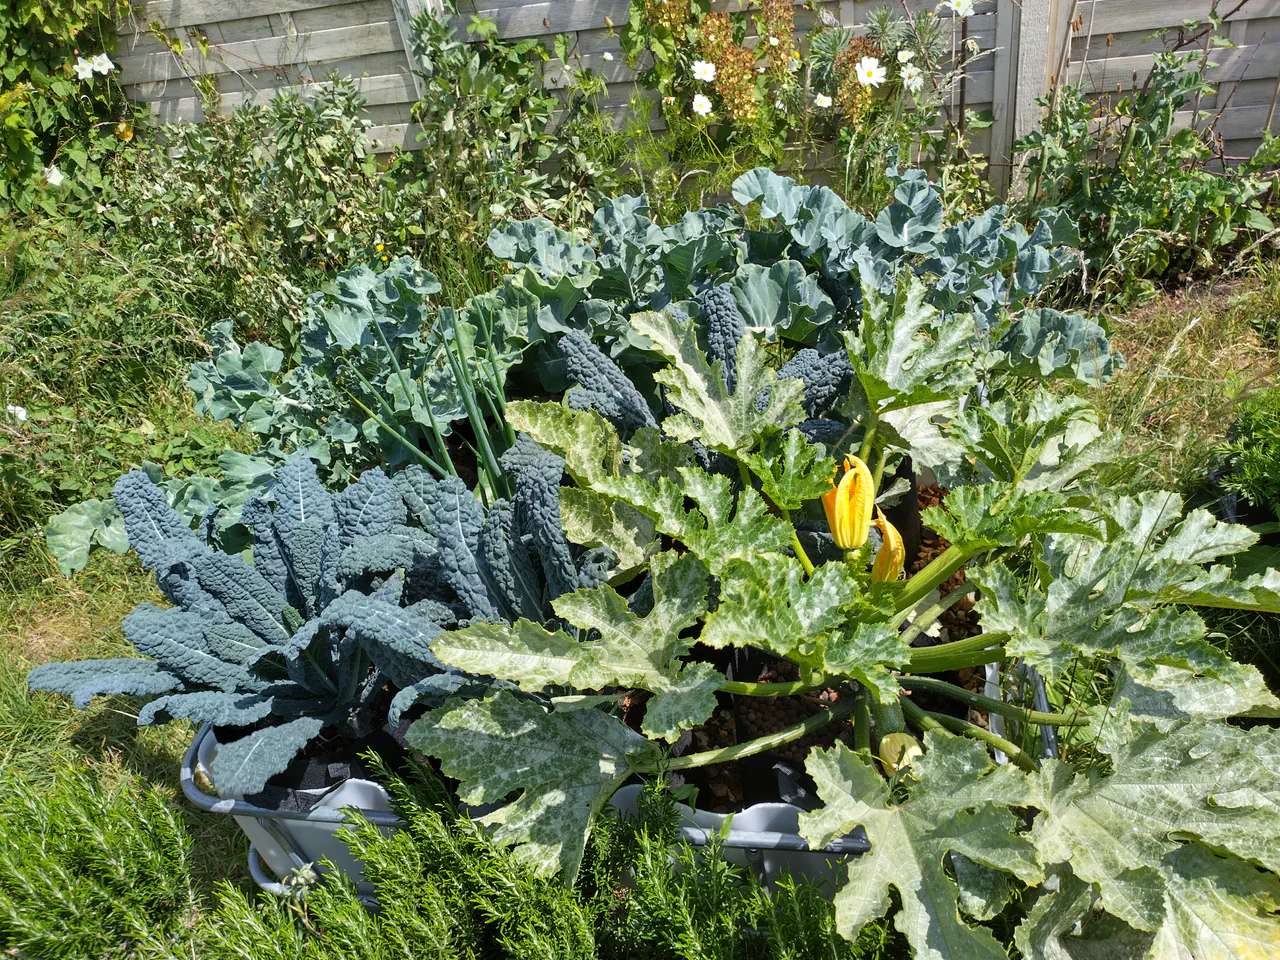
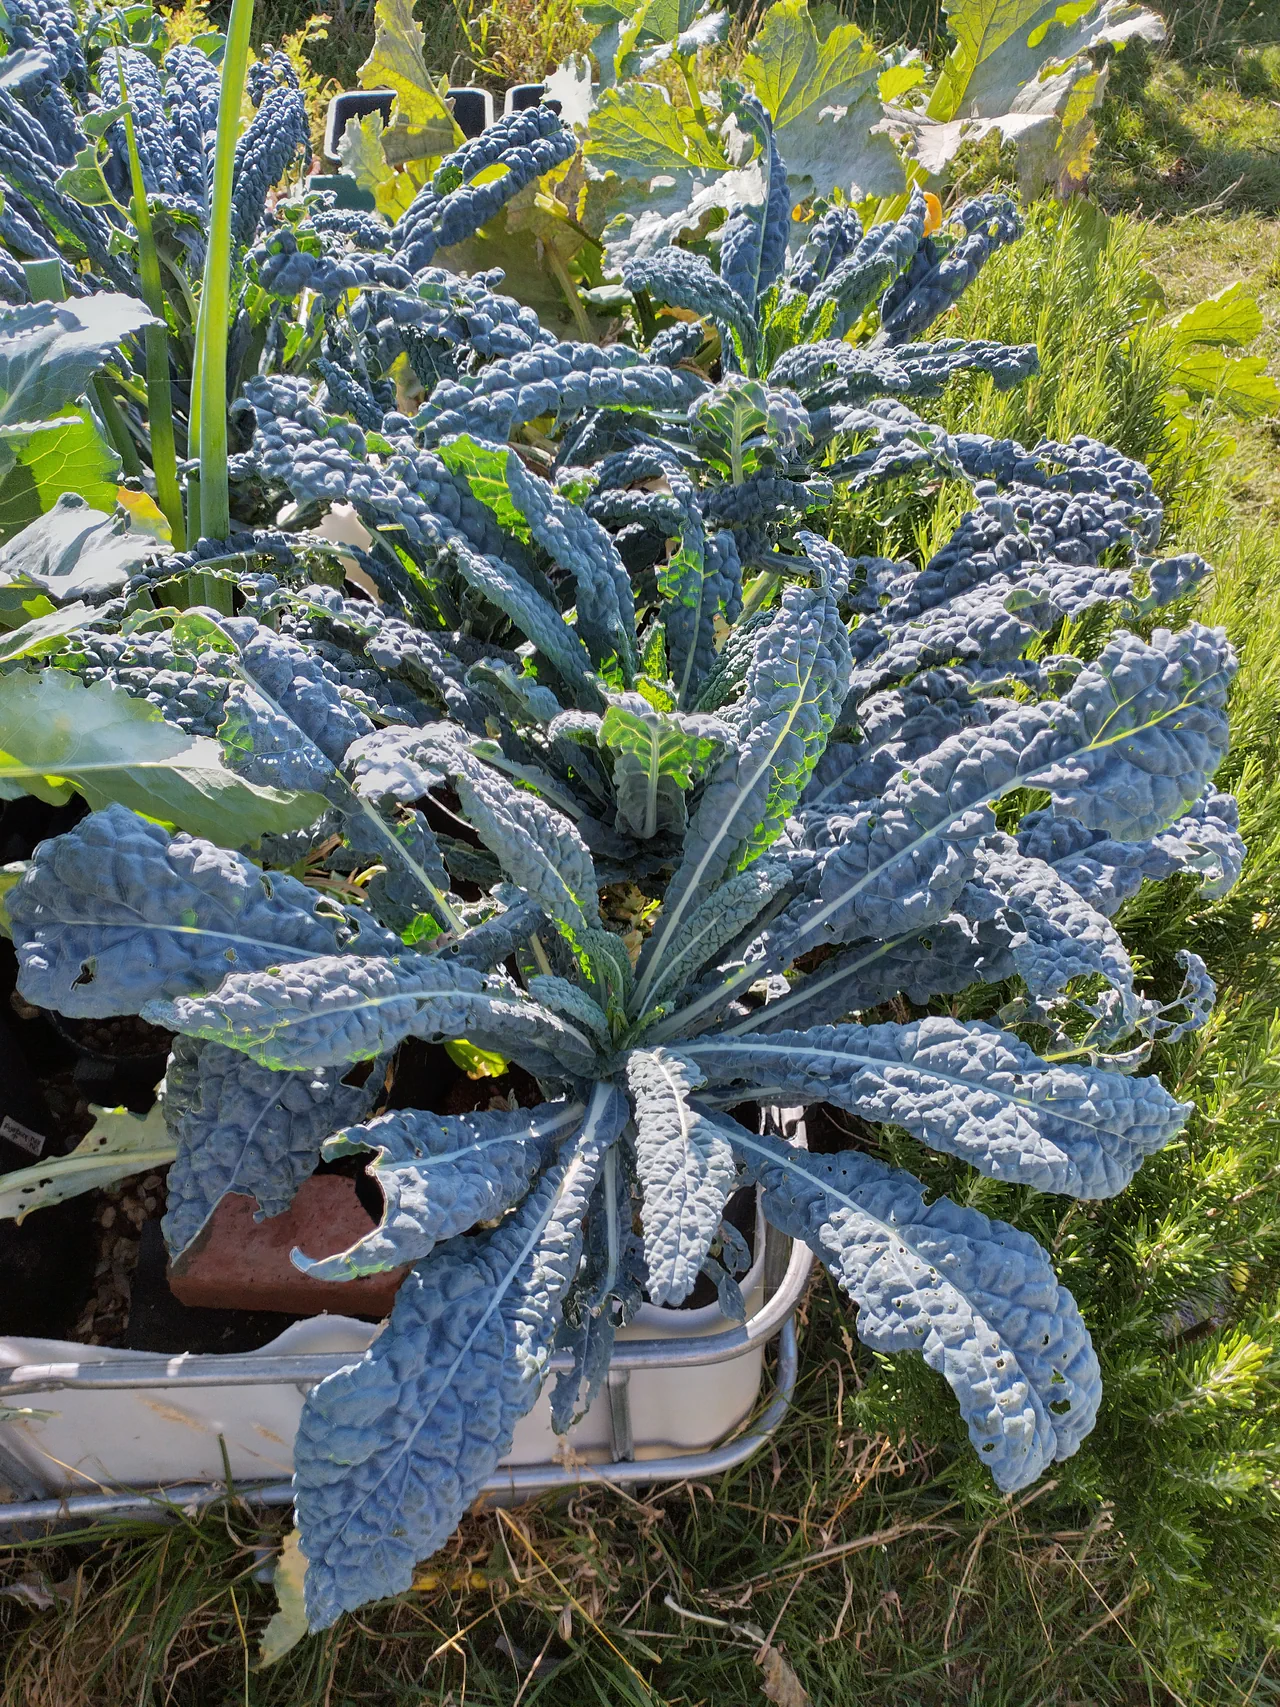
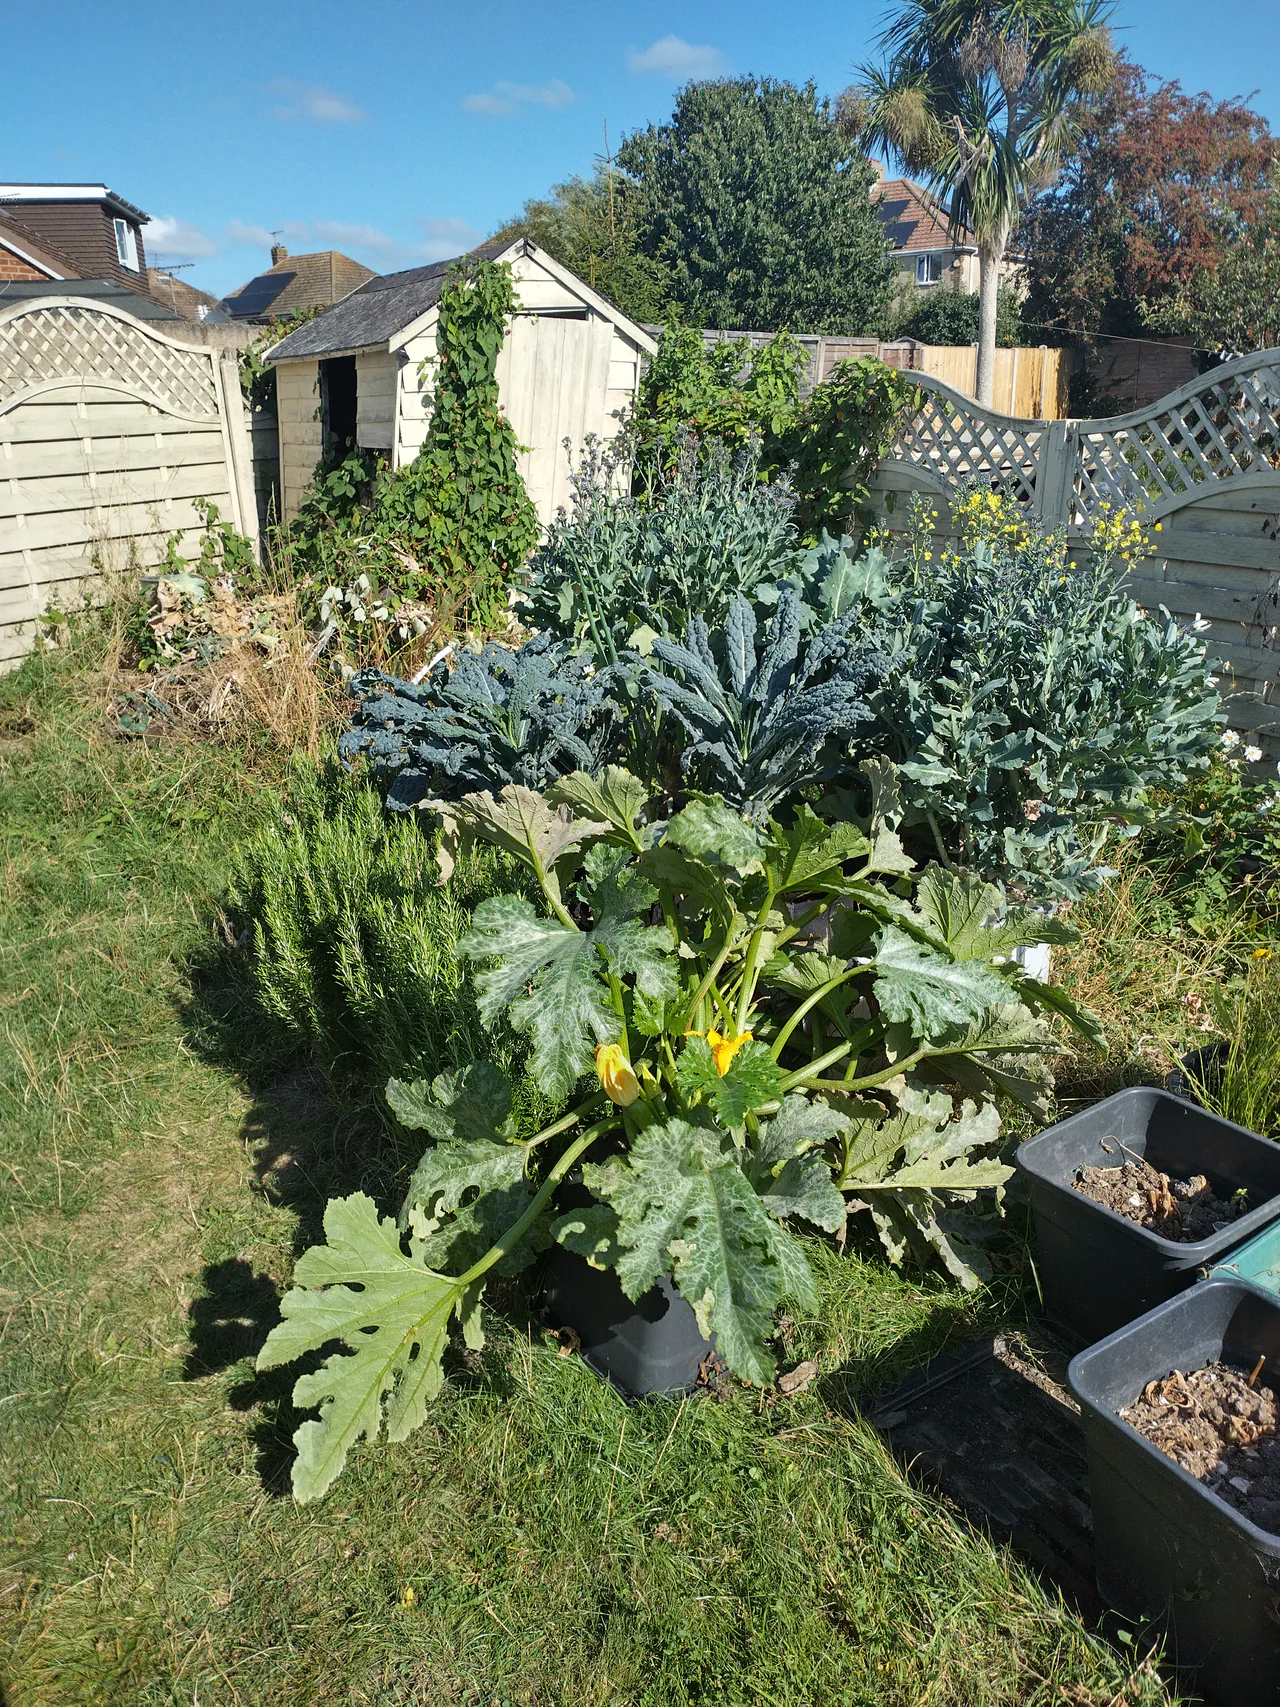
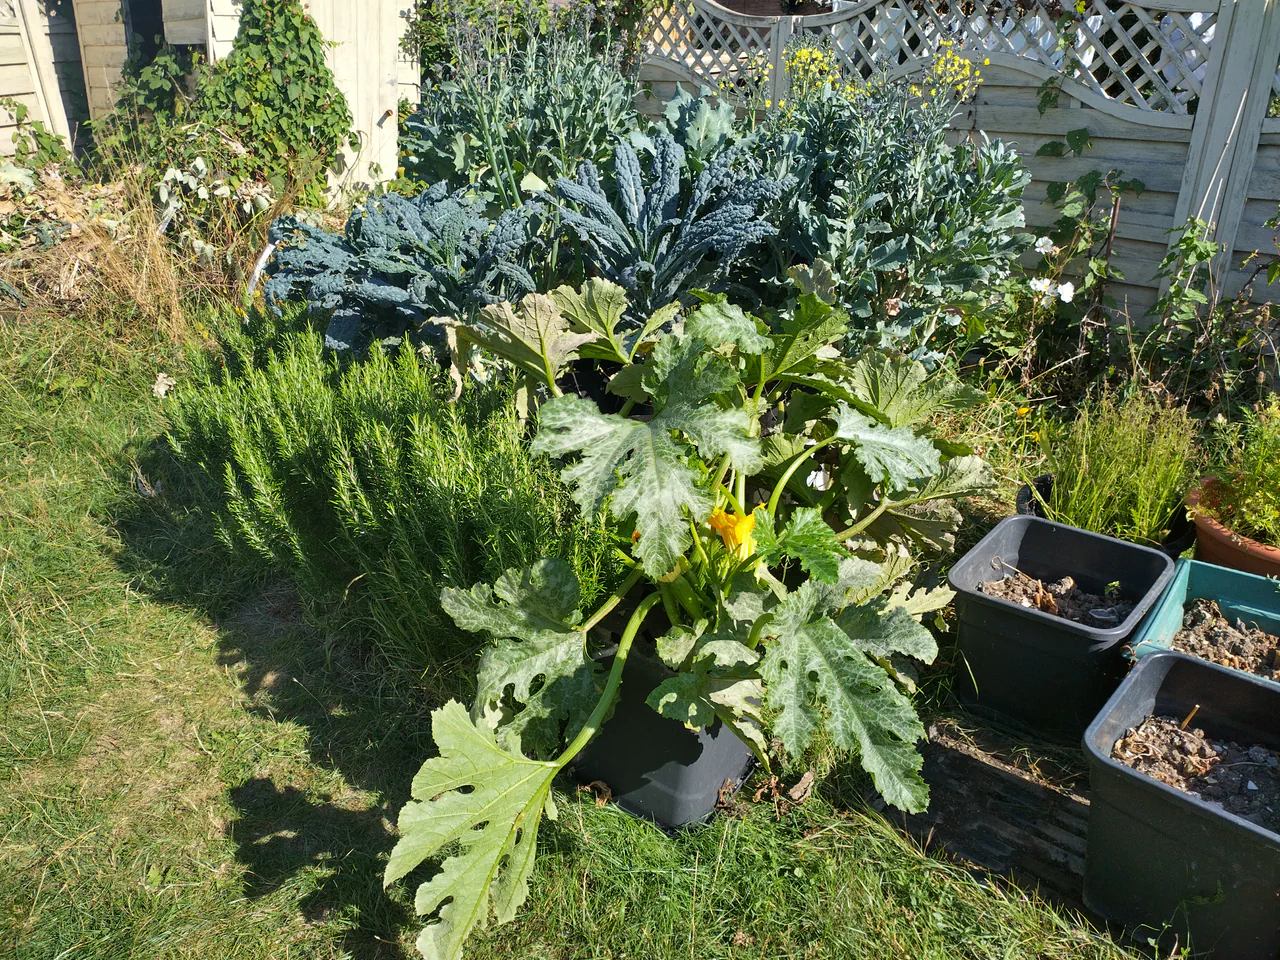
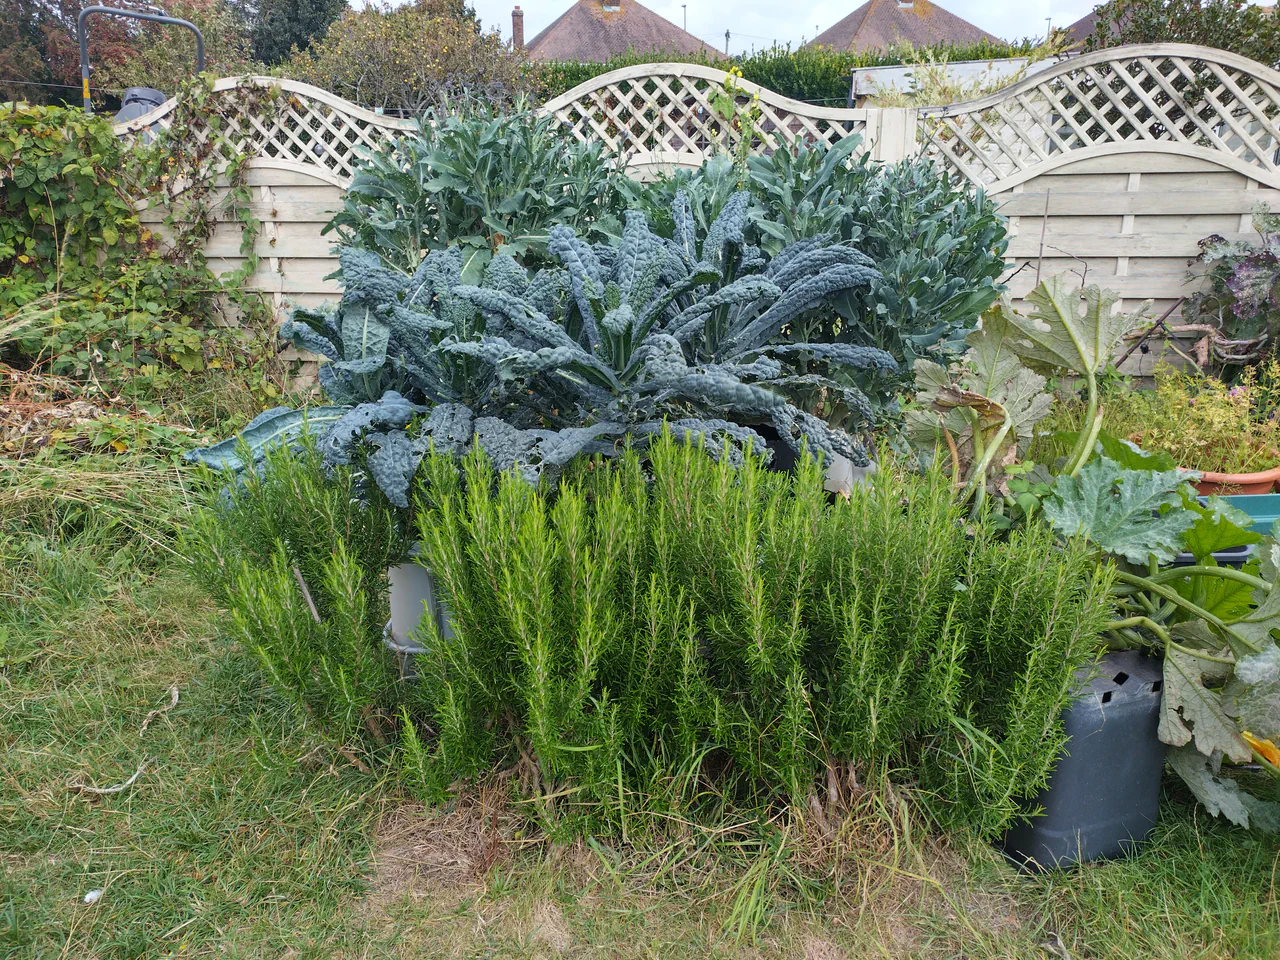
The transformation from April to August was dramatic. Small plug plants in bare gravel became an impenetrable mass of blue-green kale leaves, sprawling courgette foliage, and tall PSB shoots.
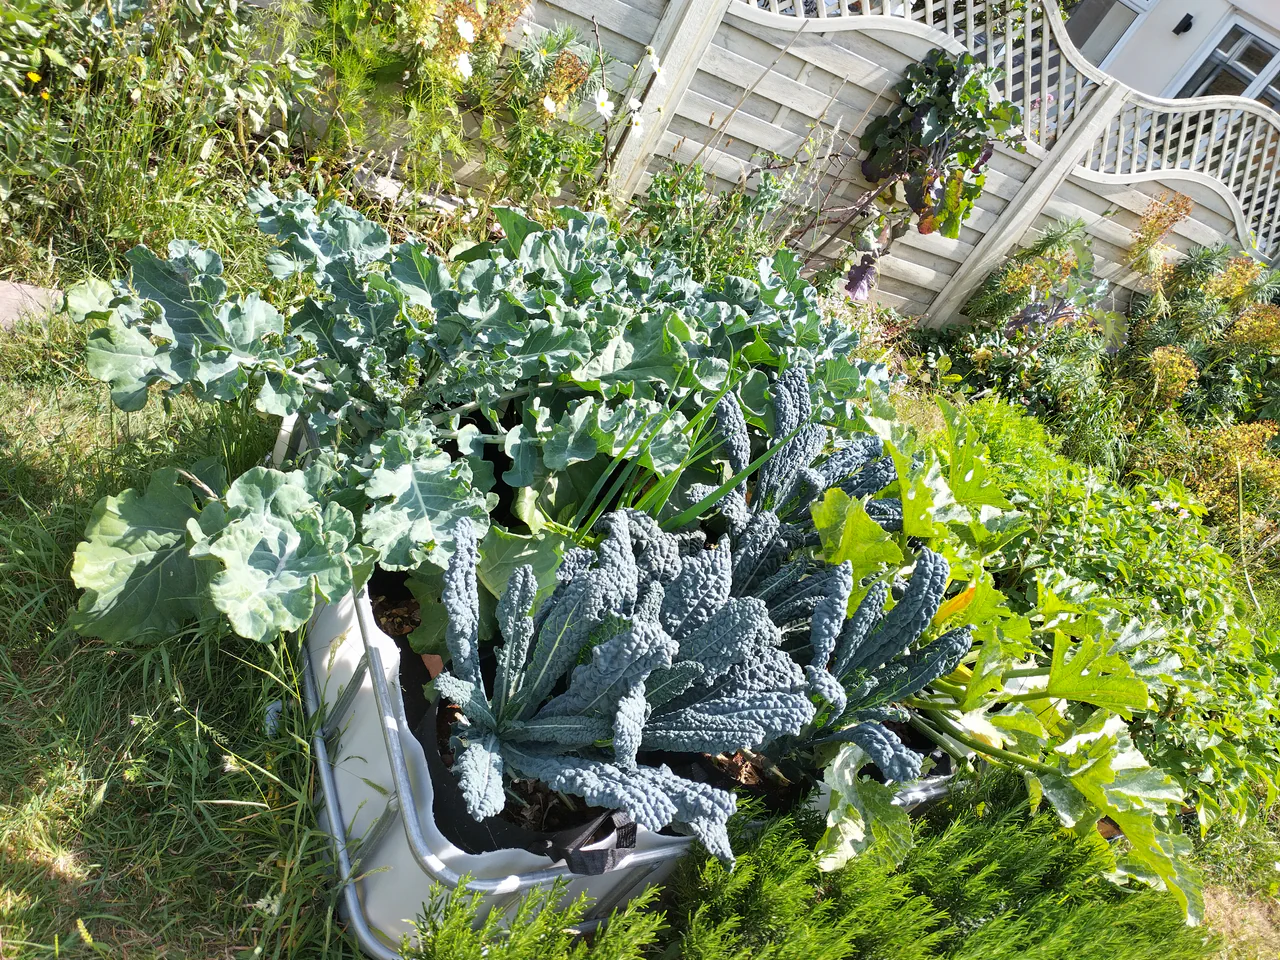
At least 20 courgettes from a single plant. Trug-fulls of purple sprouting broccoli. Kale every few days for months on end. The cavolo nero grew taller than the garden fence. The courgette was so vigorous it spread well beyond the bed and into the lawn.
These were probably the healthiest brassicas I have ever grown. Massive, consistently productive, and completely unbothered by the usual problems. Whether that is down to the hydroponic feeding, the consistent moisture, or just a good growing year is hard to say. But the results speak for themselves.
The Winter Survival Story
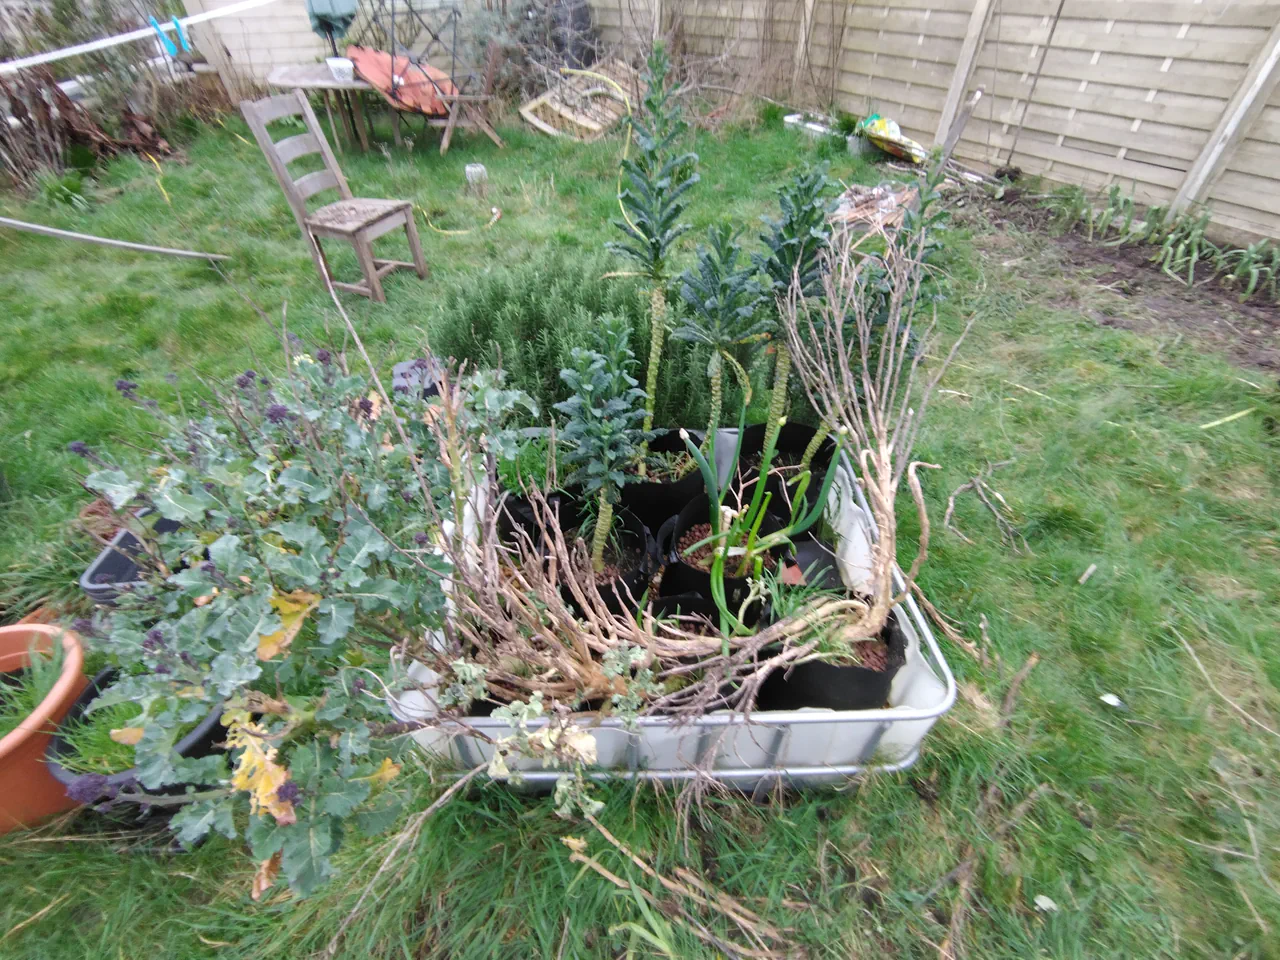
In November, the nutrient tank ran dry. The plan was to leave everything to die back over winter and clear the bed ready for the new season. That is not what happened.
It has been a rainy winter, and the rainwater alone was enough to keep the plants going. They did not seem bothered by the total lack of nutrients over the cold period.
Of the three purple sprouting broccoli plants, one died back. But two kept going, and in February produced a second crop of florets. The kale went to seed in March but was still producing harvestable leaves right up to that point. The spring onions were still there in late February, beginning to bolt.
What I'd Do Differently
Two things for next year.
Separate nutrient tanks. All the plants shared the same nutrient solution this year, which meant the kale was getting bloom-level nutrients it did not need. Next year: three separate tanks feeding three separate gravel beds, so leafy greens, fruiting plants, and brassicas each get nutrients matched to their actual requirements.
Wooden cladding. The raw IBC plastic is not pretty. Some simple timber cladding around the outside would make it look much better without affecting how it works.
Frequently Asked Questions
Can you grow brassicas hydroponically?
Yes, and they do exceptionally well. Kale, purple sprouting broccoli, and spring onions all thrived in this system. The cavolo nero kale grew taller than the garden fence. Brassicas are cold-hardy, which means the system keeps producing well into winter.
What is an IBC container?
An Intermediate Bulk Container. A large plastic tank in a metal cage frame, typically holding 1,000 litres. They are used industrially for transporting liquids and are widely available secondhand. Look for food-grade IBCs that have previously held food-safe liquids. Expect to pay £40-60 each on Facebook Marketplace or eBay.
What size fabric pots for hydroponics?
22-litre fabric pots worked perfectly in this system. They are large enough for brassicas and courgettes to reach full size, while fitting comfortably in the IBC bed. Fabric pots prevent root circling and allow side ventilation, producing healthier root systems than solid plastic pots.
Follow This System Into Year Two
Next season: three separate nutrient tanks, three gravel beds, and nutrients tailored to each crop type. The Glut is where I'll share the build, the data, and what I cook with the harvest.
No spam. Unsubscribe at any time.
Grew this? Cook this
Related Content
DIY Gutter Grow Hydroponic Tomato Wall
The other half of the IBC setup. Shares the same nutrient tank, the same infrastructure, and produced 25kg+ of cherry tomatoes.
Build a £20 Wicking Planter from Tesco
The beginner entry point to passive hydroponics. Same wicking principle, smaller scale, under £20.
Babbington Leeks: Plant Once, Harvest Forever
Perennial alliums that never need replanting. If you liked the spring onions in this bed, these are the next step.