A £20 hydroponic system. Four items from Tesco, a few bits you probably already have at home, and an afternoon. No pump, no electricity, no timer, no garden. A south-facing balcony, patio, or doorstep is all you need.
I built this because I wanted a growing system that anyone could replicate. The tomato wall is brilliant, but it is a serious build. The NFT herb wall needs gutters, a pump, and a bit of plumbing confidence. This planter needs a pot, a trough, some rope, and a Sharpie. It is where everyone starts.
The whole thing was built in one afternoon. The design is simple enough that you could improvise most of it, but I have documented every step so you do not have to guess. If you can hold a marker pen and use a Stanley knife, you can build this.
How Wicking Hydroponics Works
Water sits in the trough underneath the pot. That is your reservoir. Lengths of absorbent rope run from the reservoir up through the growing medium. Capillary action draws water upward through the rope, keeping the coir consistently moist. The roots find that moisture and help themselves. Same principle as a paraffin lamp wick, just with water instead of fuel.
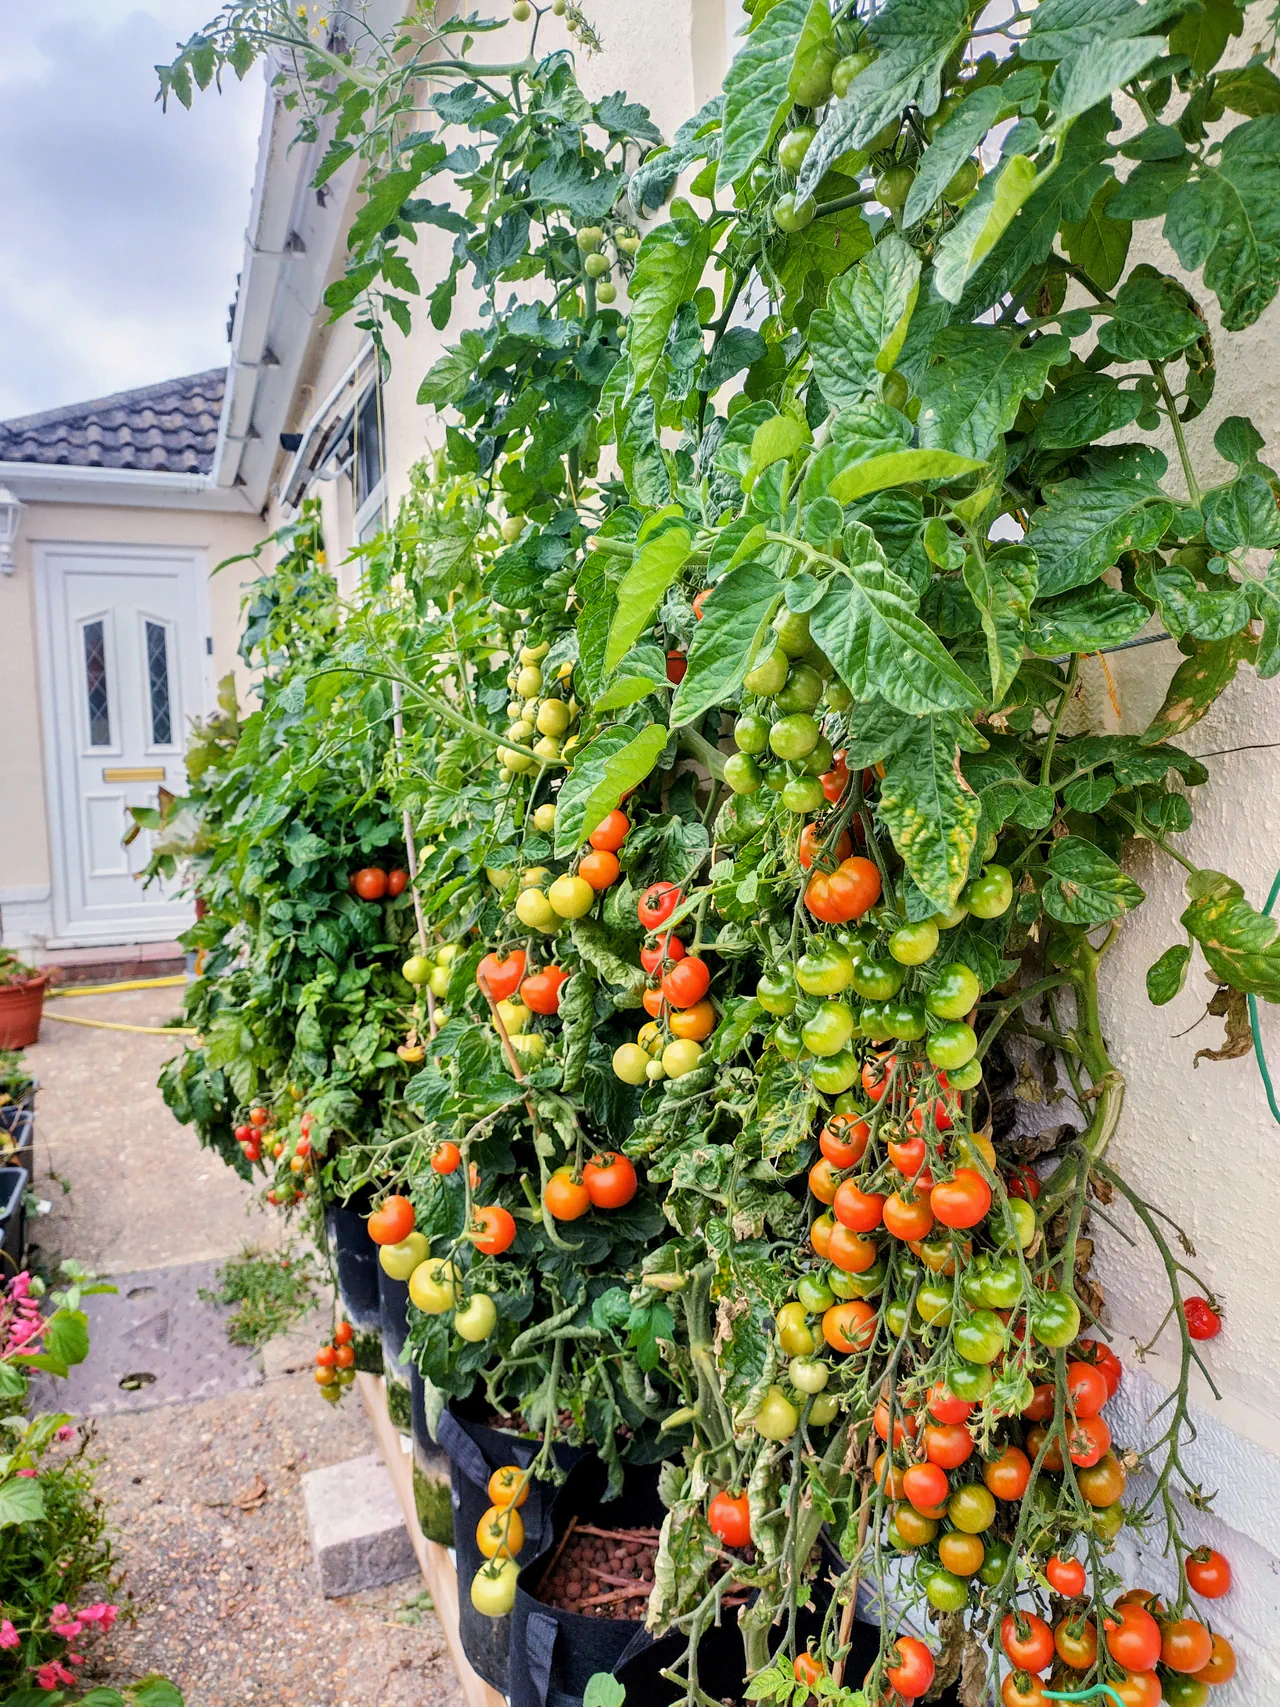
No moving parts, no electricity, no noise. You fill the trough, physics does the rest. For a much larger version of this principle (with rain gutters, fabric pots, and a 400-litre tank), see the hydroponic tomato wall guide.
What You'll Need
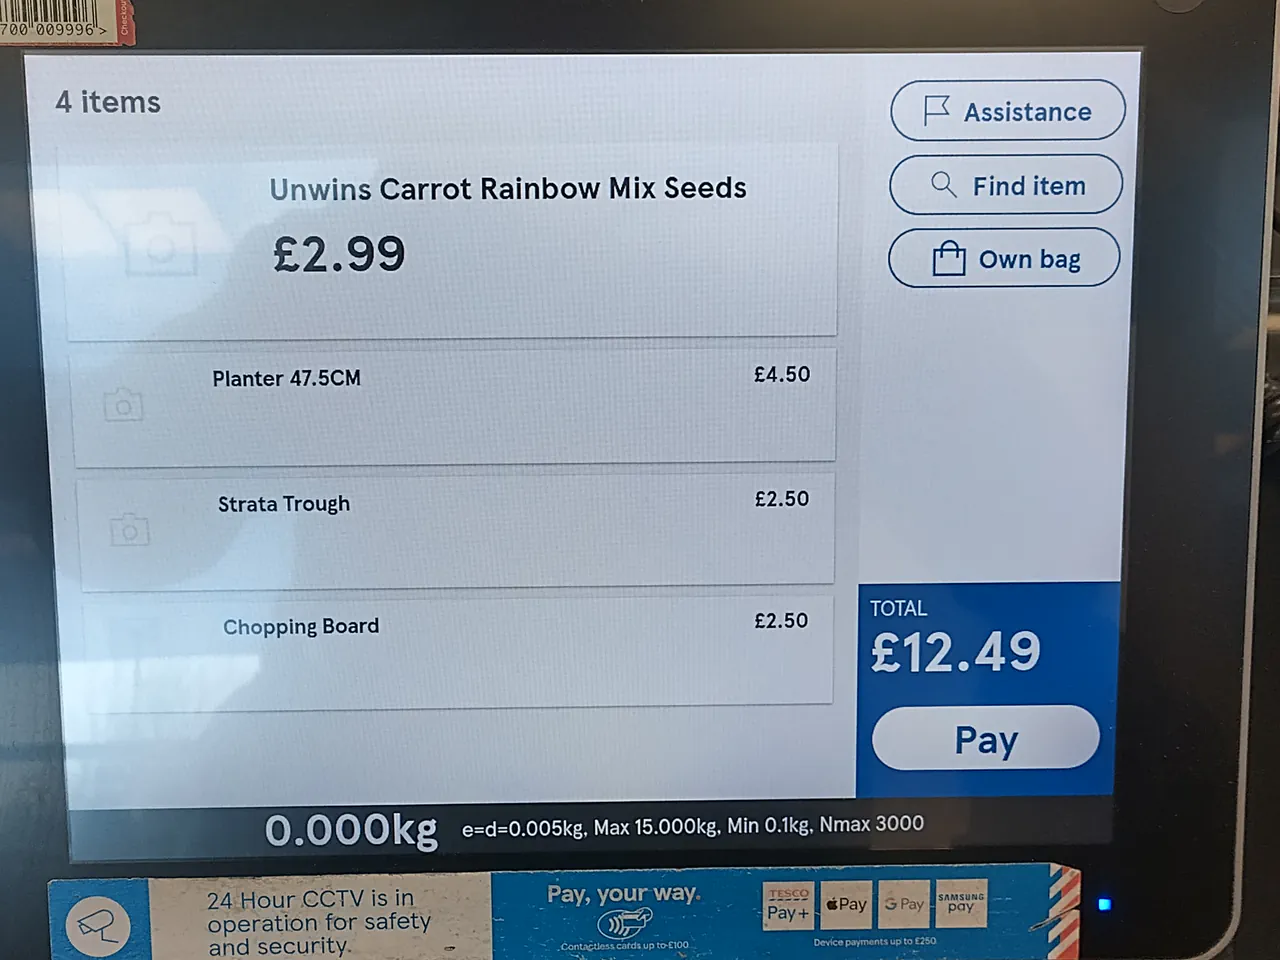
From Tesco (£12.49)
| Item | Cost |
|---|---|
| Unwins Carrot Rainbow Mix Seeds | £2.99 |
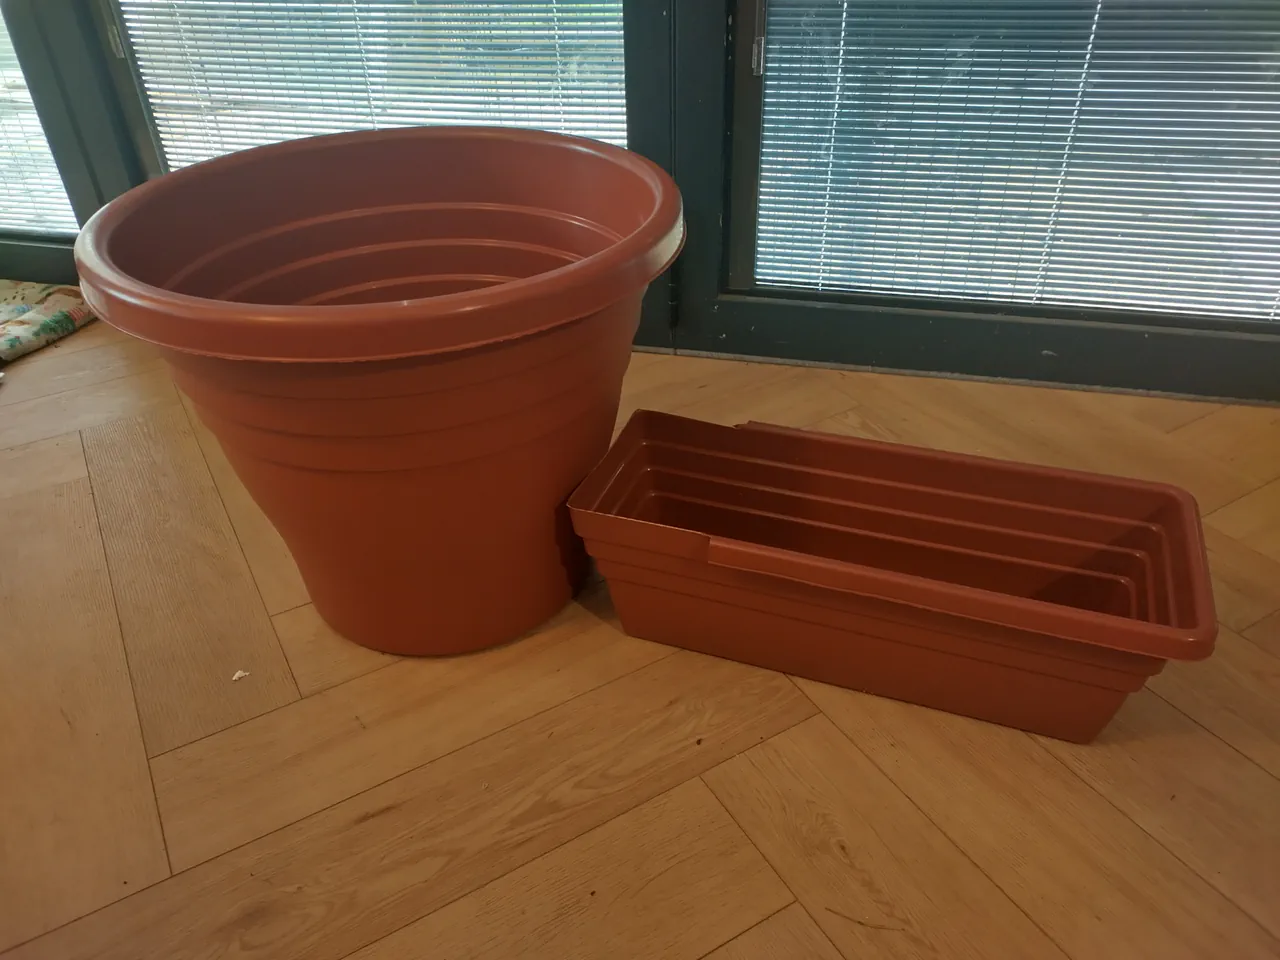
| Planter 47.5cm (Strata Ascot) | £4.50 |
| Strata Trough | £2.50 |
| Nylon Chopping Board | £2.50 |
| Tesco total | £12.49 |
Additional Materials
- 4 metres of wicking rope, cut into four 1-metre lengths
- Short length of 22mm PVC pipe (protects the wicks at the base of the pot and prevents crushing)
- Small bag of 10mm gravel (or sand) for the base layer
- Coco coir, new or reused from a previous grow
- Masking tape for marking and tidying cut lines
- Superglue and a pinch of bicarbonate of soda for reinforcing joints
- Piece of tile backer board (or cardboard, slate, anything opaque) to block light from the reservoir
Full Cost Breakdown
| Item | Estimated Cost |
|---|---|
| Tesco items (pot, trough, board, seeds) | £12.49 |
| Wicking rope (4m) | ~£2 |
| PVC pipe offcut | ~£1 |
| Gravel or sand (small bag) | ~£2–3 |
| Coco coir | ~£2–3 |
| All-in total | ~£20 |
Under £20 all-in, potentially under £15 if you already have gravel and coir from a previous grow. You probably have the masking tape, superglue, and baking soda already.
Step-by-Step Build
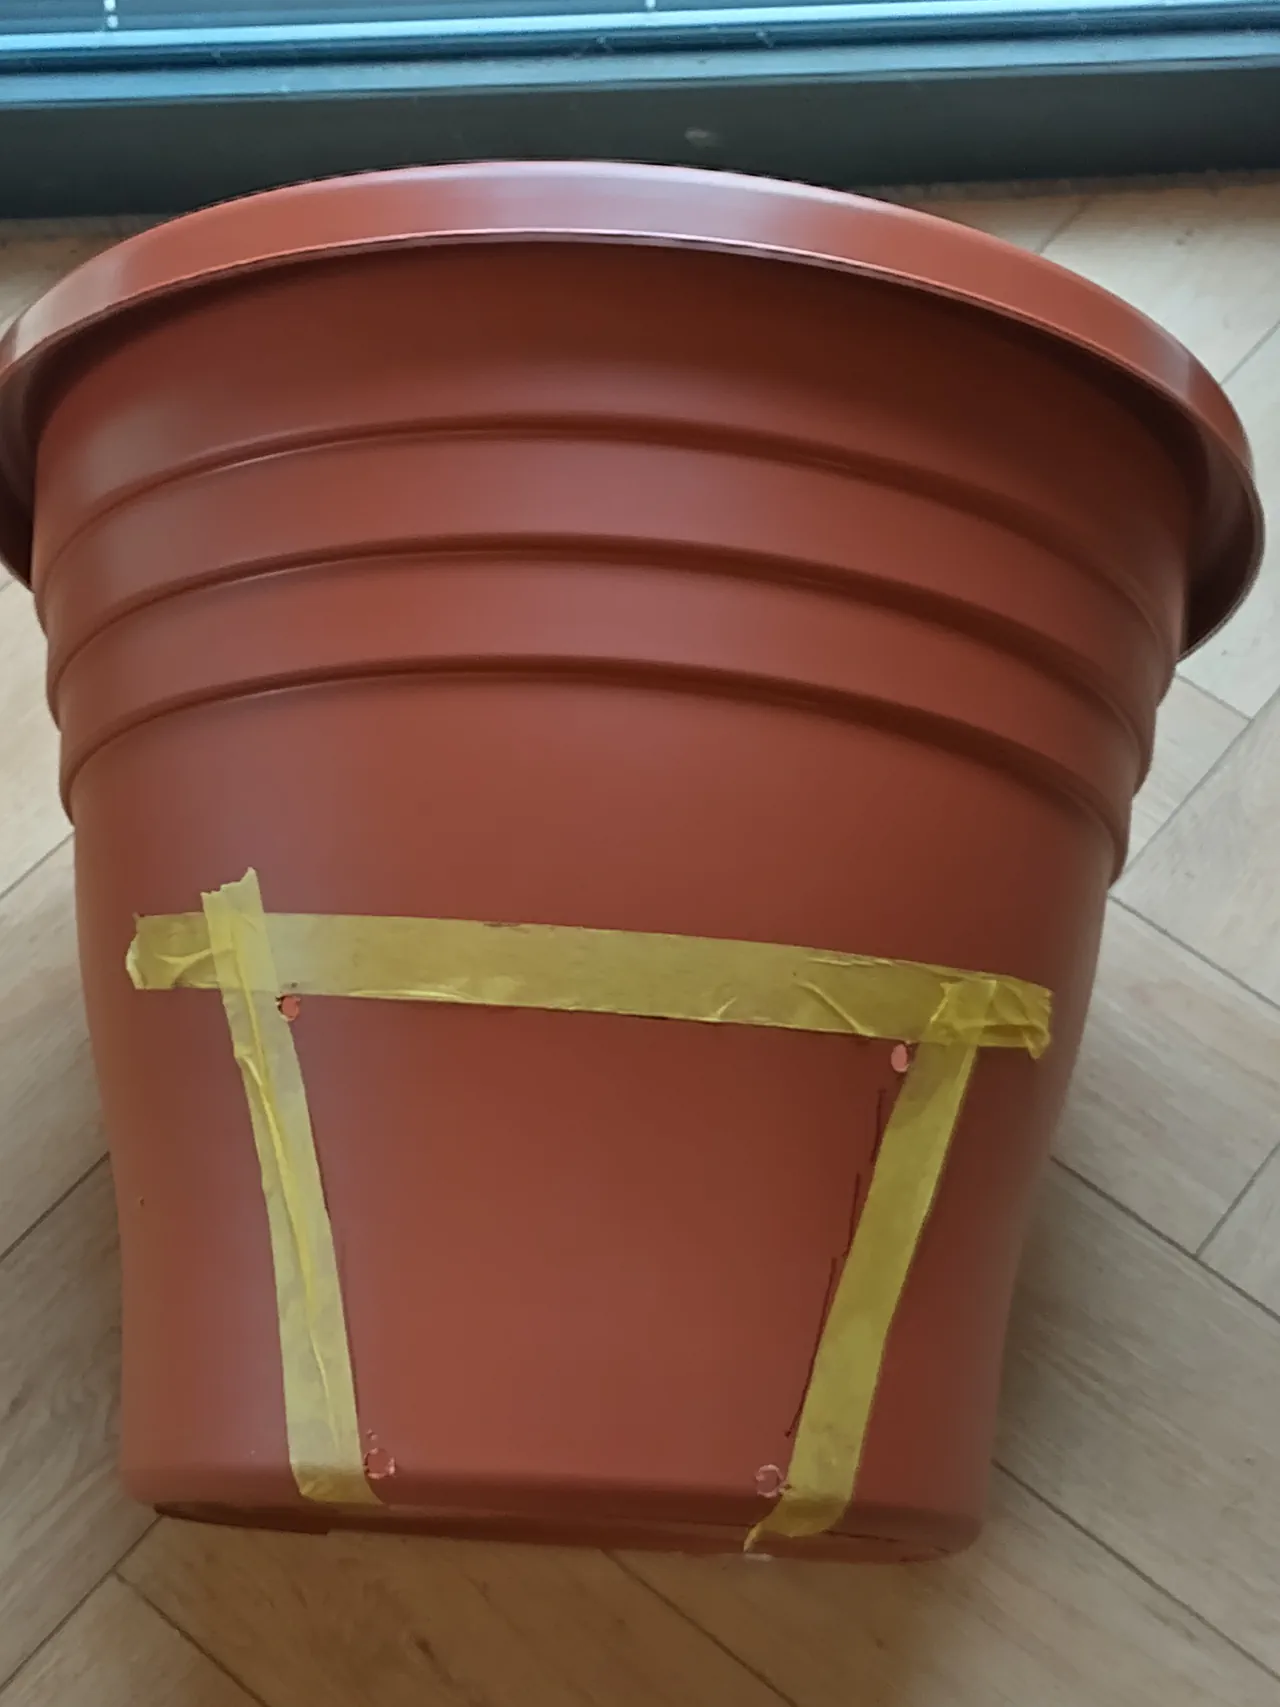
1. Mark the Trough Hole
Place the pot and trough side by side on a flat surface. Hold a Sharpie horizontally and run it up the side of the trough while drawing on the pot. This is the key insight: both the pot and trough are angled, tapering inward from top to bottom. You cannot just hold one against the other and trace around it. Do it flat, let the Sharpie bridge the gap, and the angles cancel out.
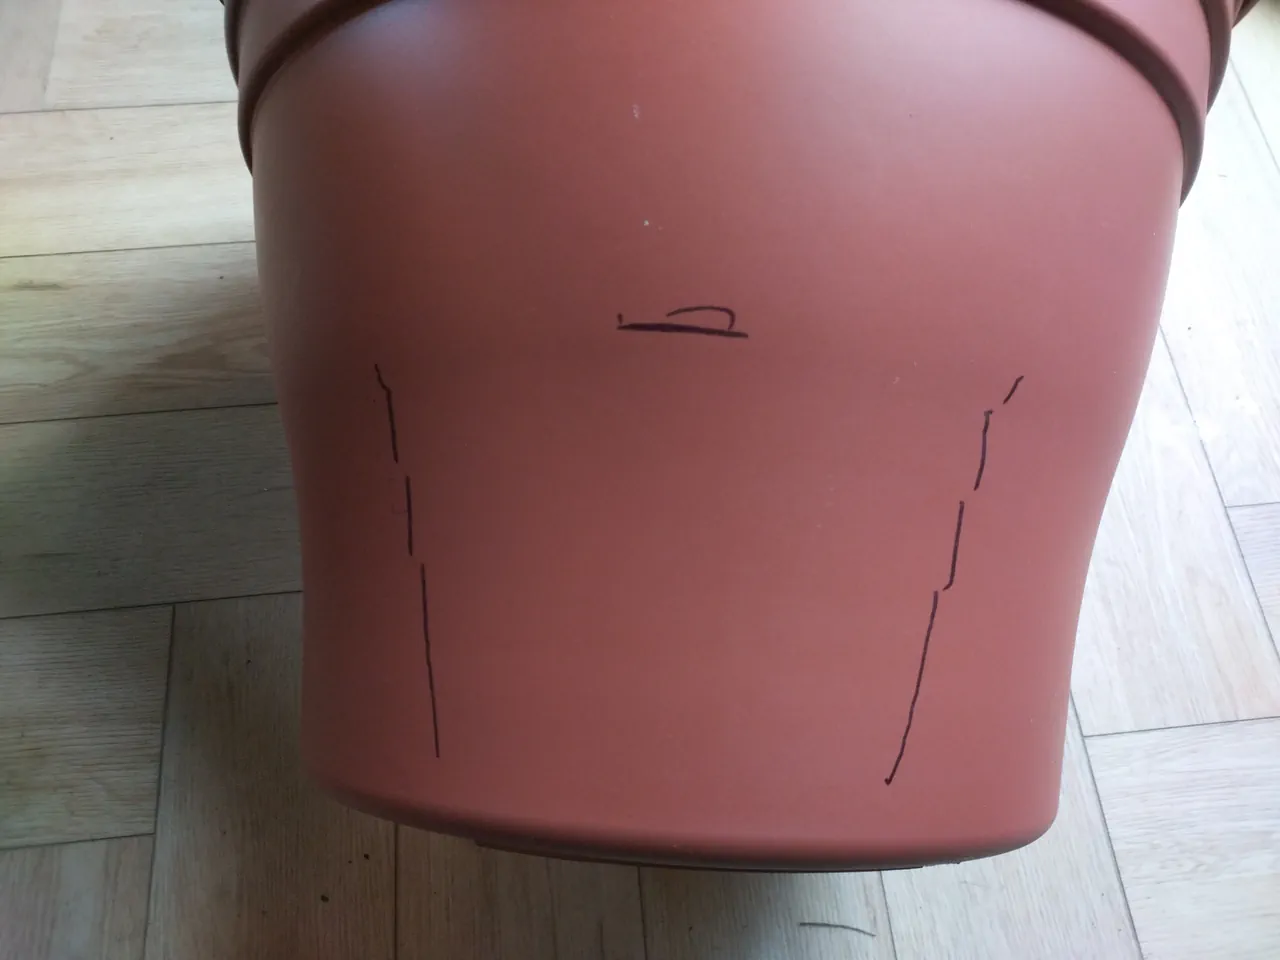
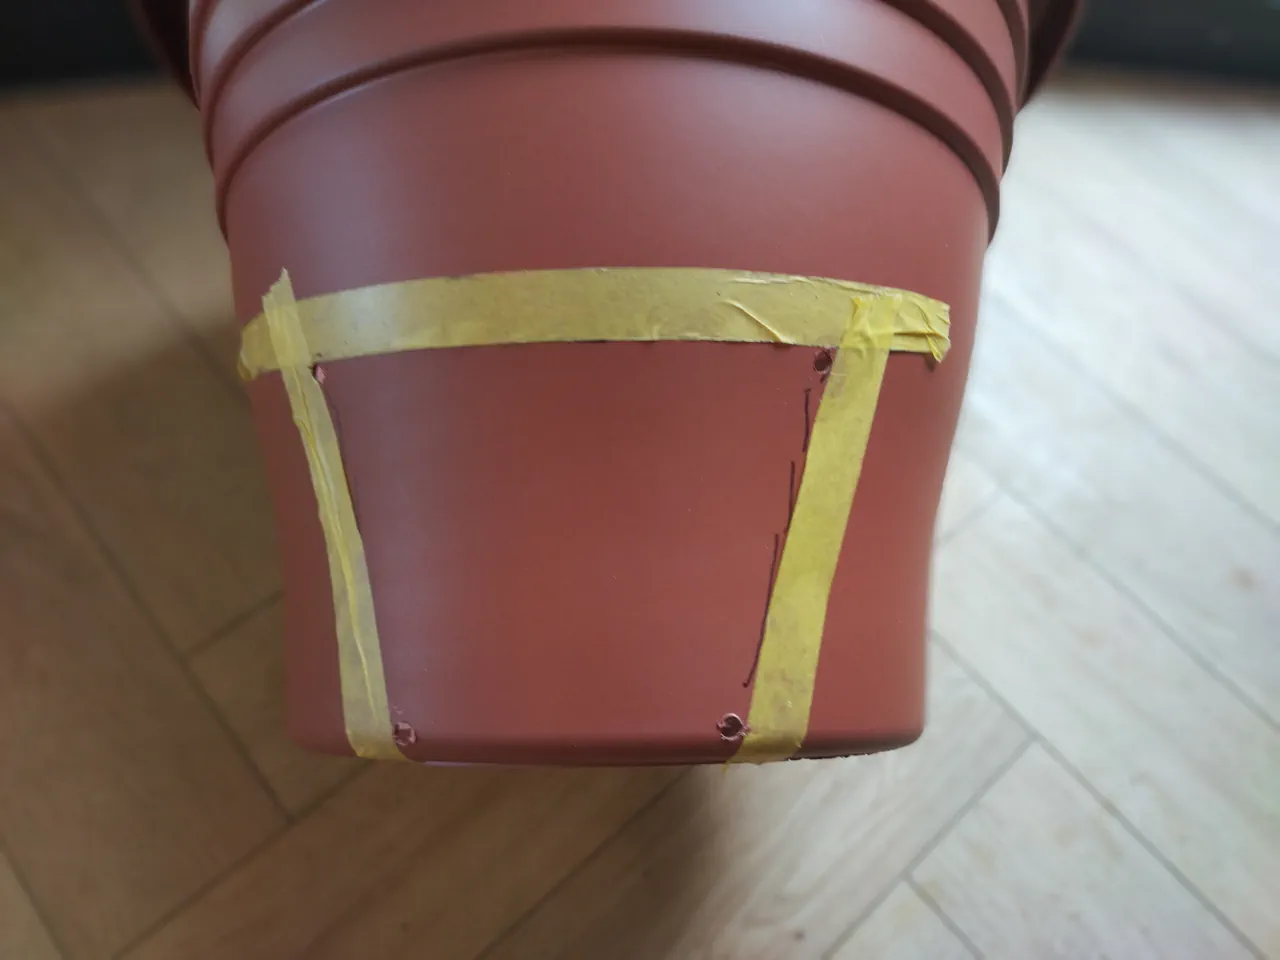
Once you have the outline, lay masking tape along the cut lines. This tidies up the edges and gives you a cleaner line to follow when cutting.
One small confession: I did not account for the width of the Sharpie nib, so the hole ended up fractionally too wide on the first attempt. It does not affect function at all, but it is worth knowing. Draw to the inside edge of the nib if you want a snug fit.
2. Drill the Corners
Before cutting, drill a small hole in each corner of the marked rectangle. This prevents cracks from propagating when you cut the sharp corners. Plastic wants to split along straight edges, and a round hole at each corner gives the stress somewhere to go.
I did the first two holes by hand with just a drill bit (no drill) to prove it is possible with truly basic tools. It worked fine. Slower, but fine.
3. Cut the Hole
A Stanley knife is better than scissors for this. Scissors risk splitting the plastic along the cut line, which is exactly what you are trying to avoid. A multitool with a small saw blade is easiest of all. But the point is: you can do this with basic tools. Score along the tape line, press harder on the second pass, and the plastic gives way cleanly.
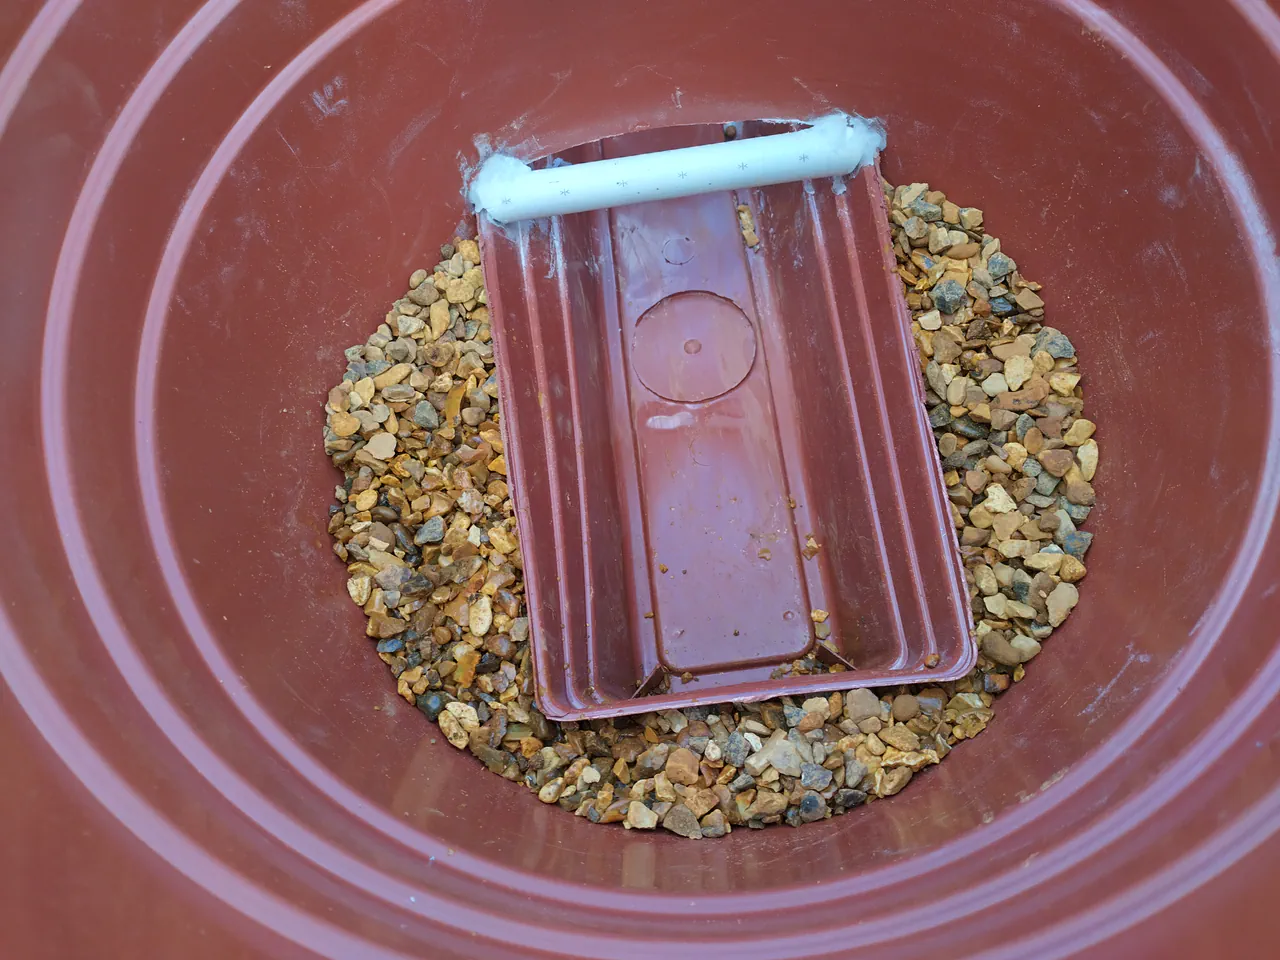
4. Trim the Trough
Cut down the trough to the first ridge line. This maximises the depth available in the pot for root vegetables like carrots. The ridge lines on the trough are convenient cutting guides built right into the plastic.
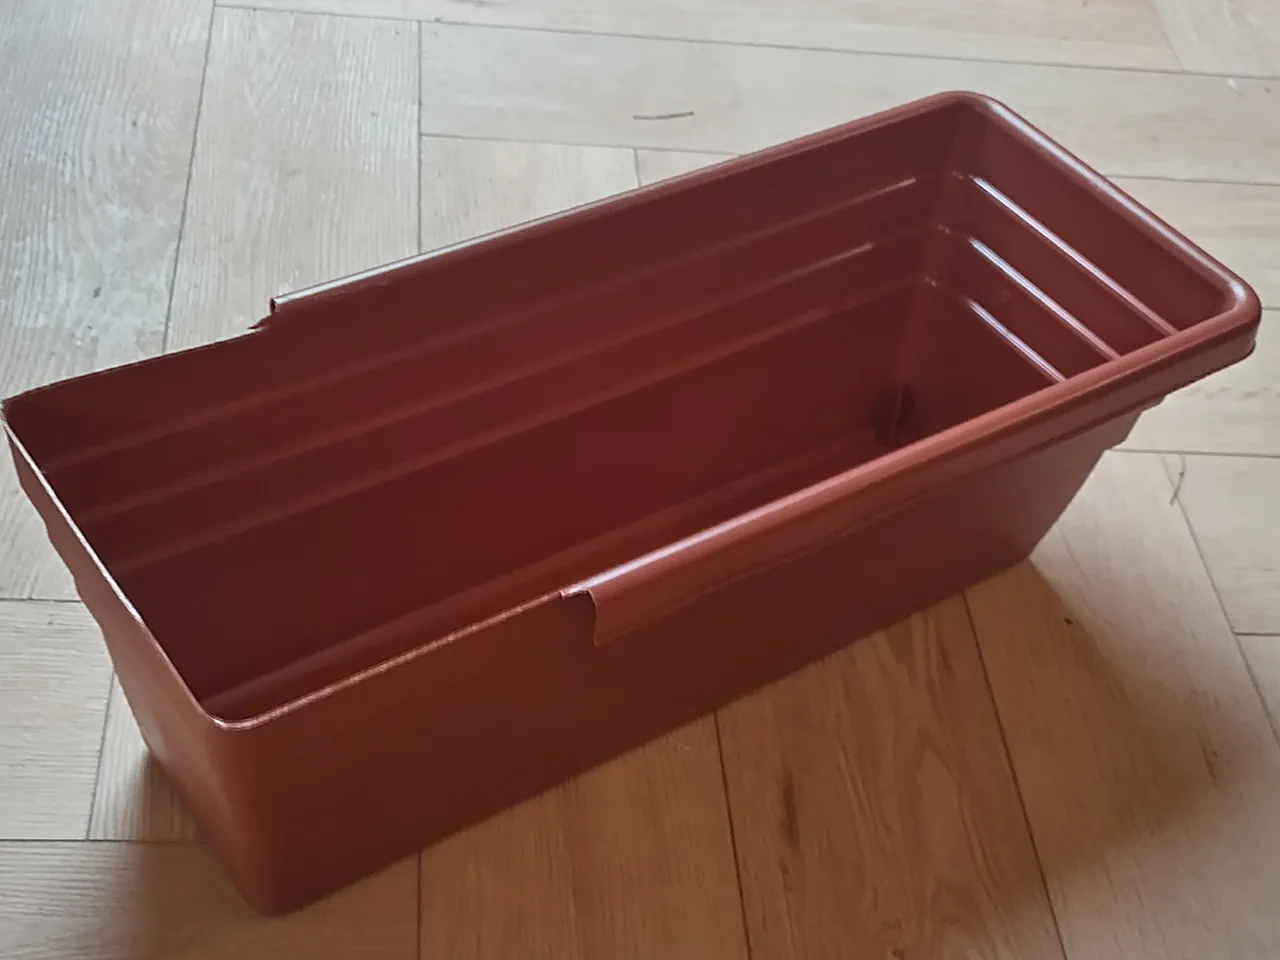
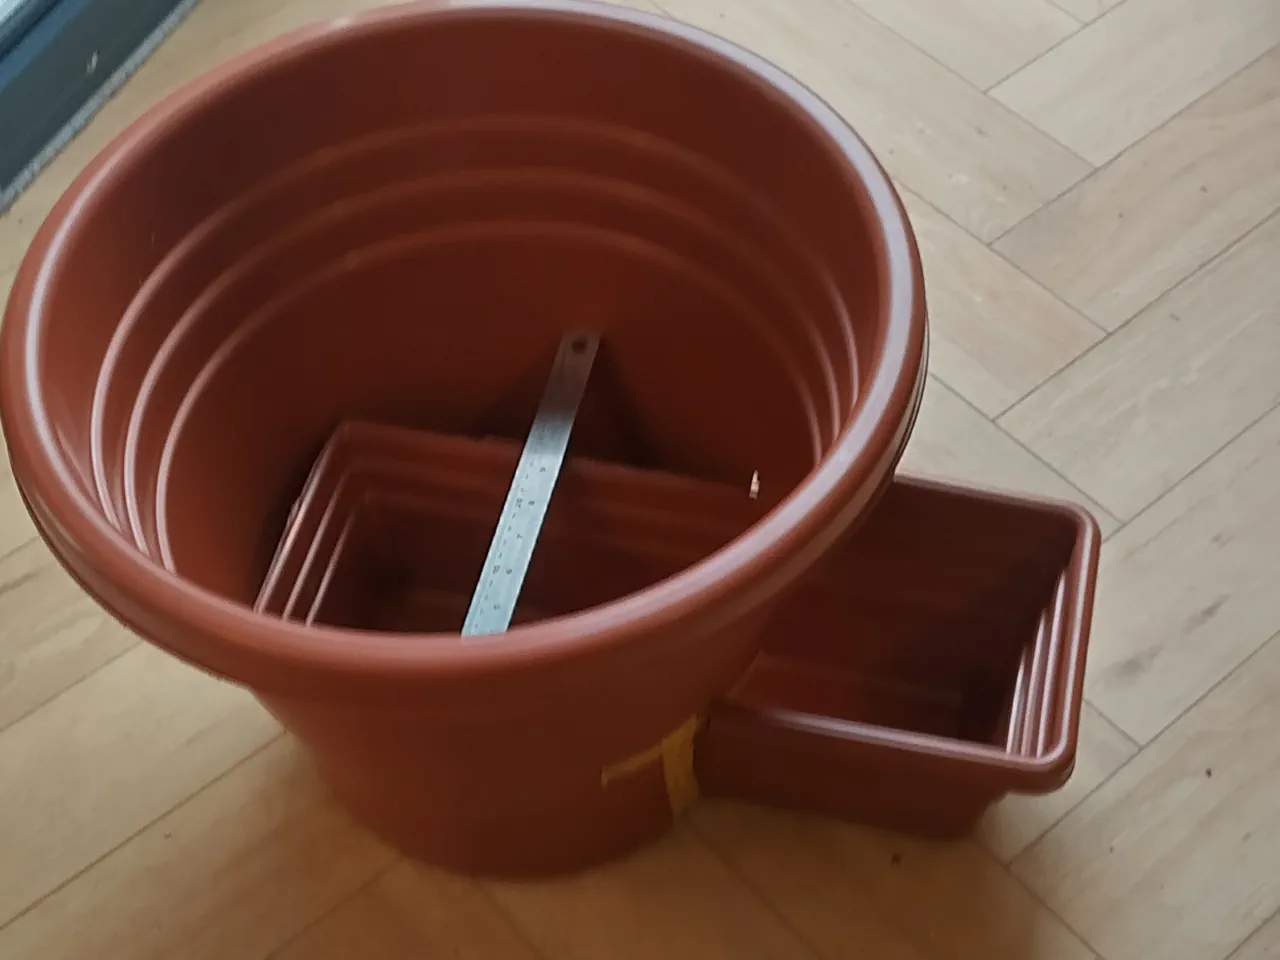
Slide the trimmed trough through the hole in the pot. If it does not quite go all the way in, trim a little more off the top edges until it sits fully inside.
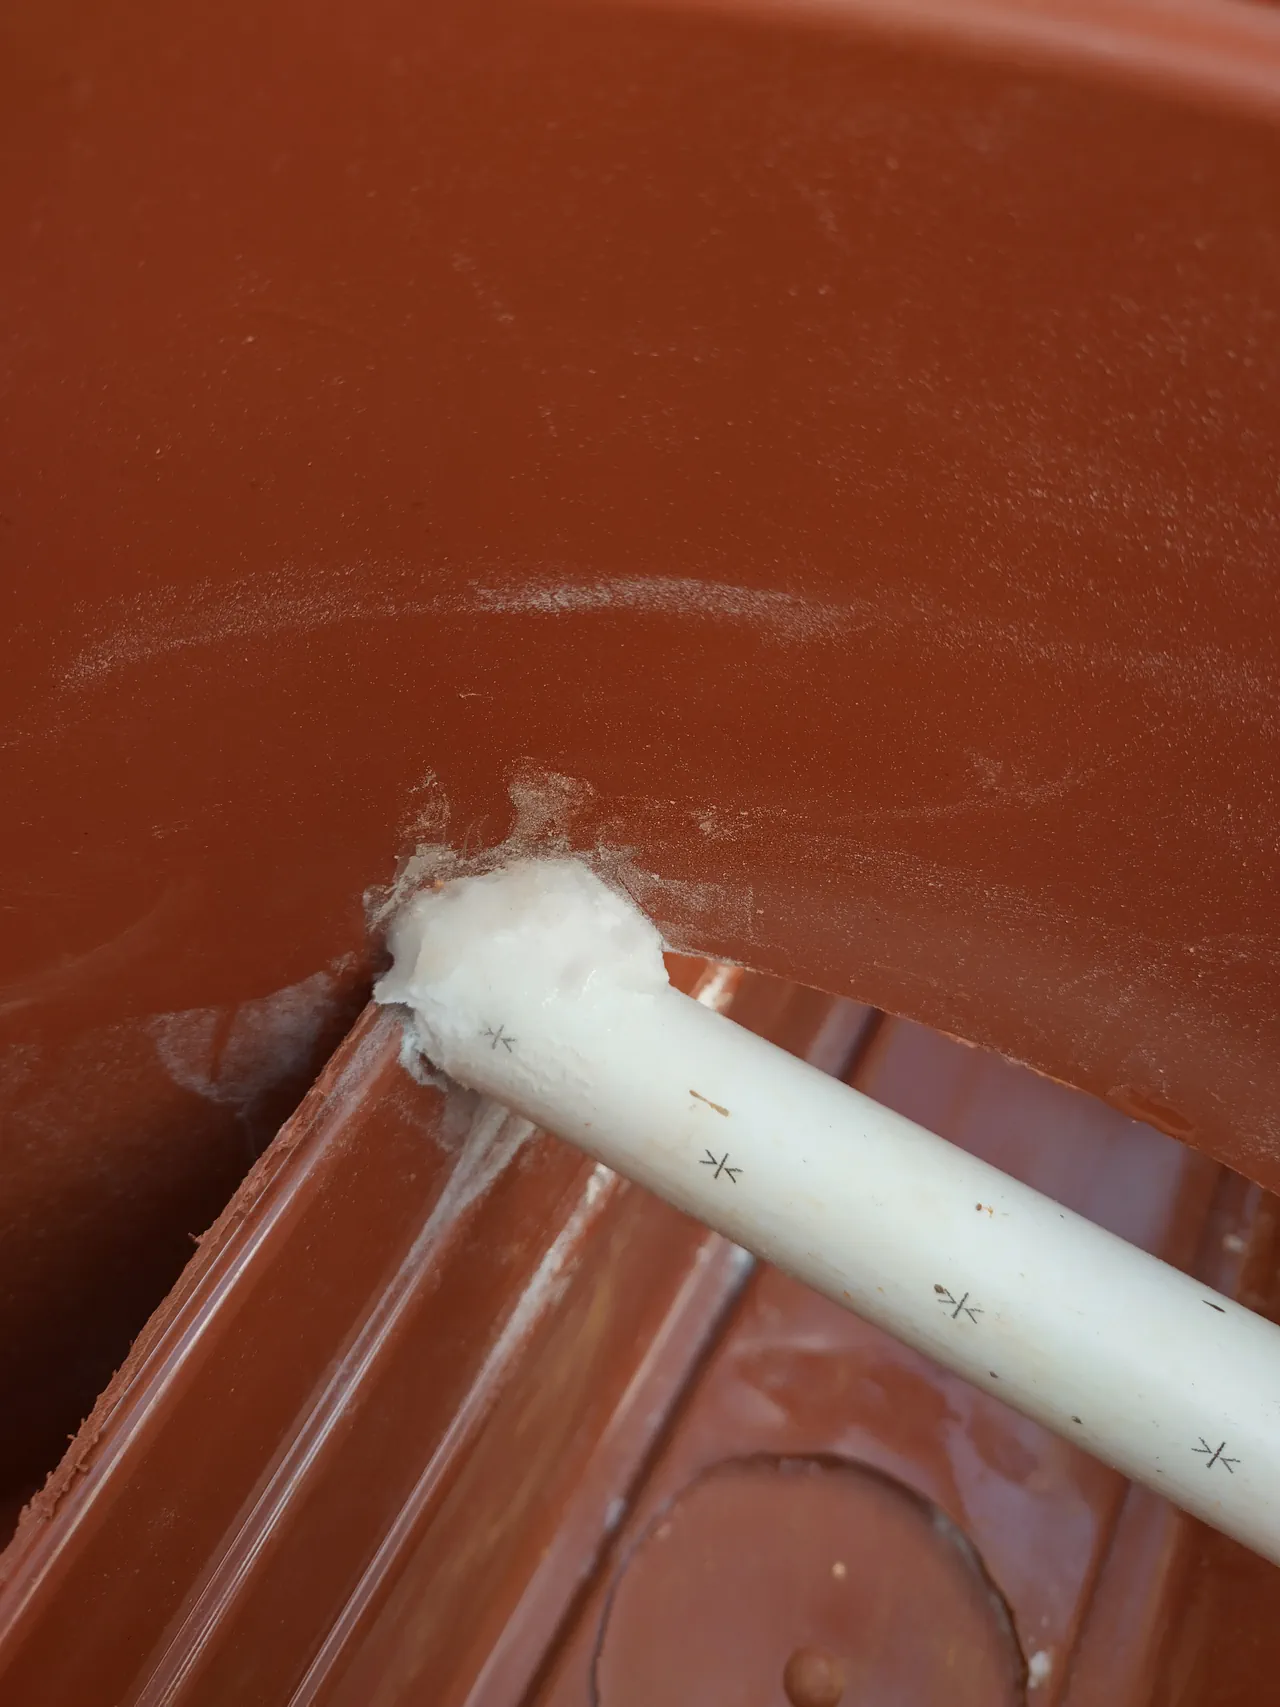
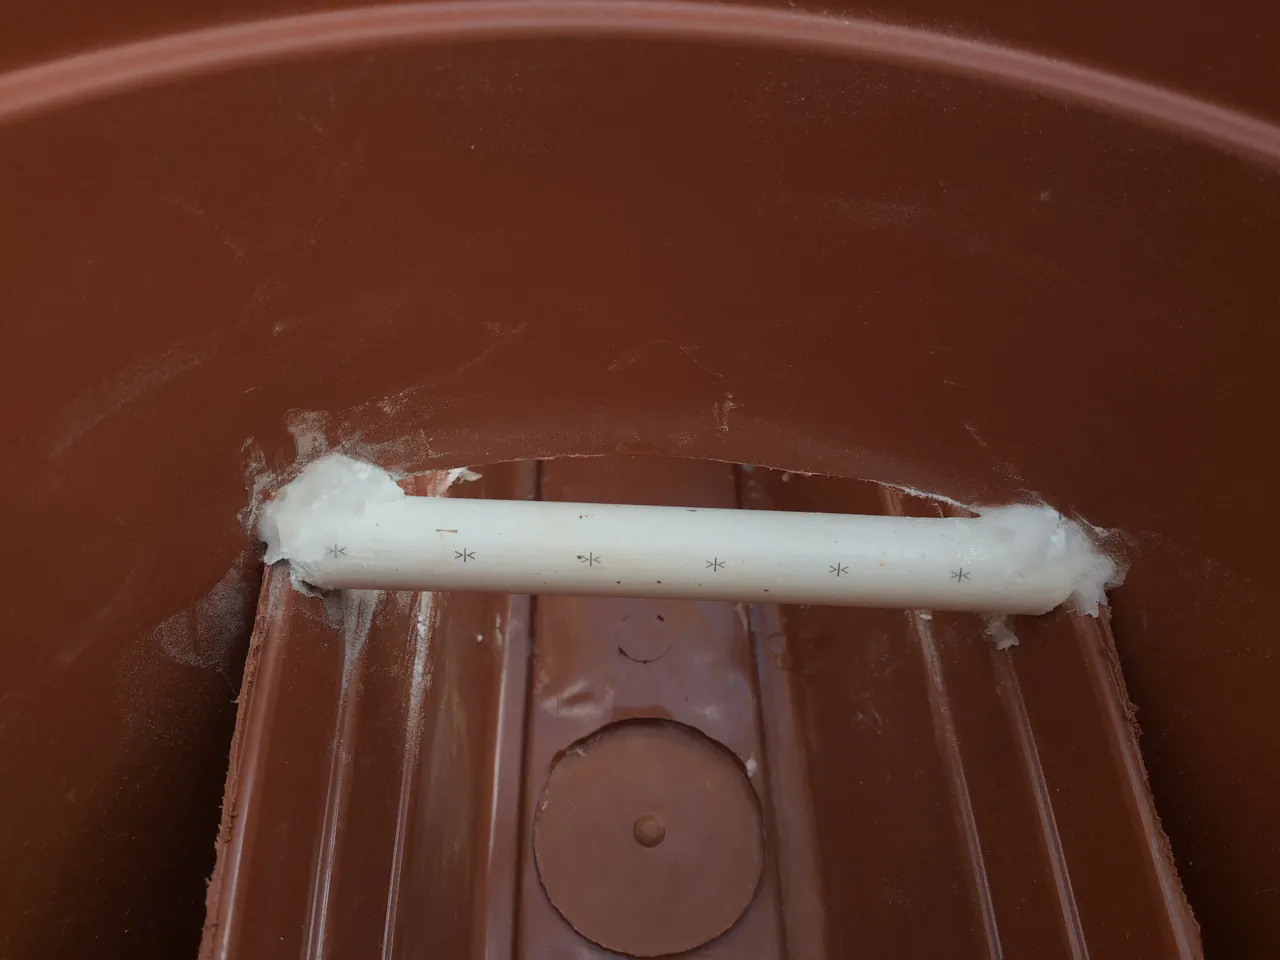
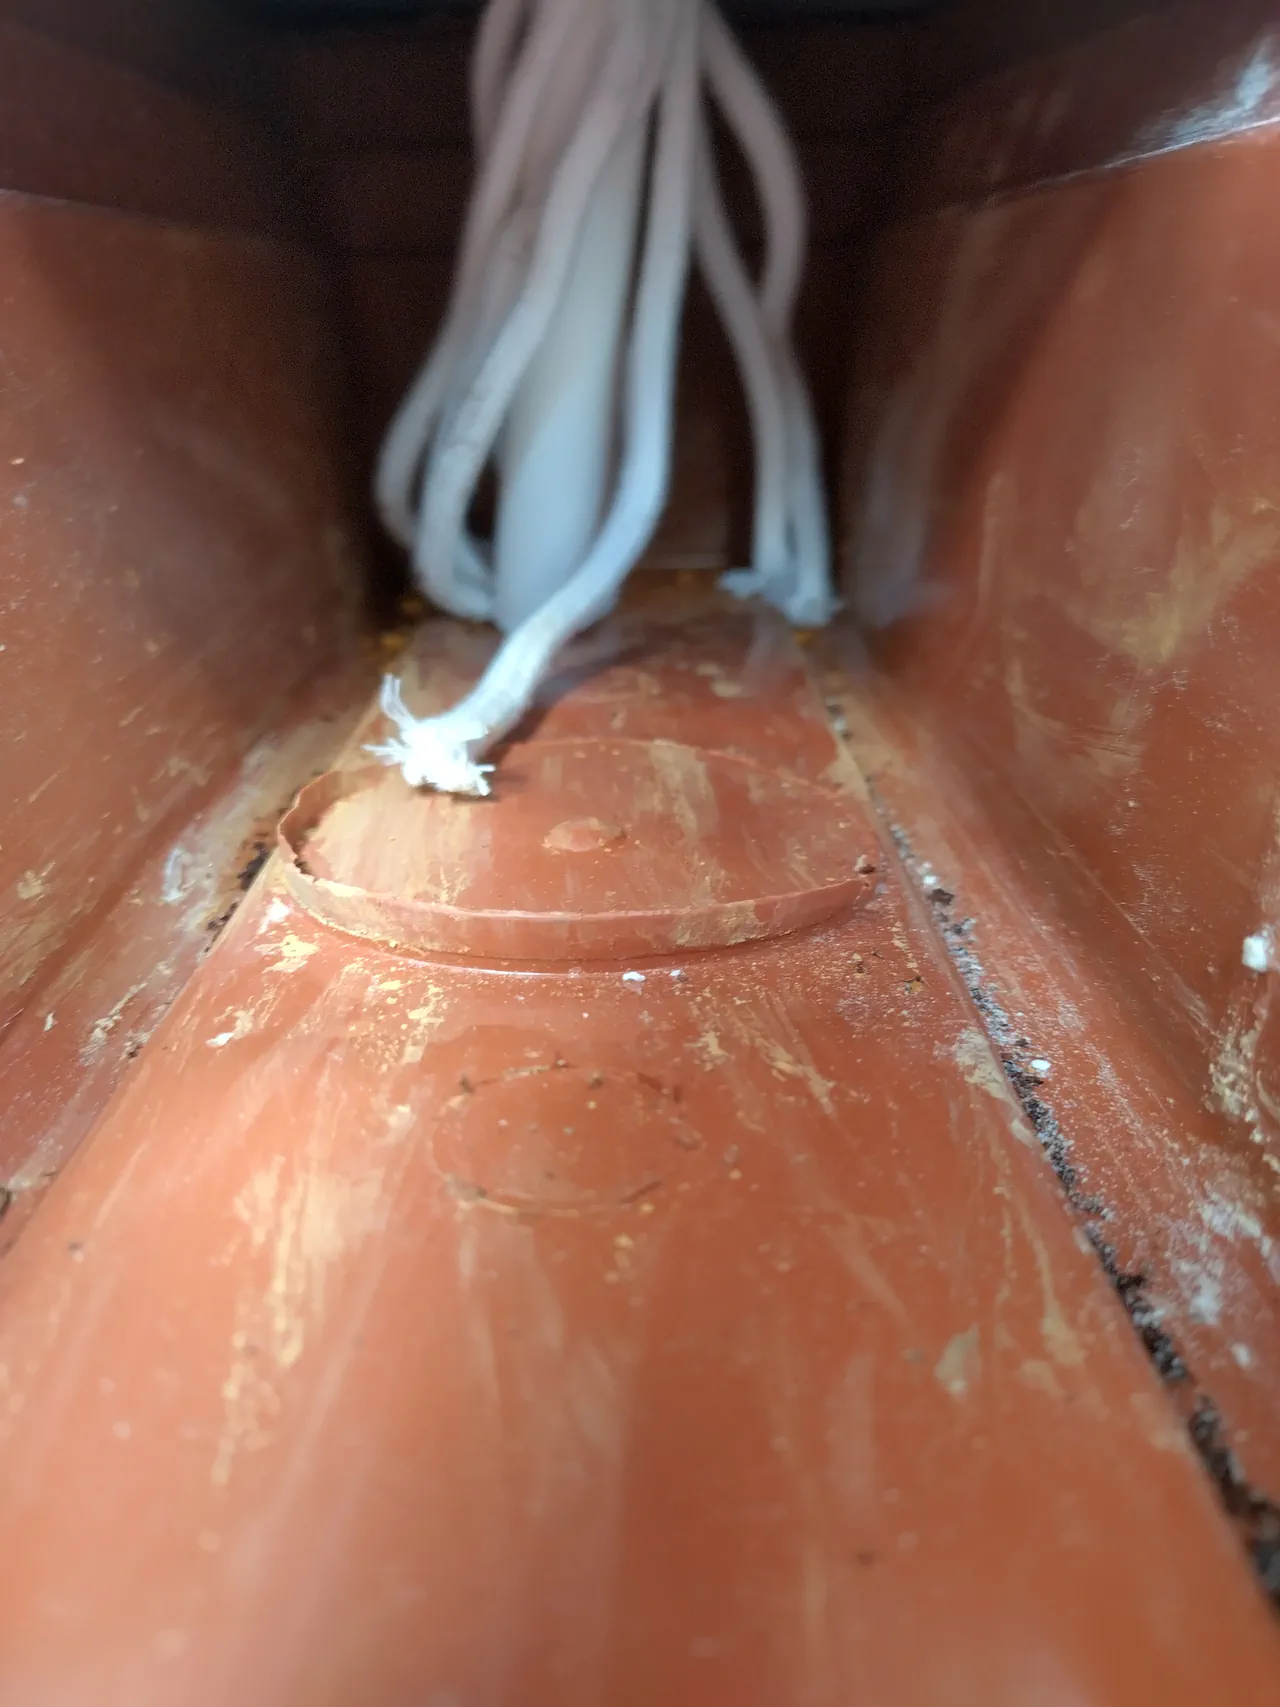
5. Reinforce the Trough Gap
Once the pot is filled with gravel and coir, there will be inward pressure on the trough at the opening where it passes through the pot wall. Without reinforcement, the sides can push together and restrict the water channel.
The fix is simple. Cut a small piece of PVC pipe with slightly angled edges and wedge it across the trough gap. Superglue it in place. Then the baking soda trick: sprinkle bicarbonate of soda generously over the joint, then drop superglue onto it. It sets into a hard, waterproof cement almost instantly.
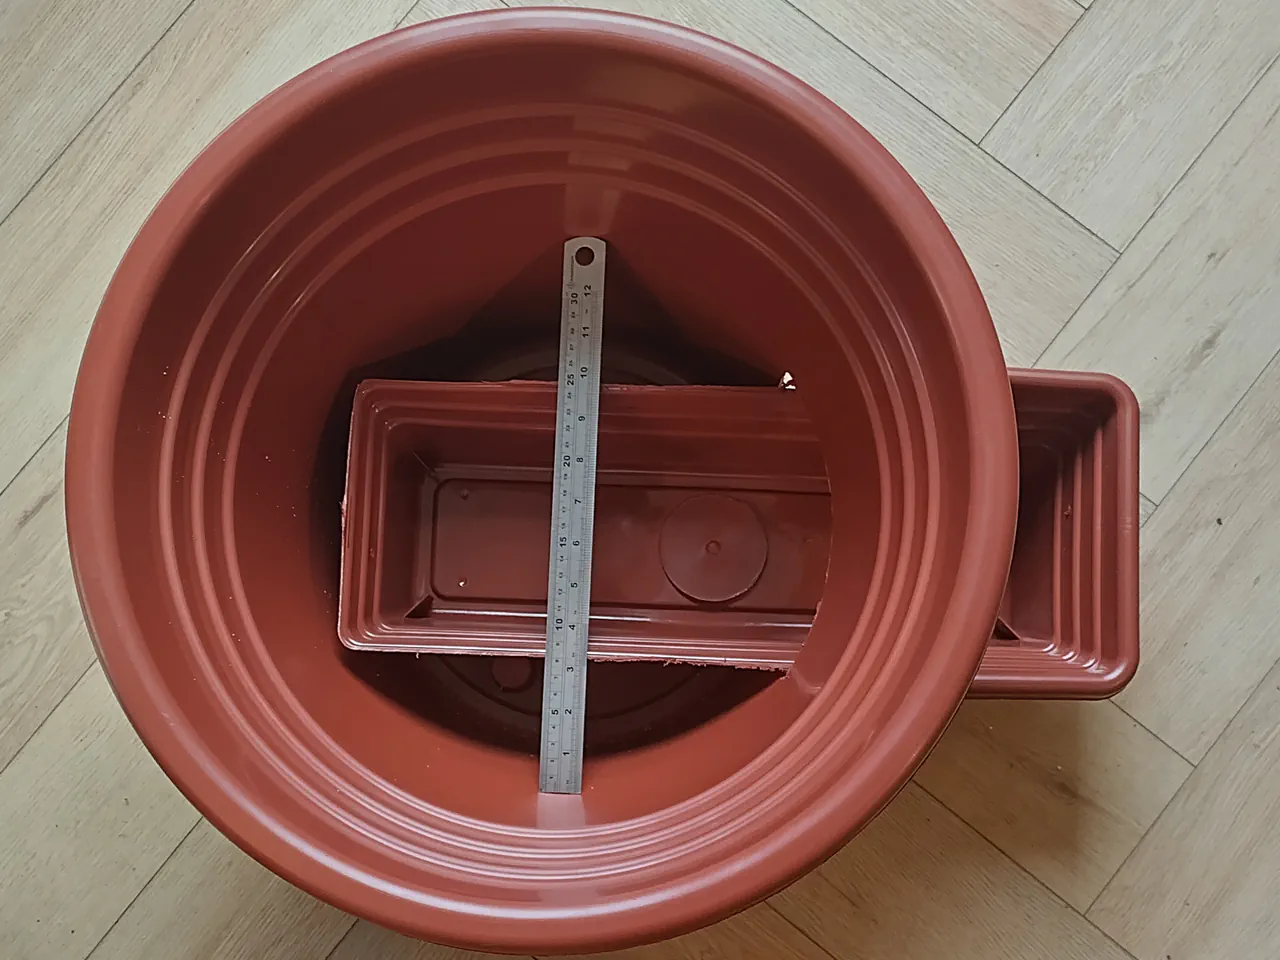
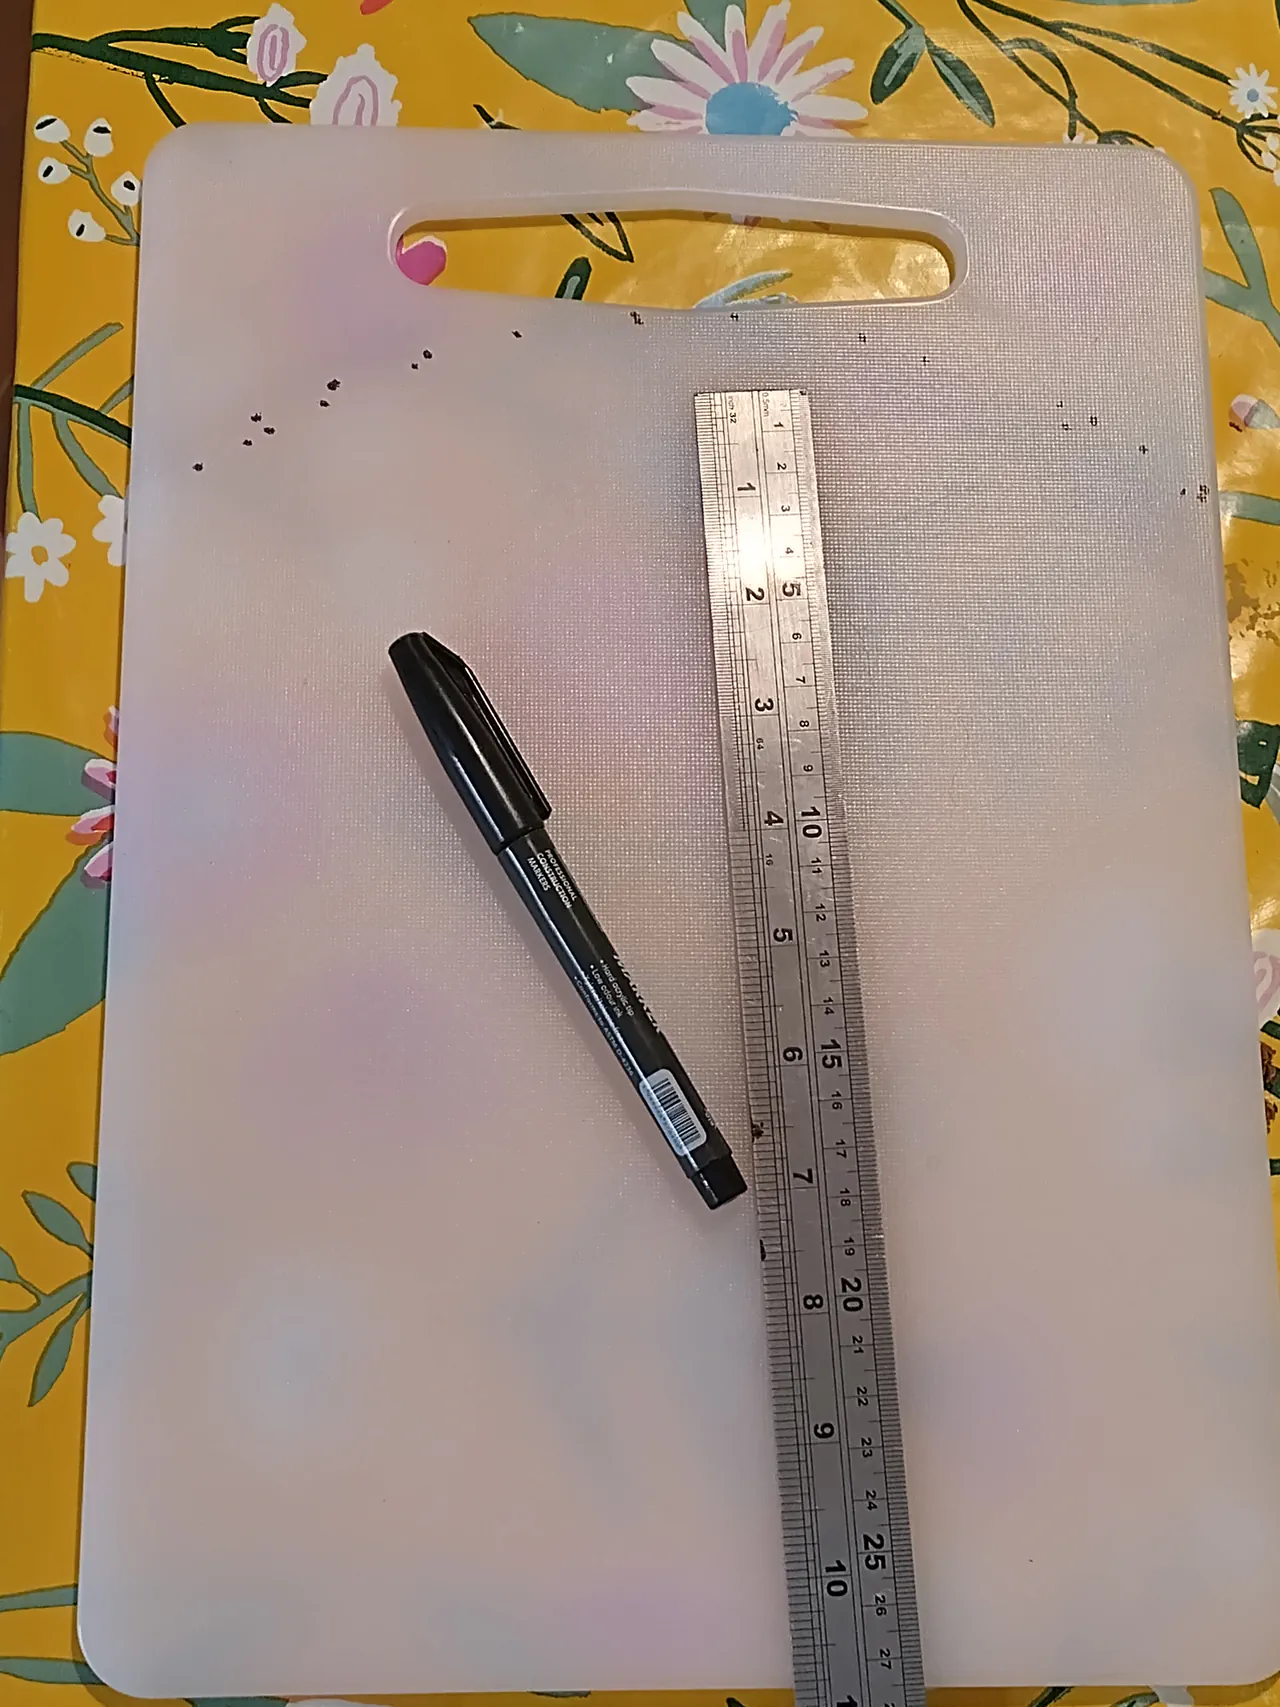
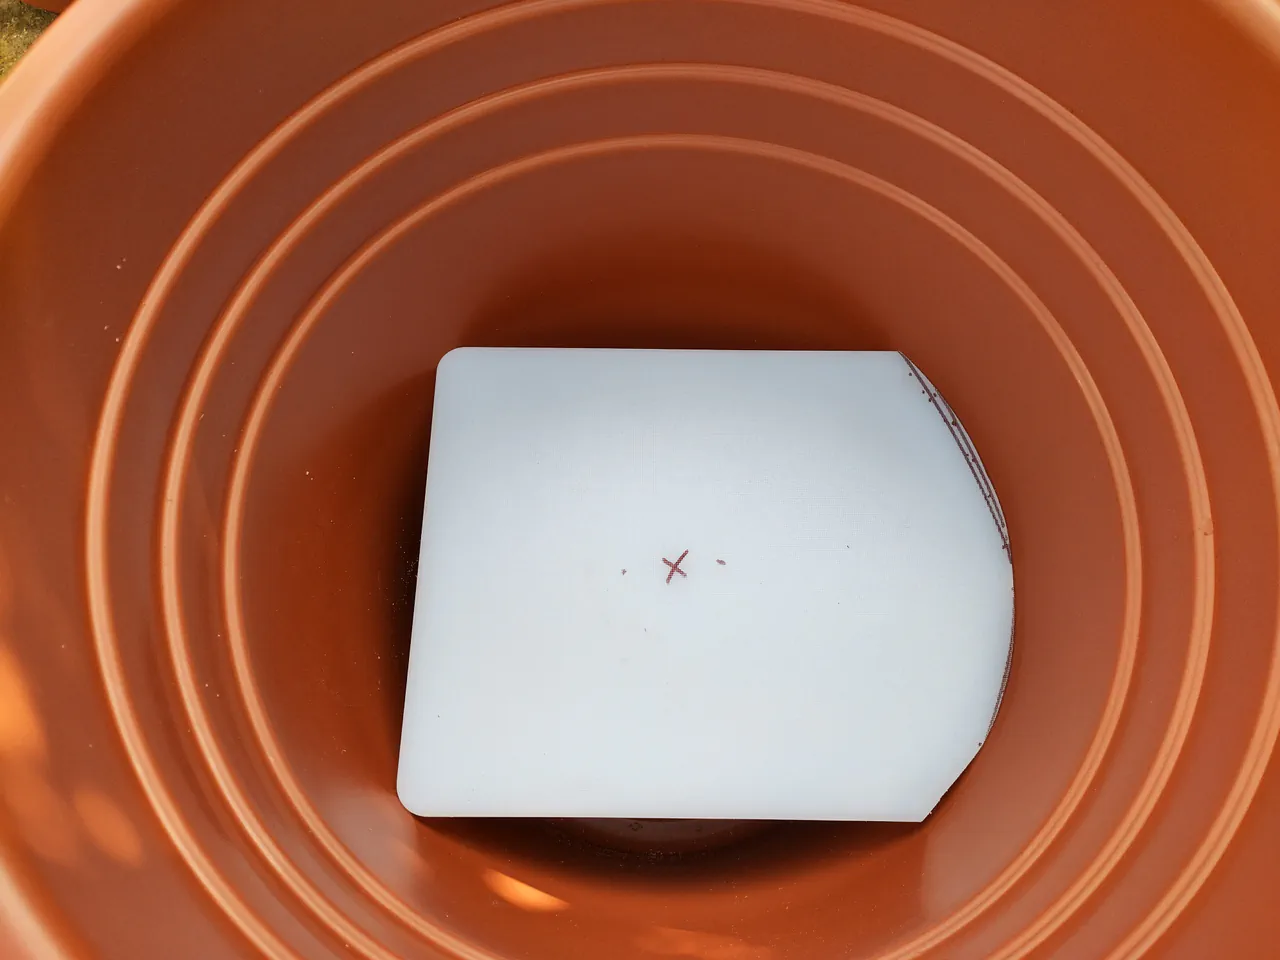
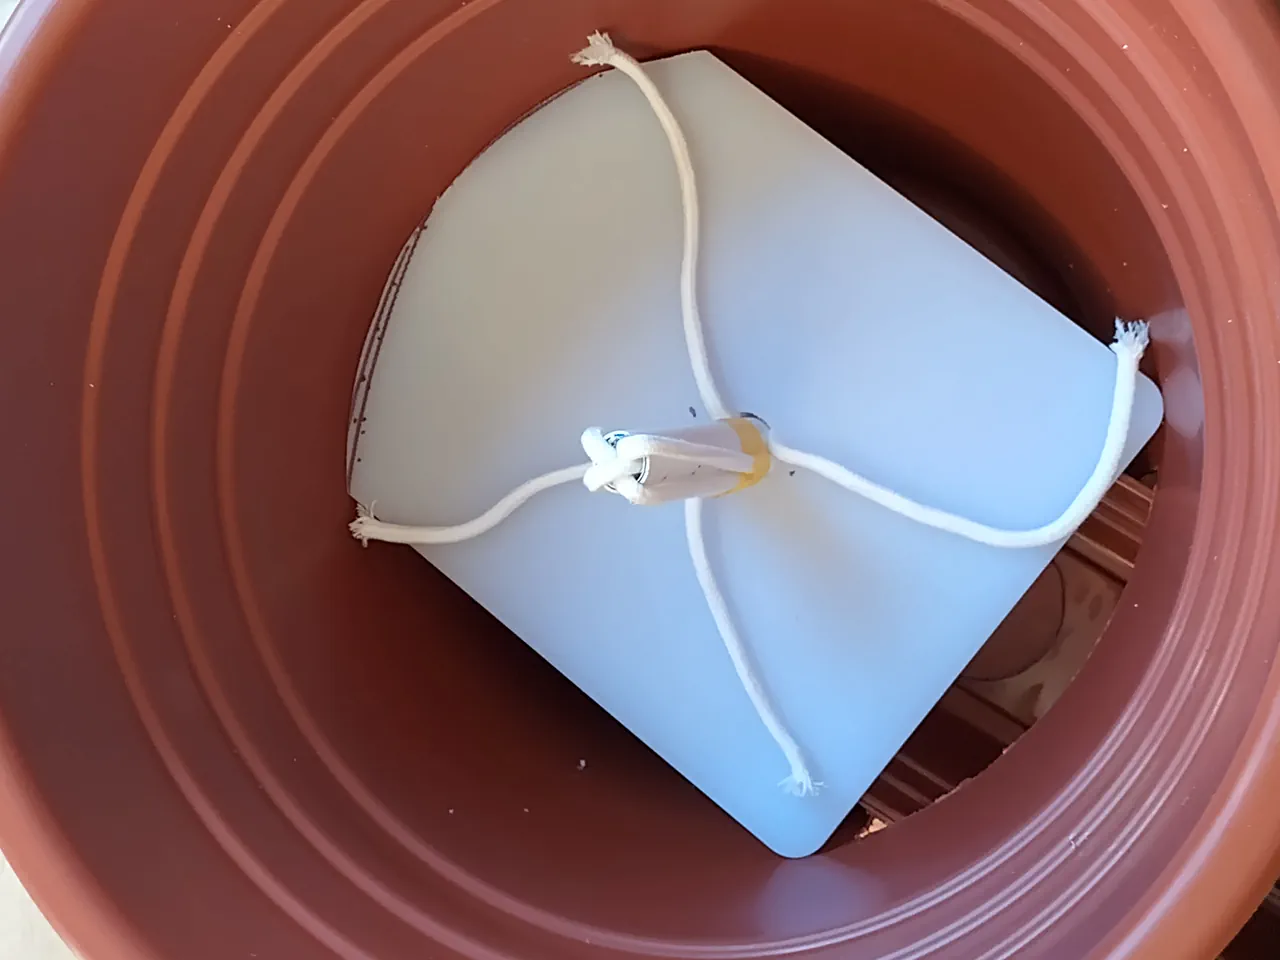
6. Cut the Chopping Board
The pot has a 35cm internal diameter at the level where the platform sits, so you need a circle of roughly 17.5cm radius. This board sits on top of the gravel layer and separates the reservoir from the growing medium above.
Method 1: hold a metal ruler with your finger through the hole at the centre, pen against the 17.5cm mark, and spin. Fiddly. One side was slightly off because my centre finger moved.
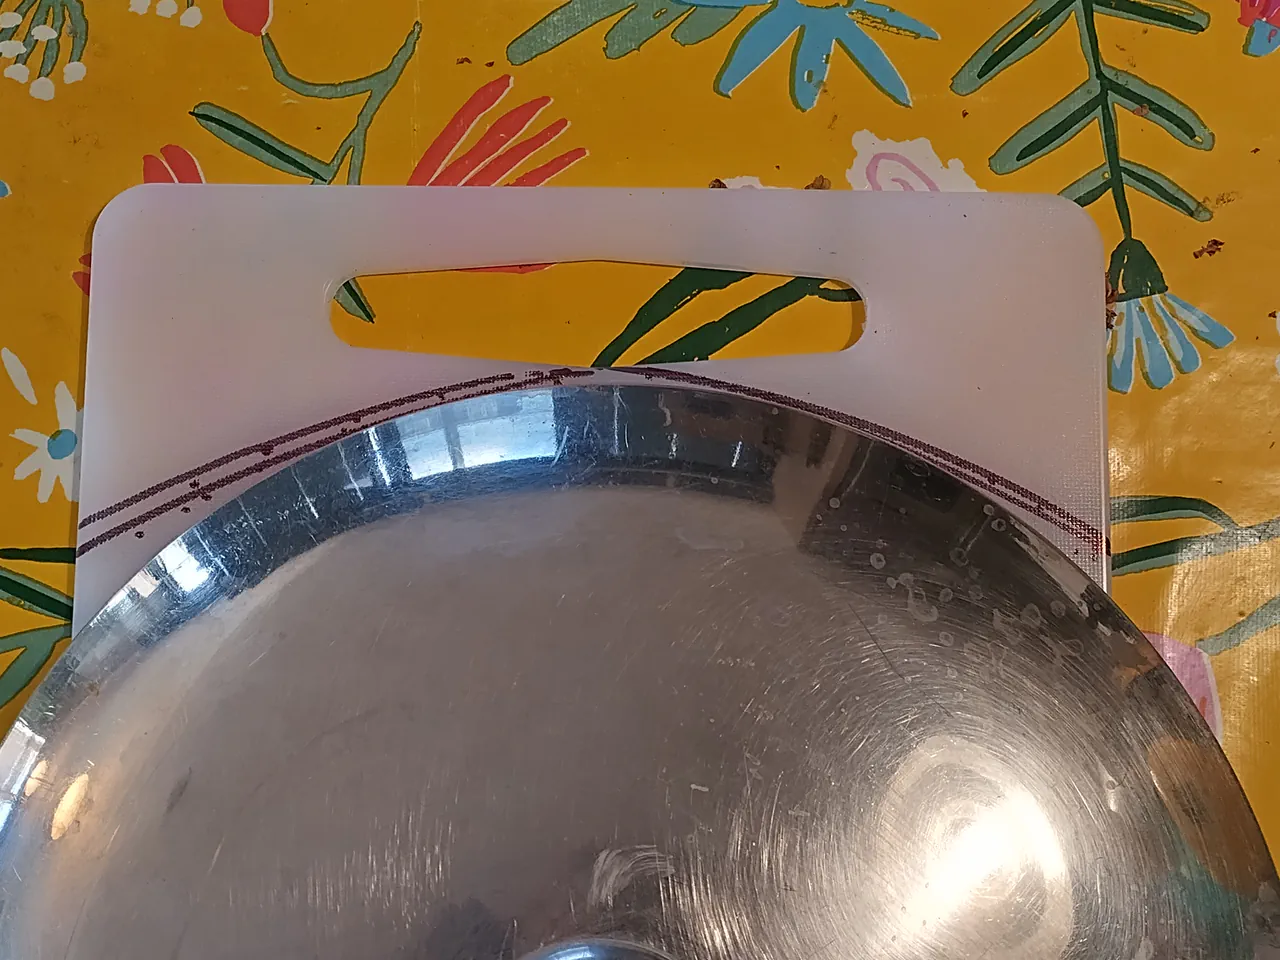
Method 2 (much better): find a saucepan lid or salad bowl that is about the right size and trace around it.
Cut the handle section off the chopping board first, then cut the circle. The nylon board cuts cleanly with a Stanley knife or a multitool. If you do not have a drill for the wick hole later, choose a thinner board that you can cut with scissors.
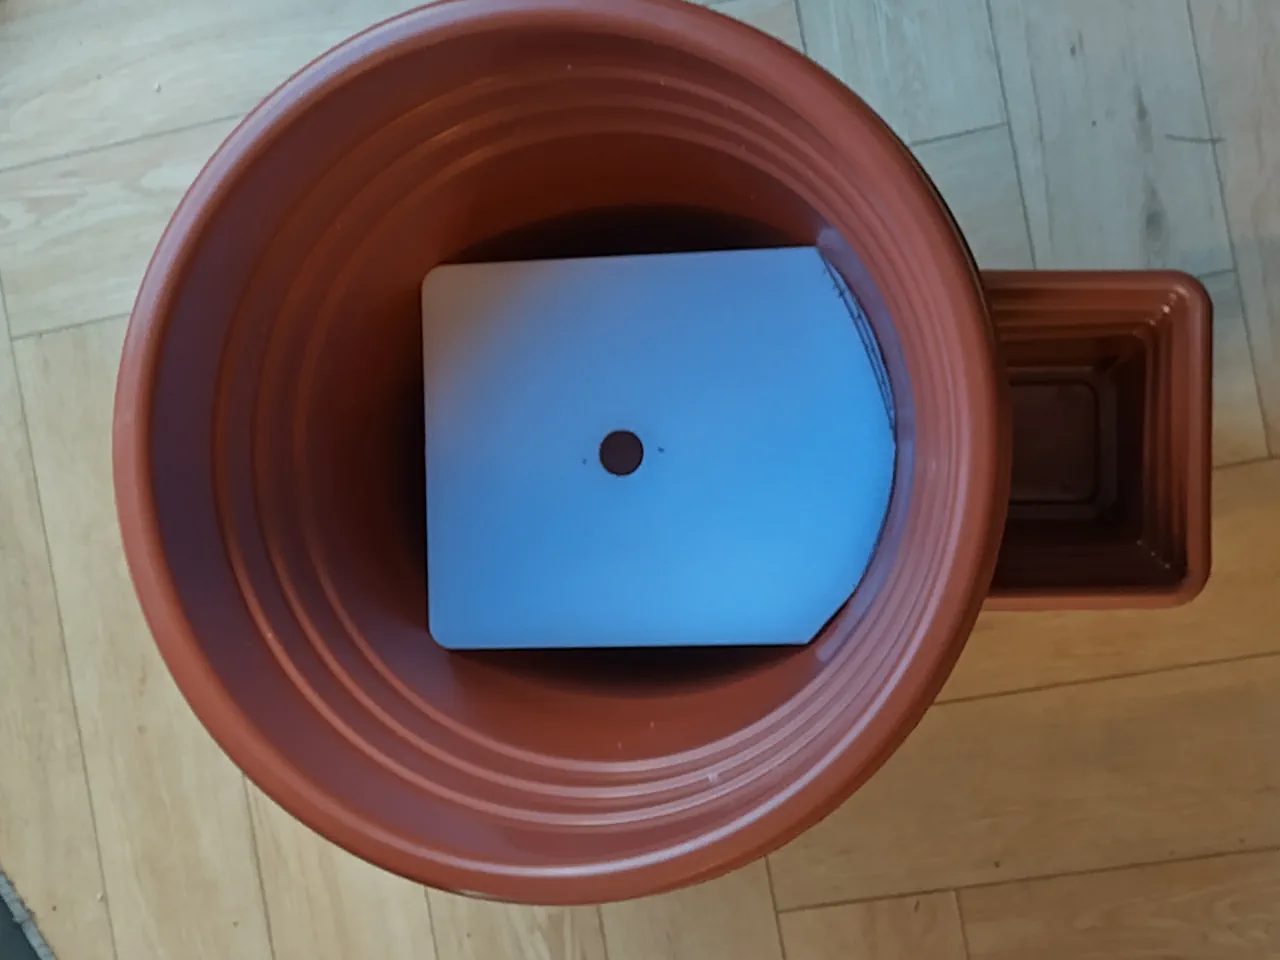
7. Drill the Wick Hole
Drill an approximately 28mm hole through the chopping board for the wicks to pass through. I used a Forstner bit, which gives a clean circular hole, but a Stanley knife would work on a thinner board. The hole does not need to be perfectly round; it just needs to be big enough for four strands of wicking rope.
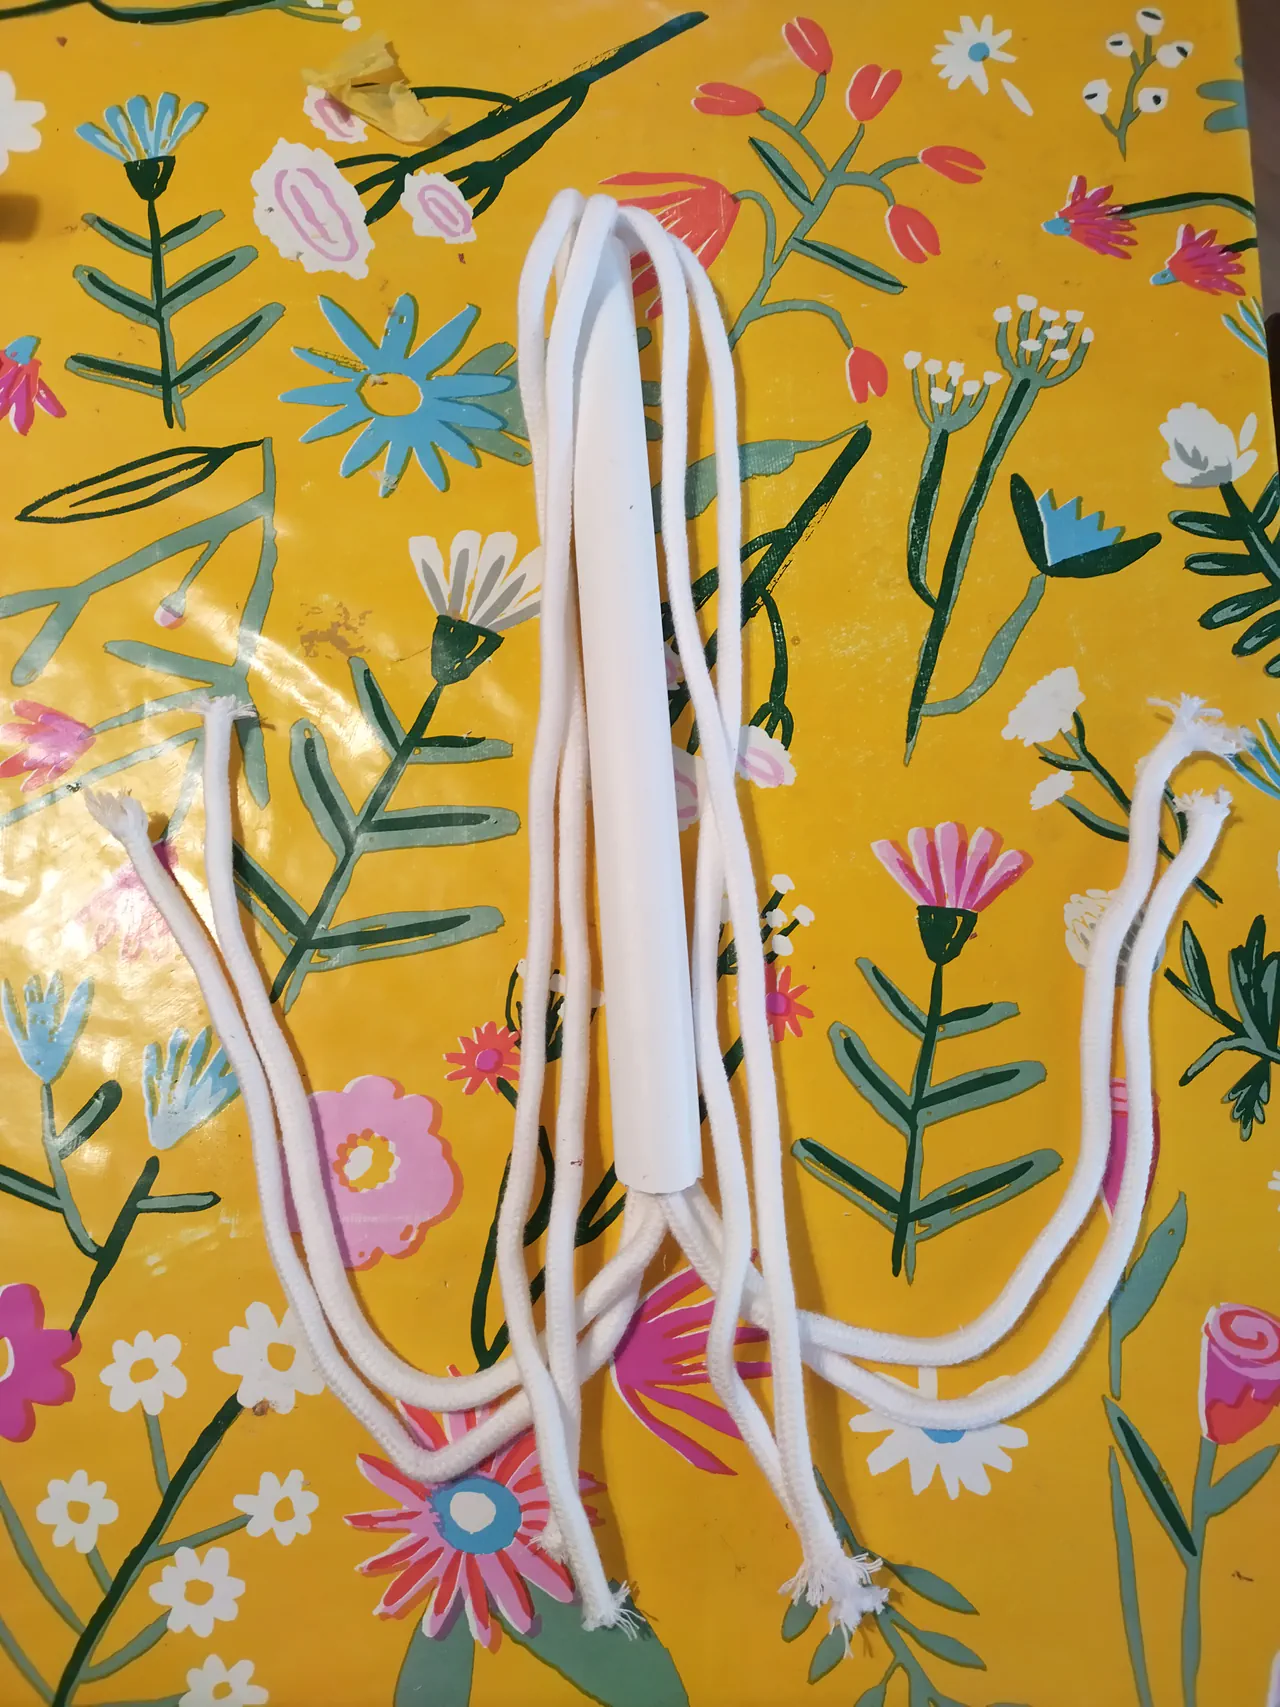
8. Make and Thread the Wicks
Cut four lengths of wicking rope, each about 1 metre long. Tape the ends together with masking tape and tape them to a wooden skewer. This makes it much easier to feed them through the PVC pipe.
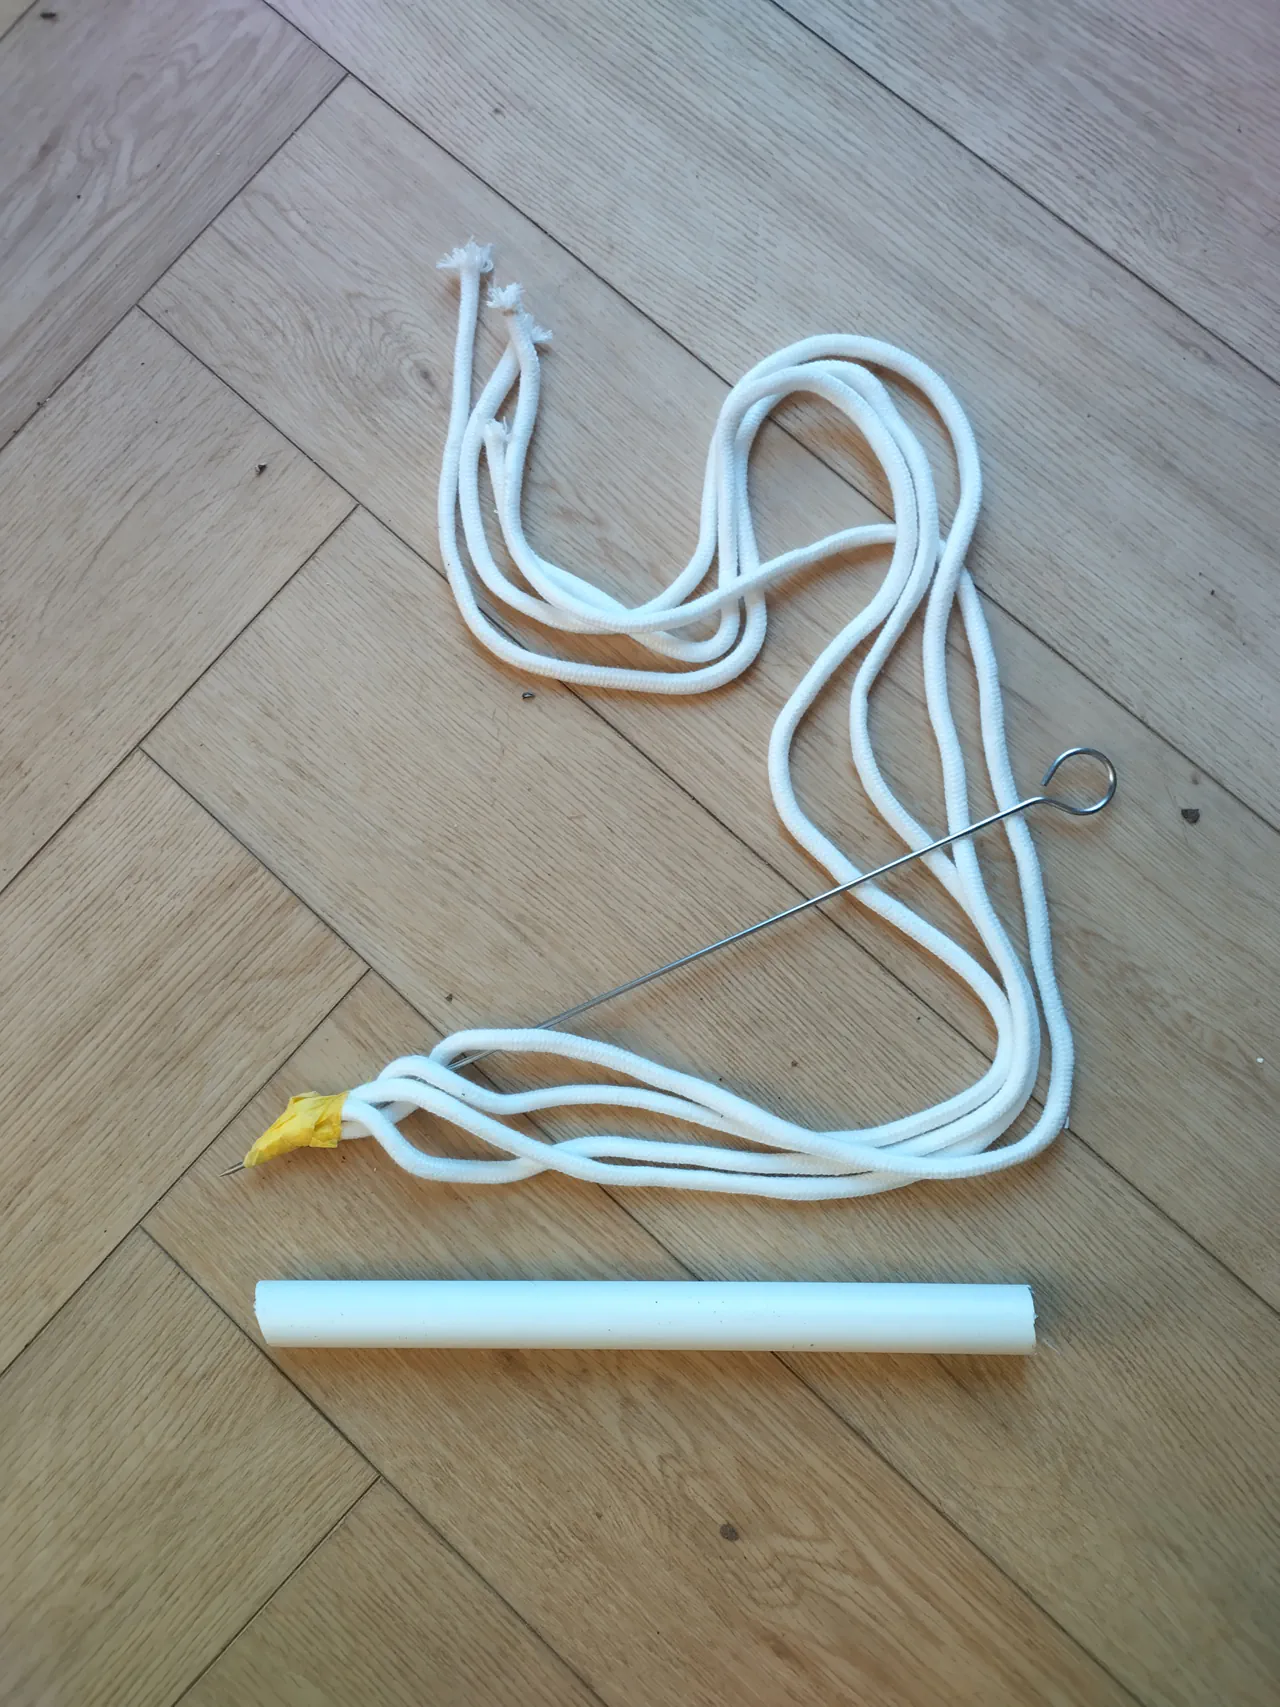
The PVC pipe sits on the bottom of the pot. The angle at the base means it does not crush the strings underneath. The four wicks loop down through the pipe and back up. Some route out to the sides of the pot, some come up through the middle of the coir. This gives a good spread of moisture throughout the growing medium.
9. Add the Gravel Base
Tip about a quarter bag of gravel around the edges of the trough, filling up to trough level. The gravel does three jobs at once: it weighs the pot down and stabilises it, holds the trough in position, and acts as thermal mass. More on that below.
Sand works too. Anything heavy and inert.
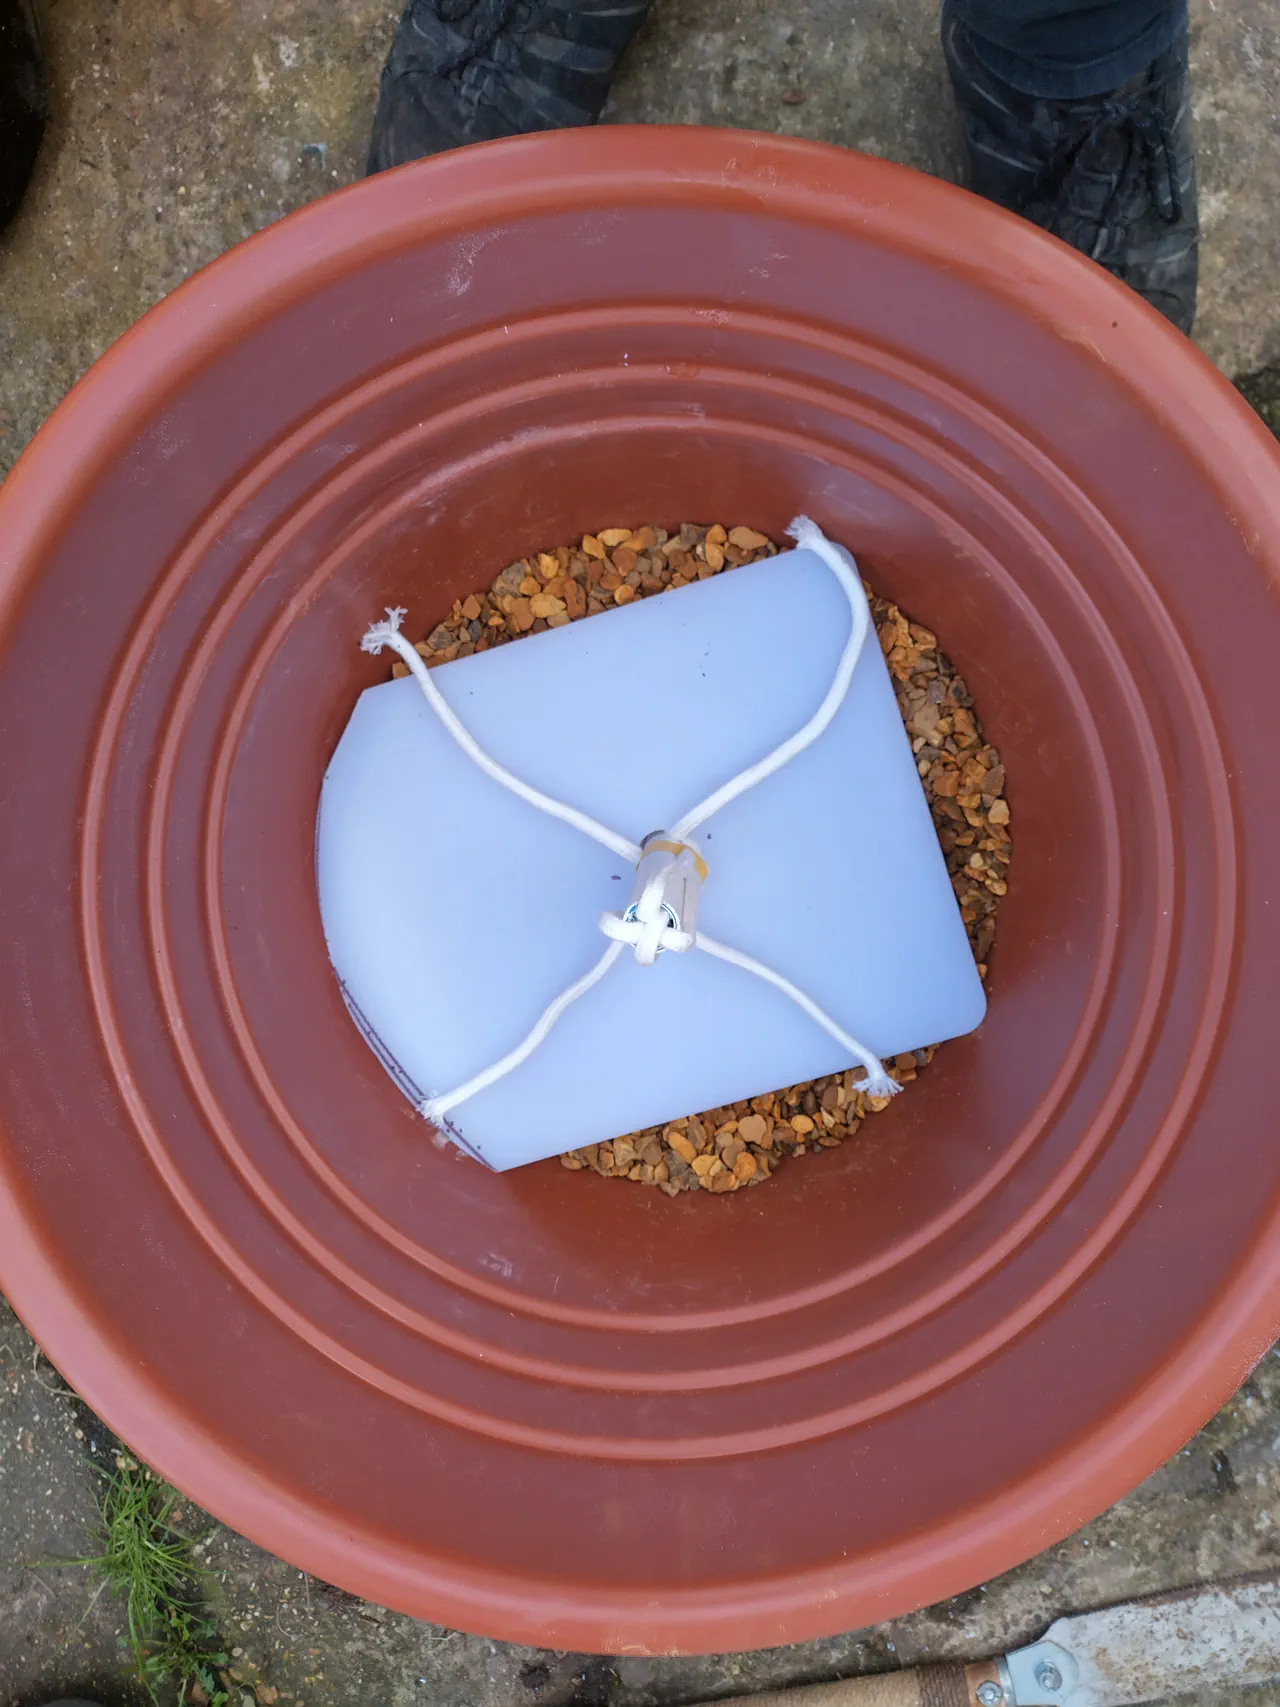
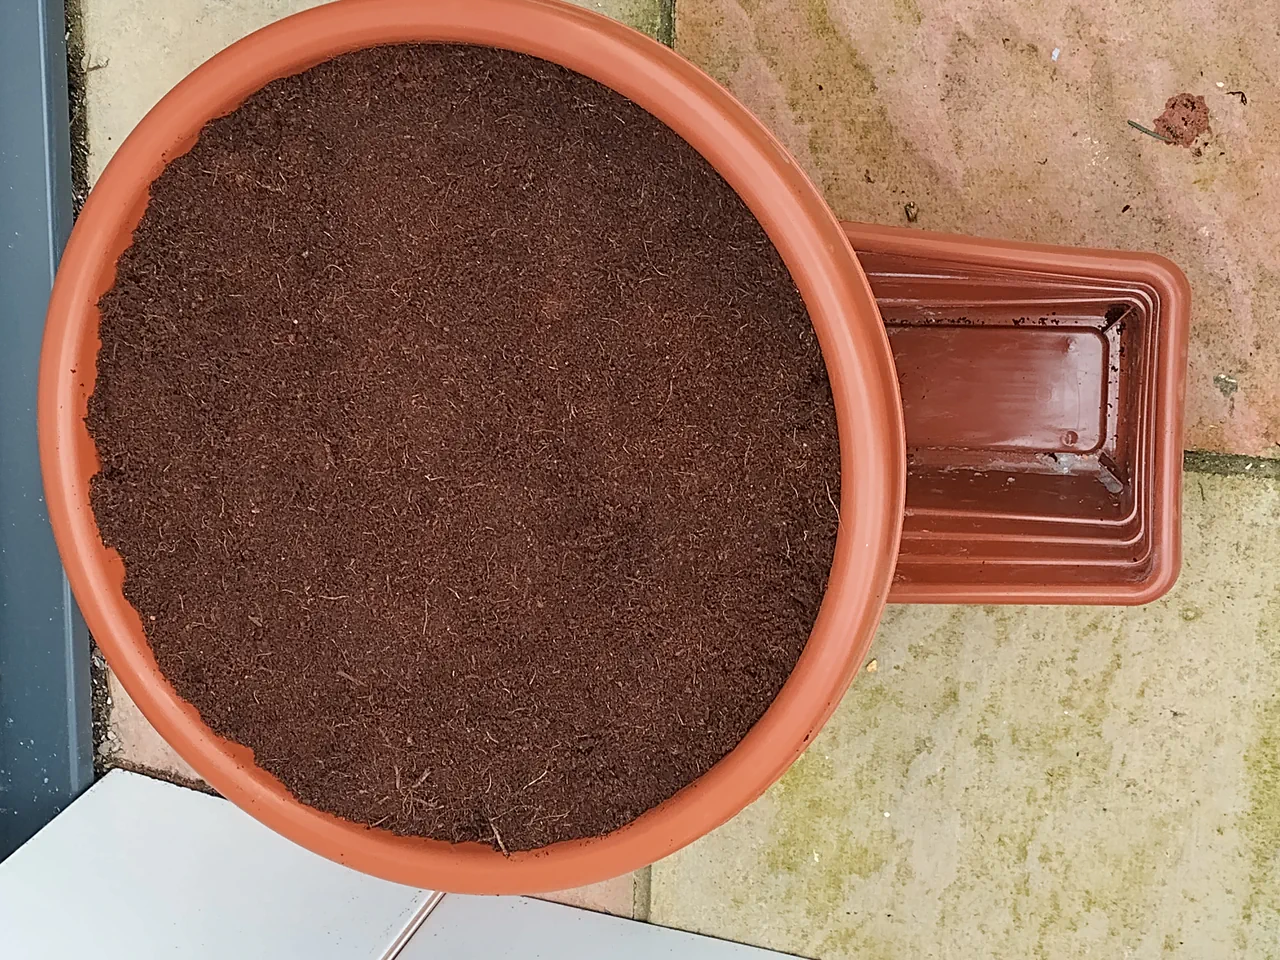
10. Fill with Coir
Fill the pot about half-full with coir, then position the side wicks and pull them gently into place against the pot walls. Fill the rest of the way, making sure the central wicks stay roughly upright as you go. Do not pack it down hard; coir works best when it is loose and airy.
I used old coir from a previous grow. It was not from tomatoes, so there was no wilting virus concern. Clean, recycled coir is perfectly fine to reuse. See reusing coir below.
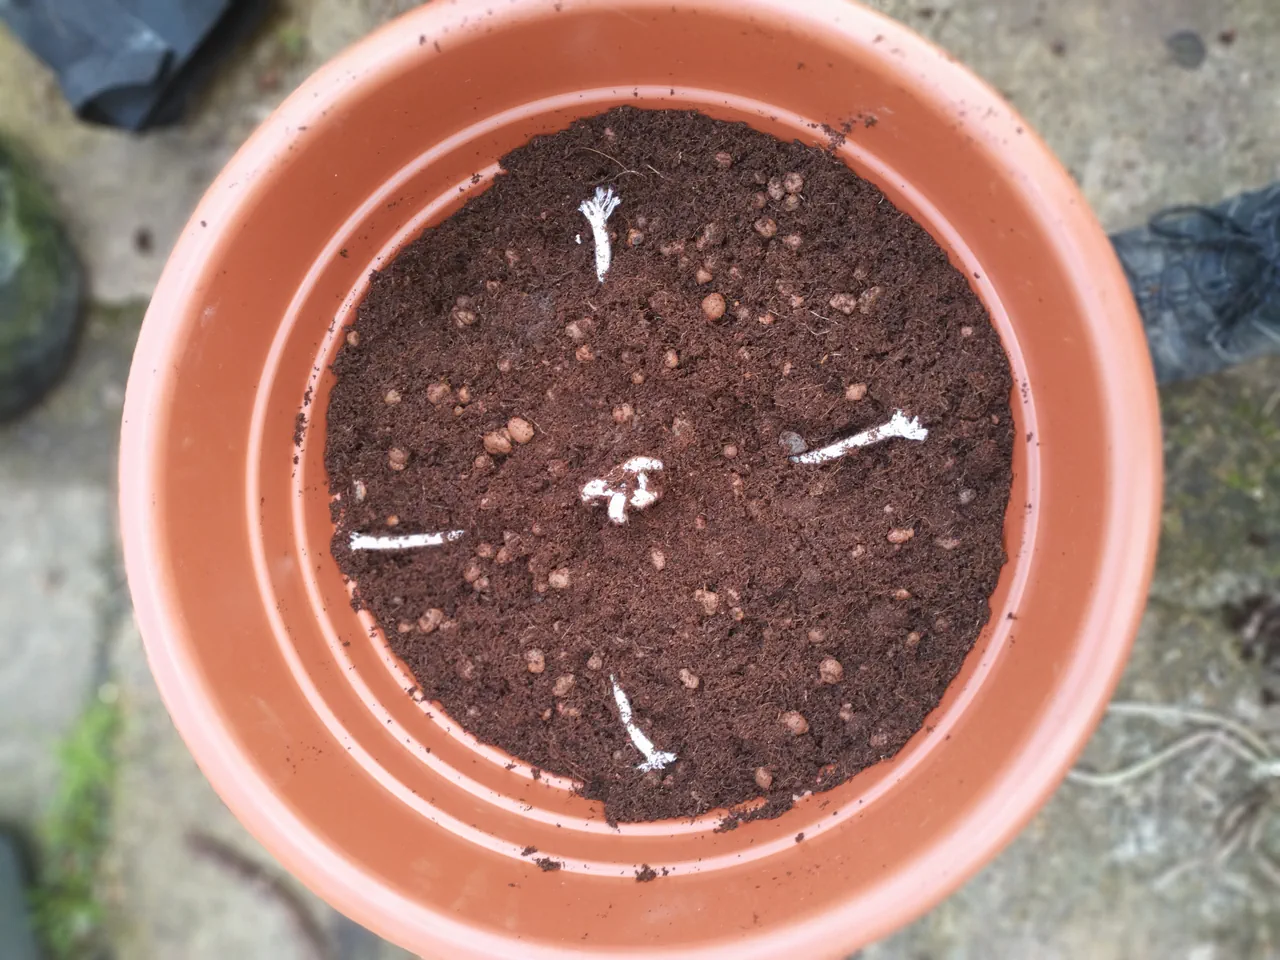
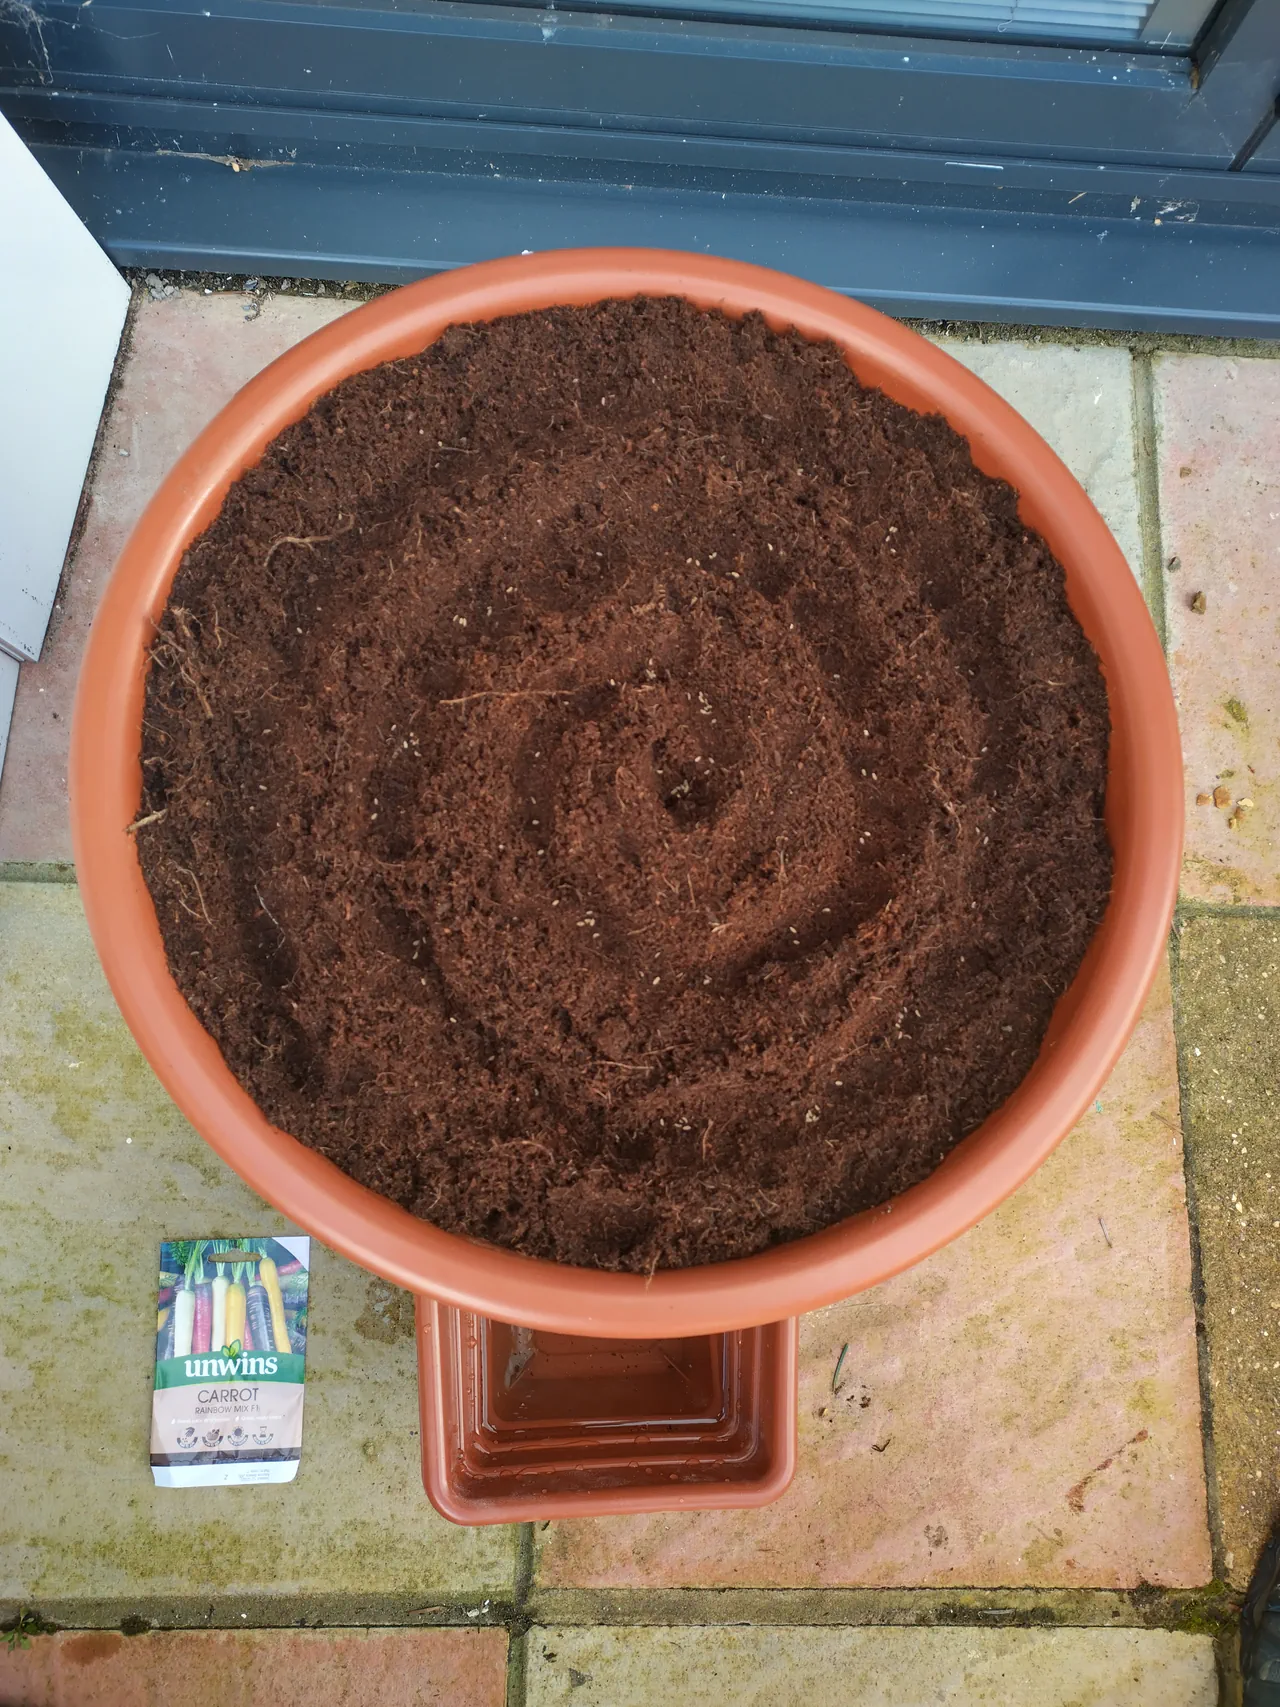
11. Plant the Seeds
Rainbow carrots give you five or six different colours from a single packet: purple, yellow, orange, white, red. They are visually spectacular at harvest and even better on the plate.
I drew a spiral pattern with my finger from the outside in, about 1cm deep, and spread the seeds very thinly along the spiral. This gives each seed space to develop without overcrowding.
If the seeds are sown too thickly, you will need to thin them out once the seedlings are established. Thinning feels wasteful, so it is worth taking your time here and spacing them properly from the start.
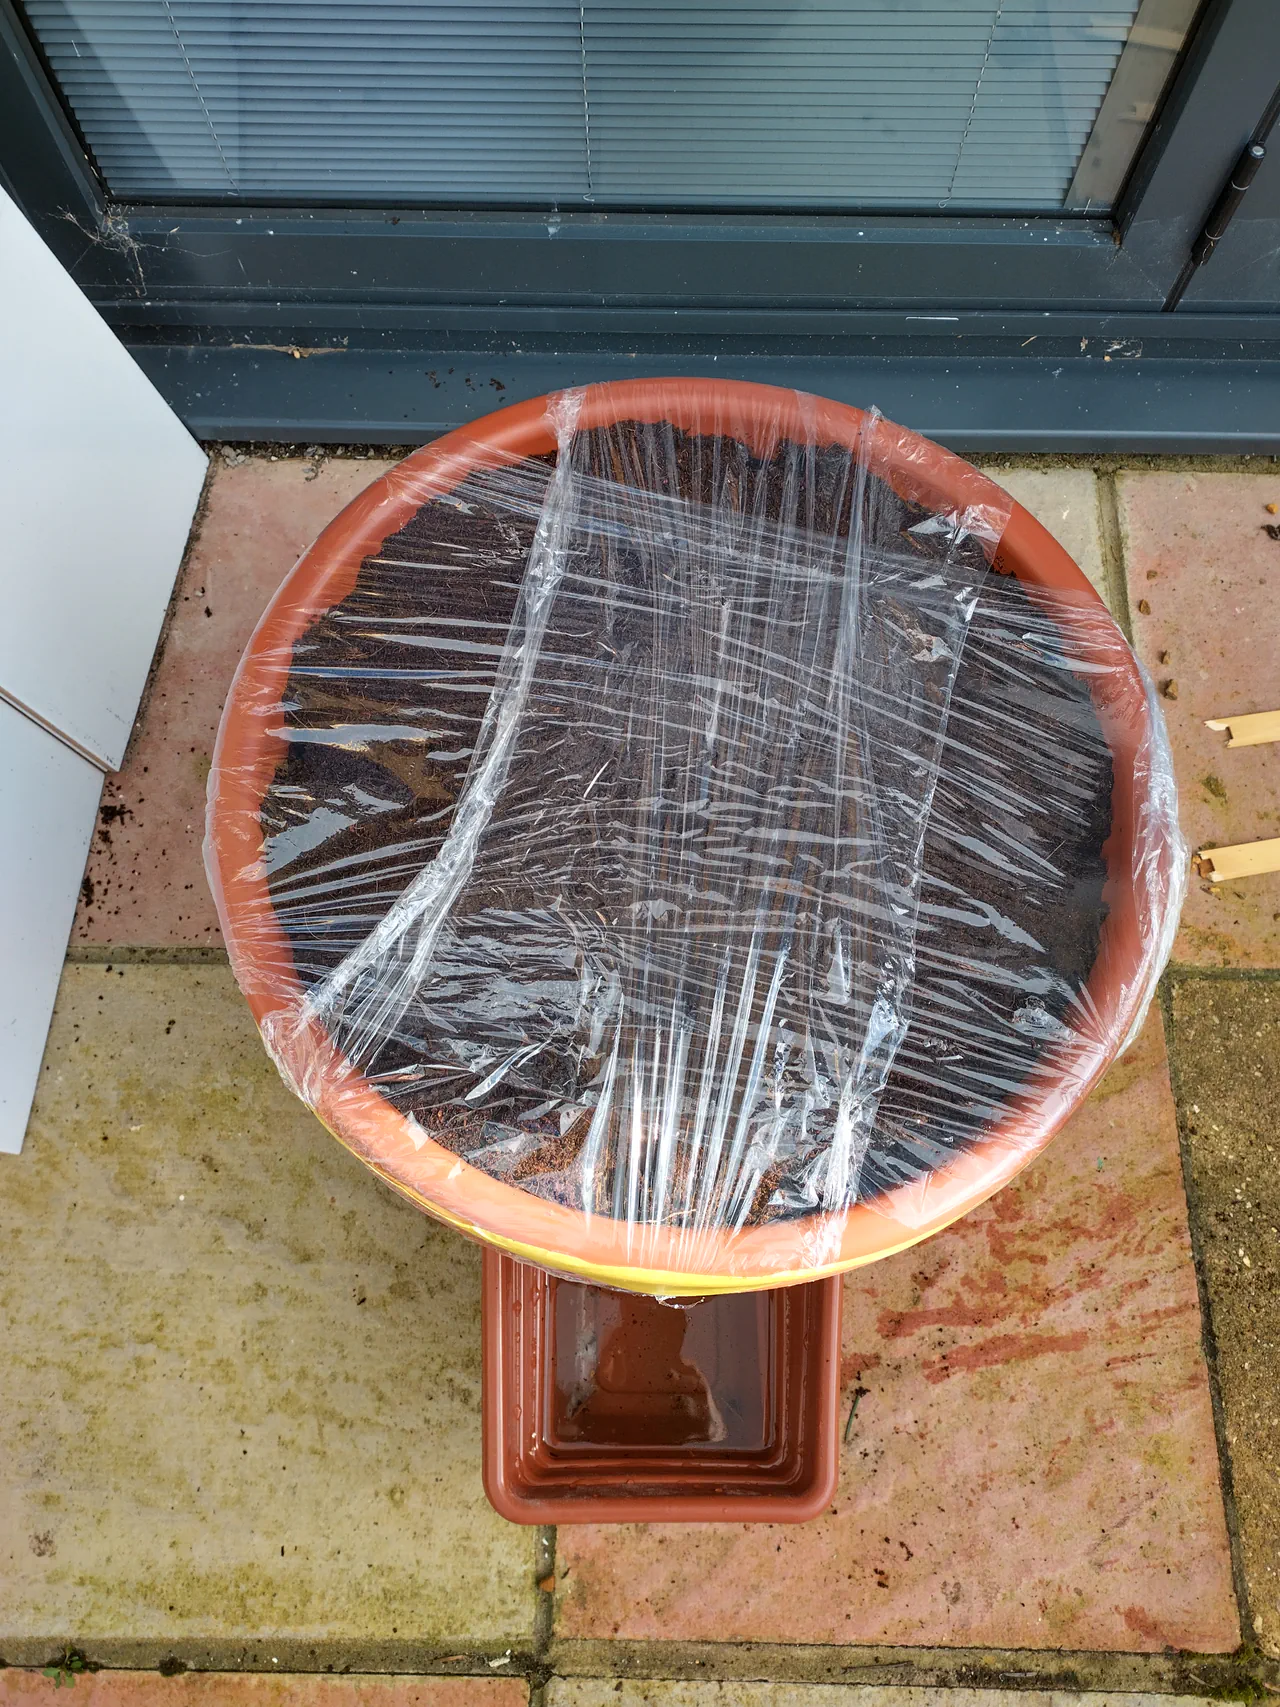
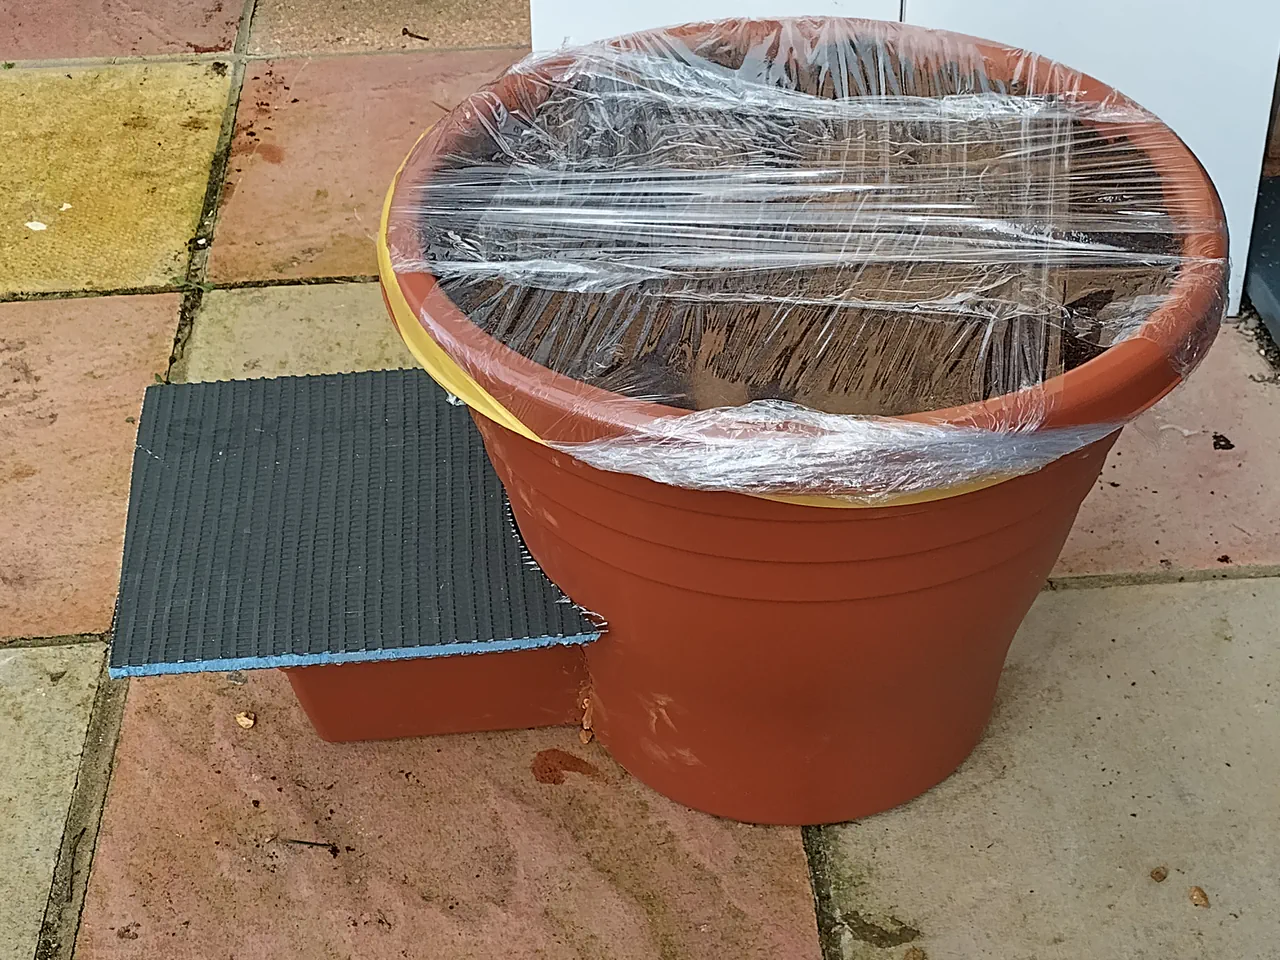
12. Cover and Fill
Lay cling film over the top of the pot with a couple of gaps for ventilation. This creates a mini greenhouse effect to help germination, keeping the surface warm and moist.
Fill the trough with water and drop the pH to 5.5 with a couple of drops of pH down. Then cover the exposed external section of the trough with a piece of tile backer board, slate, cardboard, or anything else opaque. Light in the reservoir encourages algae growth, which you do not want.
The Gravel Base: Three Jobs in One
The gravel layer is doing more work than it looks. Three jobs, one material.
Weight and stability. A pot full of coir is surprisingly light, especially when the coir dries out between waterings. On a windy balcony or exposed patio, that is a problem. The gravel at the base keeps the centre of gravity low and prevents the whole thing tipping over.
Trough reinforcement. The gravel presses inward against the trough walls, holding it firmly in position even as the coir above settles and shifts. The PVC wedge handles the opening, and the gravel handles the rest.
Thermal mass. This is the one people overlook. Water in a shallow plastic trough on a south-facing surface can get very warm in direct sunlight. Warm water holds less dissolved oxygen, and root-zone temperatures above 30°C stress most vegetable crops. The gravel absorbs heat slowly during the day and releases it slowly at night, moderating the water temperature rather than letting it spike. It is not a huge effect, but for a south-facing setup it is meaningful.
Reusing Coir
Old coir works fine if it is clean and was not from a crop that had disease. Break it up, pull out any old roots, and fill the pot. It will not have the same water-holding capacity as fresh coir (the fibres degrade over time), but for a wicking system where the reservoir provides a constant moisture supply, that matters less than it would in a hand-watered pot.
For the full detail on treating and reusing coir, including hydrogen peroxide treatment, see the coir reuse section in the tomato wall guide.
What I'd Do Differently
- Allow for the Sharpie nib width. Draw to the inside edge of the nib, not the centre. The hole was fractionally too wide because the line itself has width. Does not affect function, but a snugger fit would be tidier.
- Use a Stanley knife from the start. I tried scissors first and they risk splitting the plastic. A Stanley knife or multitool blade gives you much more control and a cleaner cut.
- Find a saucepan lid immediately. The ruler-as-compass method works, but it is fiddly and one side came out slightly off. A saucepan lid, plate, or mixing bowl traced around is faster and more accurate.
What's Next
This single planter is useful on its own, but it is also a building block for something more ambitious.
The Triangle Modular System
Three of these units arranged in a triangle with all troughs facing inward, linked together and connected to a cylindrical tank in the middle as a shared reservoir. One fill point, three growing spaces, all self-watering from the same water supply. I designed this to fit an awkward south-facing triangle spot in the garden where nothing else quite worked. I will document this build as I go.
The Experimental Platform
Two or three identical units used for A/B testing. Same crop, same conditions, one variable changed. Nutrient concentration, EC levels, coir age, variety. This humble £15 planter turns out to be the perfect tool for controlled growing experiments, precisely because it is so cheap and simple to replicate. When each unit costs under £20, you can afford to build several and start generating real data.
Follow the build
I'm building the triangle modular system this week and planting the second and third pots. The Glut is where I'll share the results — build updates, harvest data, and what I cook with it.
No spam. Unsubscribe at any time.
Frequently Asked Questions
What is the cheapest hydroponic system to build?
This wicking planter costs under £20 all-in, including seeds. No electricity, no pump, no specialist tools. Everything comes from Tesco and basic household supplies. It is the simplest passive hydroponic system I know how to build.
Can you grow vegetables on a balcony?
Yes. This planter is completely self-contained and just needs a sunny spot. A south-facing balcony, patio, or doorstep is ideal. The reservoir means you only need to top up the water every few days rather than watering daily, which makes balcony growing much more practical.
Do you need electricity for hydroponics?
Not for a wicking system. It is completely passive. Fill the trough with water, and capillary action does the rest. No pump, no timer, no power supply. Just physics.
Related growing guides
Related Content
All Growing Guides
Browse all guides by method, difficulty, and season
Pink Oyster Mushrooms in a Bucket
Another beginner-friendly project: grow 2.4kg+ of mushrooms from a single bucket
Growing Broad Beans
From seed to plate, the most rewarding spring crop
DIY Gutter Grow Hydroponic Tomato Wall
Scale up the wicking principle to a full wall system
Gutter NFT Herb Wall
Grow herbs year-round with a simple NFT system